node.js|环境部署|源码编译高版本的node.js
一、
前言
本文就如何二进制部署和源码编译安装部署node.js环境做一个简单的介绍
node的版本大体是以18版本为界限,也就是说18版本之前对glibc版本没有要求,其后的版本都对glibc版本有要求,node的版本越高,glibc需要的版本也越高
二进制形式的node 18版本后需要glibc和libc版本比较高,17.5以前的centos可以直接运行,没有任何依赖要求
源码编译形式的node需要python环境,高版本gcc,bison,bzip2,bzip2-devel,高版本make这些依赖,例如node17.5就需要依赖python环境至少为3.6,gcc-8,make-4版本,
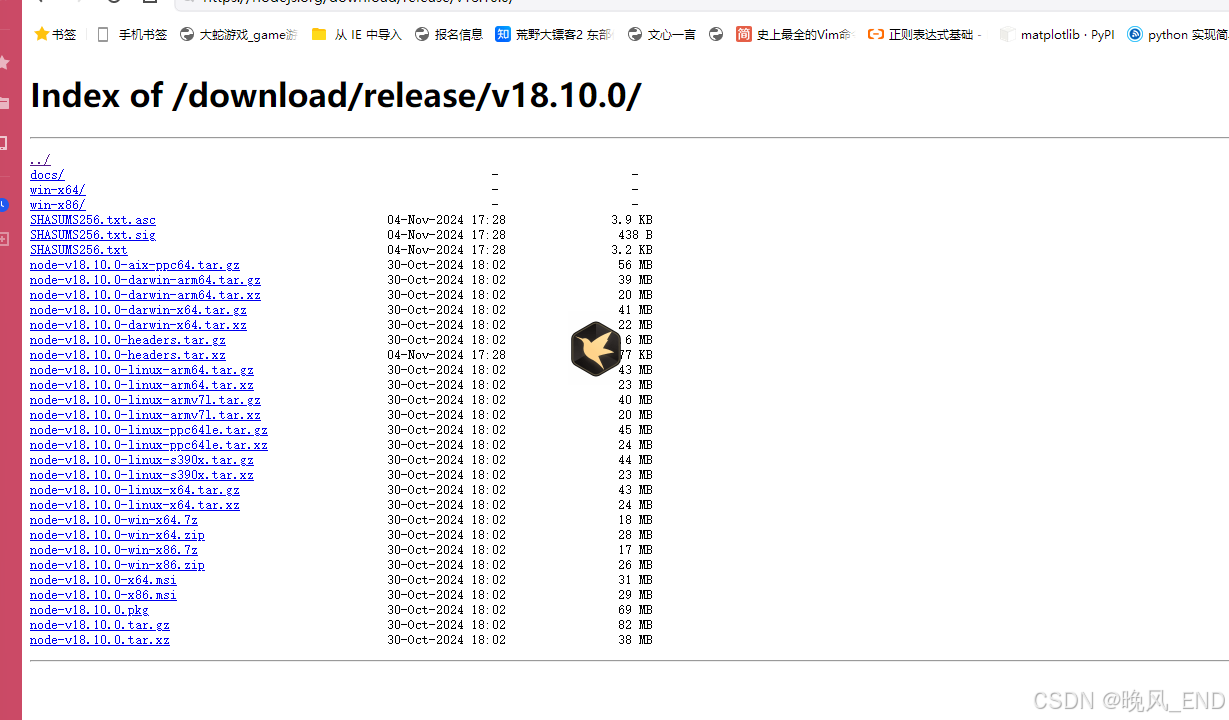
node二进制下载地址:Index of /download/release/
node源码下载地址:Index of /nodejs-release/v0.1.18/ | 清华大学开源软件镜像站 | Tsinghua Open Source Mirror

二、
二进制安装node
以node-v18.10.0-linux-x64.tar.xz为例,此安装包放置在root家目录下,解压后,直接找bin,可以看到很多依赖报错:
[root@centos14 ~]# ldd node-v18.10.0-linux-x64/bin/node
node-v18.10.0-linux-x64/bin/node: /lib64/libm.so.6: version `GLIBC_2.27' not found (required by node-v18.10.0-linux-x64/bin/node)
node-v18.10.0-linux-x64/bin/node: /lib64/libc.so.6: version `GLIBC_2.25' not found (required by node-v18.10.0-linux-x64/bin/node)
node-v18.10.0-linux-x64/bin/node: /lib64/libc.so.6: version `GLIBC_2.28' not found (required by node-v18.10.0-linux-x64/bin/node)
node-v18.10.0-linux-x64/bin/node: /lib64/libstdc++.so.6: version `CXXABI_1.3.9' not found (required by node-v18.10.0-linux-x64/bin/node)
node-v18.10.0-linux-x64/bin/node: /lib64/libstdc++.so.6: version `GLIBCXX_3.4.20' not found (required by node-v18.10.0-linux-x64/bin/node)
node-v18.10.0-linux-x64/bin/node: /lib64/libstdc++.so.6: version `GLIBCXX_3.4.21' not found (required by node-v18.10.0-linux-x64/bin/node)linux-vdso.so.1 =>  (0x00007ffe0bf2c000)libdl.so.2 => /lib64/libdl.so.2 (0x00007f1b8ea01000)libstdc++.so.6 => /lib64/libstdc++.so.6 (0x00007f1b8e6fa000)libm.so.6 => /lib64/libm.so.6 (0x00007f1b8e3f8000)libgcc_s.so.1 => /lib64/libgcc_s.so.1 (0x00007f1b8e1e2000)libpthread.so.0 => /lib64/libpthread.so.0 (0x00007f1b8dfc6000)libc.so.6 => /lib64/libc.so.6 (0x00007f1b8dbf8000)/lib64/ld-linux-x86-64.so.2 (0x00007f1b8ec05000)
🆗,先将此文件libstdc++.so.6.0.26 按如下命令安装:
cp libstdc++.so.6.0.26 /usr/lib64/
cd /usr/lib64/
ln -snf ./libstdc++.so.6.0.26 libstdc++.so.6
再次查看,发现缺少的依赖少了很多,剩下的主要是glibc的相关依赖了
[root@centos14 ~]# ldd node-v18.10.0-linux-x64/bin/node
node-v18.10.0-linux-x64/bin/node: /lib64/libm.so.6: version `GLIBC_2.27' not found (required by node-v18.10.0-linux-x64/bin/node)
node-v18.10.0-linux-x64/bin/node: /lib64/libc.so.6: version `GLIBC_2.25' not found (required by node-v18.10.0-linux-x64/bin/node)
node-v18.10.0-linux-x64/bin/node: /lib64/libc.so.6: version `GLIBC_2.28' not found (required by node-v18.10.0-linux-x64/bin/node)linux-vdso.so.1 =>  (0x00007ffc00dee000)libdl.so.2 => /lib64/libdl.so.2 (0x00007f34af859000)libstdc++.so.6 => /lib64/libstdc++.so.6 (0x00007f34afb03000)libm.so.6 => /lib64/libm.so.6 (0x00007f34af557000)libgcc_s.so.1 => /lib64/libgcc_s.so.1 (0x00007f34af341000)libpthread.so.0 => /lib64/libpthread.so.0 (0x00007f34af125000)libc.so.6 => /lib64/libc.so.6 (0x00007f34aed57000)/lib64/ld-linux-x86-64.so.2 (0x00007f34afa5d000)
那么,要解决这个问题,就需要编译glibc搞版本了,看要求必须至少是glibc-2.28版本了,而glibc-2.28编译需要满足三个条件,第一个条件是内核版本大于4,第二个条件是gcc编译器版本大于8,第三个条件是make版本大于4
内核版本要求这个简单,只需要安装rpm安装kernel-lt-5.4.266-1.el7.elrepo.x86_64.rpm 这个内核文件就可以了,gcc编译器版本使用开发包也就是devtoolset-9 就可以了,make编译也非常简单,编译三连后,做软链接替换系统默认的make就可以了
相关命令如下:
1、
rpm -ivh kernel-lt-5.4.266-1.el7.elrepo.x86_64.rpmgrub2-set-default 0 && grub2-mkconfig -o /etc/grub2.cfggrubby --args="user_namespace.enable=1" --update-kernel="$(grubby --default-kernel)"
重启服务器使用新内核,验证内核版本是否正确:
[root@centos14 ~]# uname -a
Linux centos14 5.4.266-1.el7.elrepo.x86_64 #1 SMP Mon Jan 8 23:23:50 EST 2024 x86_64 x86_64 x86_64 GNU/Linux
2、
yum install devtoolset-9-gcc gcc-c++ gmp-devel mpfr-devel libmpc-devel -ysource /opt/rh/devtoolset-9/enable验证gcc版本是否正确;
[root@centos14 ~]# gcc -v
Using built-in specs.
COLLECT_GCC=gcc
COLLECT_LTO_WRAPPER=/opt/rh/devtoolset-9/root/usr/libexec/gcc/x86_64-redhat-linux/9/lto-wrapper
Target: x86_64-redhat-linux
Configured with: ../configure --enable-bootstrap --enable-languages=c,c++,fortran,lto --prefix=/opt/rh/devtoolset-9/root/usr --mandir=/opt/rh/devtoolset-9/root/usr/share/man --infodir=/opt/rh/devtoolset-9/root/usr/share/info --with-bugurl=http://bugzilla.redhat.com/bugzilla --enable-shared --enable-threads=posix --enable-checking=release --enable-multilib --with-system-zlib --enable-__cxa_atexit --disable-libunwind-exceptions --enable-gnu-unique-object --enable-linker-build-id --with-gcc-major-version-only --with-linker-hash-style=gnu --with-default-libstdcxx-abi=gcc4-compatible --enable-plugin --enable-initfini-array --with-isl=/builddir/build/BUILD/gcc-9.3.1-20200408/obj-x86_64-redhat-linux/isl-install --disable-libmpx --enable-gnu-indirect-function --with-tune=generic --with-arch_32=x86-64 --build=x86_64-redhat-linux
Thread model: posix
gcc version 9.3.1 20200408 (Red Hat 9.3.1-2) (GCC)
3、
tar xvf make-4.3.tar.gz
cd make-4.3
./configure
make
make install
ln -sf /usr/local/bin/make /usr/bin
验证make版本是否正确:
[root@centos14 make-4.3]# make -version
GNU Make 4.3
Built for x86_64-pc-linux-gnu
Copyright (C) 1988-2020 Free Software Foundation, Inc.
License GPLv3+: GNU GPL version 3 or later <http://gnu.org/licenses/gpl.html>
This is free software: you are free to change and redistribute it.
There is NO WARRANTY, to the extent permitted by law.
开始编译glibc:
1、
编译环境准备
yum install gmp-devel mpfr-devel libmpc-devel bison bison-devel -y2、正式开始编译glibc
tar xvf glibc-2.28.tar.gz
cd glibc-2.28
mkdir build
cd build
../configure --prefix=/usr/ --disable-profile --enable-add-ons --disable-werror
make -j2
make install
需要说明的是, --disable-werror这个参数是表示即使遇到警告错误也继续,在不加此参数的时候,很多属性警告,经观察,对这个整体编译并没有什么危害,因此,需要忽略掉
make的时候的输出:
mbreloc -Wl,-z,relro -Wl,--hash-style=both /root/glibc-2.28/build/csu/crt1.o /root/glibc-2.28/build/csu/crti.o `gcc  --print-file-name=crtbegin.o` /root/glibc-2.28/build/elf/pldd.o /root/glibc-2.28/build/elf/xmalloc.o  -Wl,-dynamic-linker=/lib64/ld-linux-x86-64.so.2 -Wl,-rpath-link=/root/glibc-2.28/build:/root/glibc-2.28/build/math:/root/glibc-2.28/build/elf:/root/glibc-2.28/build/dlfcn:/root/glibc-2.28/build/nss:/root/glibc-2.28/build/nis:/root/glibc-2.28/build/rt:/root/glibc-2.28/build/resolv:/root/glibc-2.28/build/mathvec:/root/glibc-2.28/build/support:/root/glibc-2.28/build/crypt:/root/glibc-2.28/build/nptl /root/glibc-2.28/build/libc.so.6 /root/glibc-2.28/build/libc_nonshared.a -Wl,--as-needed /root/glibc-2.28/build/elf/ld.so -Wl,--no-as-needed -lgcc  `gcc  --print-file-name=crtend.o` /root/glibc-2.28/build/csu/crtn.o
make[2]: Leaving directory '/root/glibc-2.28/elf'
make[1]: Leaving directory '/root/glibc-2.28'
[root@centos14 build]# echo $?
0
make install 的输出,结尾会报错,但无关紧要,主要是说glibc并不是一个主的运行库安装,估计是使用dev-tools-gcc的缘故吧
LD_SO=ld-linux-x86-64.so.2 CC="gcc" /usr/bin/perl scripts/test-installation.pl /root/glibc-2.28/build/
/opt/rh/devtoolset-9/root/usr/libexec/gcc/x86_64-redhat-linux/9/ld: cannot find -lnss_test2
collect2: error: ld returned 1 exit status
Execution of gcc failed!
The script has found some problems with your installation!
Please read the FAQ and the README file and check the following:
- Did you change the gcc specs file (necessary after upgrading fromLinux libc5)?
- Are there any symbolic links of the form libXXX.so to old libraries?Links like libm.so -> libm.so.5 (where libm.so.5 is an old library) are wrong,libm.so should point to the newly installed glibc file - and there should beonly one such link (check e.g. /lib and /usr/lib)
You should restart this script from your build directory after you've
fixed all problems!
Btw. the script doesn't work if you're installing GNU libc not as your
primary library!
make[1]: *** [Makefile:111: install] Error 1
make[1]: Leaving directory '/root/glibc-2.28'
make: *** [Makefile:12: install] Error 2
glibc安装完毕后,就不需要任何处理了,基本可以正常使用,/etc/profile 文件末尾添加如下内容,然后source /etc/profile 就可以使用node了(添加node到系统环境变量内):
export PATH=$PATH:/root/node-v18.10.0-linux-x64/bin:/root/node-v18.10.0-linux-x64/lib/node_modules/npm/bin/验证node是否正常:
[root@centos14 node-v0.1.18]# npm -v
8.19.2
[root@centos14 node-v0.1.18]# node -v
v18.10.0
三、
node高版本的编译问题
node编译需要的依赖基本都在预编译阶段就给出了,如下:
[root@centos14 node-v20.19.0]# ./configure
Node.js configure: Found Python 3.6.8...
WARNING: C++ compiler (CXX=g++, 4.8.5) too old, need g++ 10.1.0 or clang++ 8.0.0
WARNING: warnings were emitted in the configure phase
INFO: configure completed successfully
依然使用上面的方法,安装python3和dev-tools-gcc就可以了,基本不会出什么太多的问题,只是时间比较长,基本都在半小时左右,就不在这里过多的废话了