Vue接口平台学习七——接口调试页面请求体
一、实现效果图及简单梳理

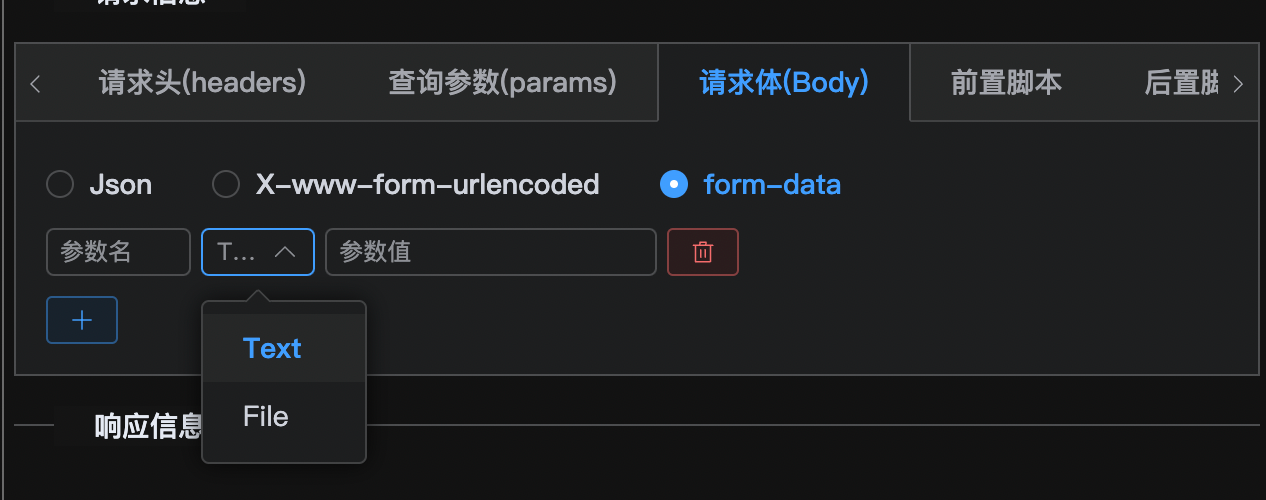
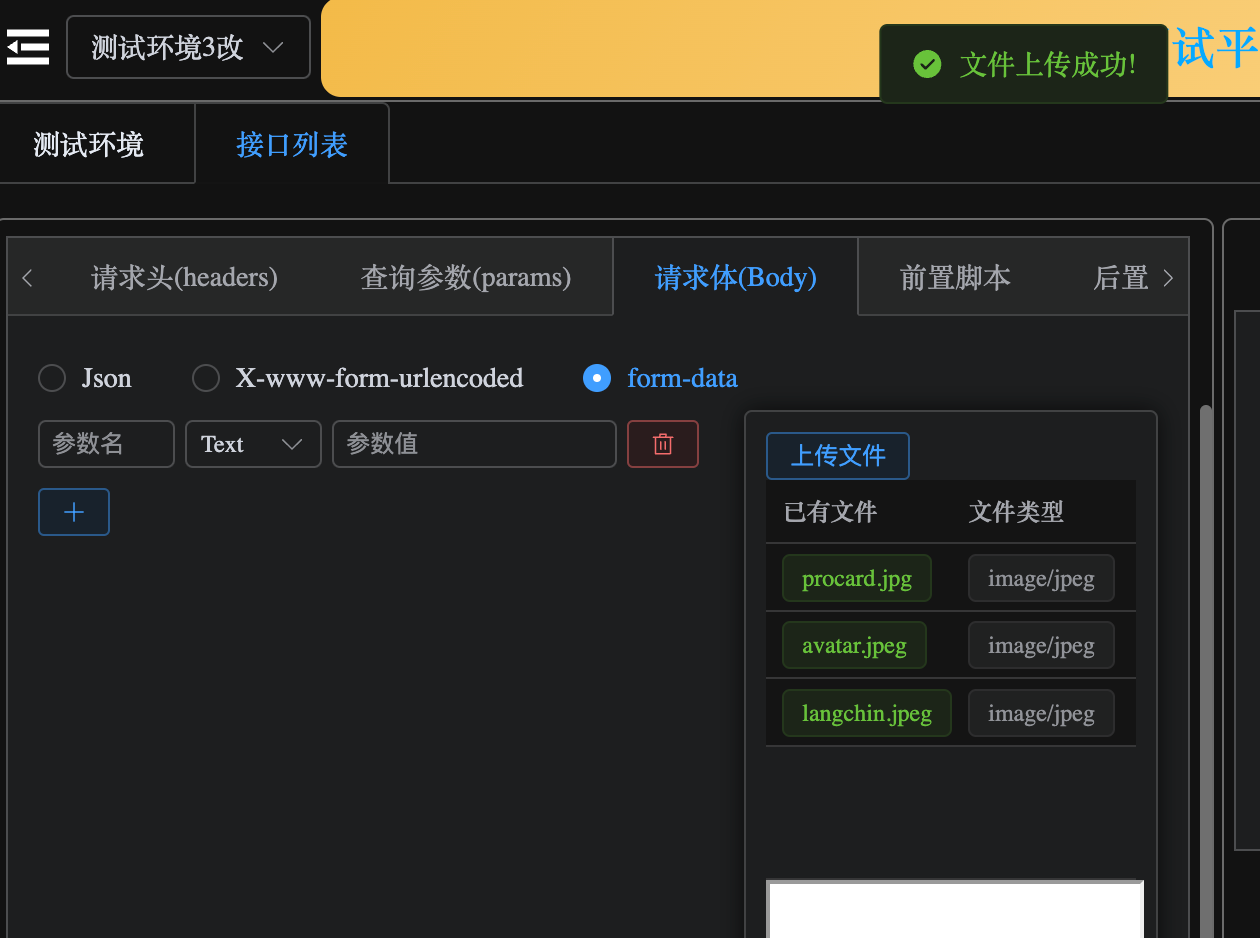
请求体部分的左边,展示参数,分text和file类型。
右边部分一个el-upload的上传文件按钮,一个table列表展示,一个显示框,用于预览选择的文件,点击可大图展示。
二、页面内容实现
0. 整体布局
这里分左右两边,左边用于添加和显示参数,右边用于上传文件和预览文件
<el-row :gutter="5"><el-col :span="15"></el-col><el-col :span="9"></el-col></el-row>
1. 左边的参数值部分
单个参数
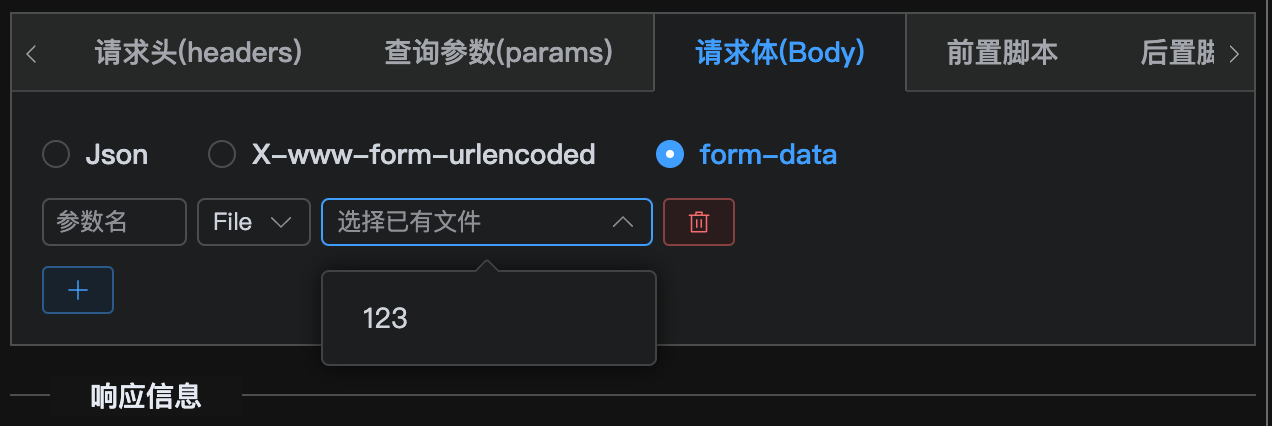
左边包含内容,参数名(输入框),参数类型(下拉选择),参数值(选择text时为输入框,选择file时,为下拉选择),一个删除按钮,一个添加参数按钮
<el-col :span="15"><el-row :gutter="5" style="margin-top: 5px;"><el-col :span="5"><el-input size="small" placeholder="参数名" clearable/></el-col><el-col :span="4"><el-select v-model="paramsType" placeholder="参数类型" size="small" style="width: 100%;"><el-option label="Text" value="text"/><el-option label="File" value="file"/></el-select></el-col><el-col :span="11"><!-- 文字输入框 --><el-input v-if="paramsType === 'text'" placeholder="参数值" size="small"clearable/><el-select v-else size="small" placeholder="选择已有文件" style="width: 100%;"><el-option value="123"/></el-select></el-col><el-col :span="4"><el-button icon="Delete" size="small" type="danger" plain></el-button></el-col></el-row><el-button style="margin-top: 10px;" icon="Plus" size="small" type="primary" plain></el-button></el-col>
单个参数大概就这样,现在需要定义一个变量,用来存储所有参数,然后遍历显示,并且点击添加时,需要向这个列表增加新的值。
多个参数循环遍历
const params = ref([]); // 参数列表 ['name','value']
<el-col :span="15"><el-row v-for="(item, index) in params" :key="index" :gutter="5" style="margin-top: 5px;"><el-col :span="5"><el-input size="small" v-model="item[0]" placeholder="参数名" clearable/></el-col><el-col :span="4"><el-select v-model="paramsType[index]" placeholder="参数类型" size="small" style="width: 100%;"><el-option label="Text" value="text"/><el-option label="File" value="file"/></el-select></el-col><el-col :span="11"><!-- 文字输入框 --><el-input v-if="paramsType[index] === 'text'" v-model="item[1]" placeholder="参数值" size="small"clearable/><el-select v-else v-model="item[1][0]" size="small" placeholder="选择已有文件" style="width: 100%;"><el-option value="123"/></el-select></el-col><el-col :span="4"><el-button icon="Delete" size="small" type="danger" plain></el-button></el-col></el-row><el-button @click="params.push(['',''])" style="margin-top: 10px;" icon="Plus" size="small" type="primary" plain></el-button></el-col>

由于后端定义的文件内容,包含名字,文件类型,文件地址三部分。所以如果选择类型是File,则有包含三部分内容。而下拉选择的仅仅只是绑定文件名,也就是列表第一个值。
删除
绑定点击事件
<el-button icon="Delete" @click="params.splice(index, 1)" size="small" type="danger" plain></el-button></el-col>
从数组中删除元素splice。
文件相关
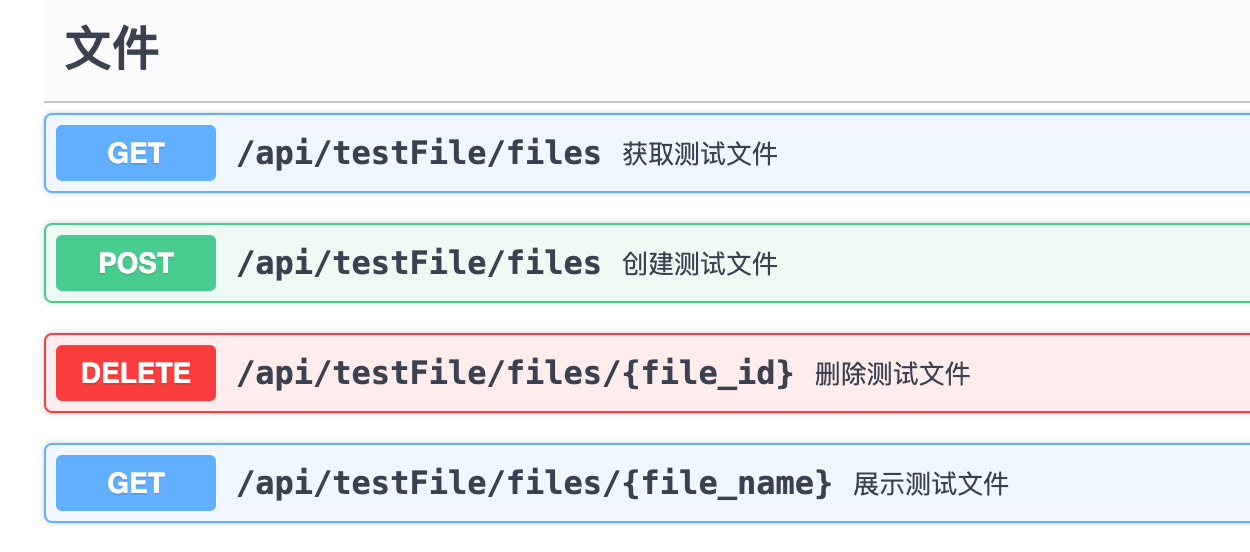
定义接口
根据接口文档,在vue中封装接口
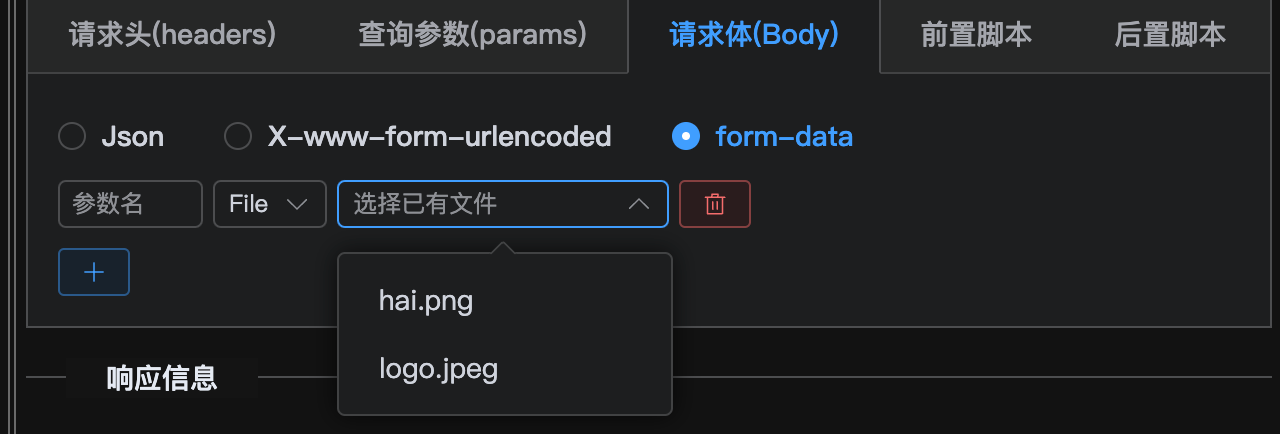
页面组件挂载完毕,获取一下文件列表,存储在files中,然后将数据中的info字段的第一个,也就是info[0] 绑定给文件下拉选择的选项,作为name
text和file的参数区别
后端返回文件列表的数据格式如下:

之前定义的params是一个列表,如下
params = [name,value] # 2部分组成,name和value,
# 而这个value,需要区分text和file
# 1.当选择text,value只有一个文本值
params = [name,[text_value]]# 2.当选择file,value则包含3部分
params = [name,[file_name,file_type,file_url]]
所以这里需要区分一下选择Text和选择File
<el-select @change="selectType($event, index)" v-model="paramsType[index]" placeholder="参数类型" size="small" style="width: 100%;"><el-option label="Text" value="text"/><el-option label="File" value="file"/></el-select>
const selectType = (val, index) => {if (val === 'file') {params.value[index][1] = ['', '', ''];} else {params.value[index][1] = '';}
};
下拉选项绑定File
在下拉选择时,绑定change函数,如果选择file,那参数就有3个部分组成.
<el-select v-else @change="selectFile($event, index)" v-model="item[1][0]" size="small"placeholder="选择已有文件" style="width: 100%;"><el-option v-for="item in files" :label="item.info[0]" :value="item.info[0]"/></el-select>
const files = ref([]);const getAllFile = async () => {// 获取文件列表const response = await http.pro.getFiles();if (response.status === 200) {files.value = response.data;}
};onMounted(() => {
if (props.modelValue.length > 0) {params.value = props.modelValue;} else {params.value = [['', '']];}getAllFile();
});
2. 右边的上传及预览部分
<el-col :span="9"><el-card style="padding: 0;"><el-upload class="upload-demo" :action="uploadApi" :on-success="uploadSuccess" :on-error="uploadError" :show-file-list="false" name="file" ><el-button type="primary" plain size="small">上传文件</el-button></el-upload><el-table :data="files" style="width: 100%" size="small" height="200px"><el-table-column label="已有文件"><template #default="scope"><el-tag type="success">{{ scope.row.info[0] }}</el-tag></template></el-table-column><el-table-column label="文件类型"><template #default="scope"><el-tag type="info">{{ scope.row.info[1] }}</el-tag></template></el-table-column></el-table><div>。。。图片和视频展示</div></el-card></el-col>
一个上传按钮,使用el-upload,然后一个表单展示组件,一个iframe用于显示已有的文件。
el-upload
https://element-plus.org/zh-CN/component/upload.html

添加请求上传的url
cosnt uploadApi = request.defaults.baseURL + `/api/testFile/files/`
绑定成功和失败的事件,给出提醒就行了。
const uploadSuccess = (response) => {ElMessage({type: 'success',message: '文件上传成功!',duration: 2000});getAllFile();
};const uploadError = (error) => {ElMessage({type: 'error',message: error,duration: 2000});
};
此时选择文件就能直接调用接口,上传了。
el-table
 <el-table :data="files" style="width: 100%" size="small" height="200px"><el-table-column label="已有文件" show-overflow-tooltip><template #default="scope"><el-tag type="success">{{ scope.row.info[0] }}</el-tag></template></el-table-column><el-table-column label="文件类型"><template #default="scope"><el-tag type="info">{{ scope.row.info[1] }}</el-tag></template></el-table-column>
</el-table>
表单部分,与之前下拉选择时一致。内容从files读取,显示名字的地方,超长,则悬浮展示全称。
单个文件数据
{"id": 5,"info": ["procard.jpg","image/jpeg","https://testapi-13xxxx-chengdu.myqcloud.com/procard.jpg "],"file": "procard.jpg"
}
之前也看过,文件类型数据info定义时含3个字段,名字,图片,和存储地址(使用了腾讯云的对象存储)。
所以显示文件名是scope.row.info[0] ,文件类型是scope.row.info[1]
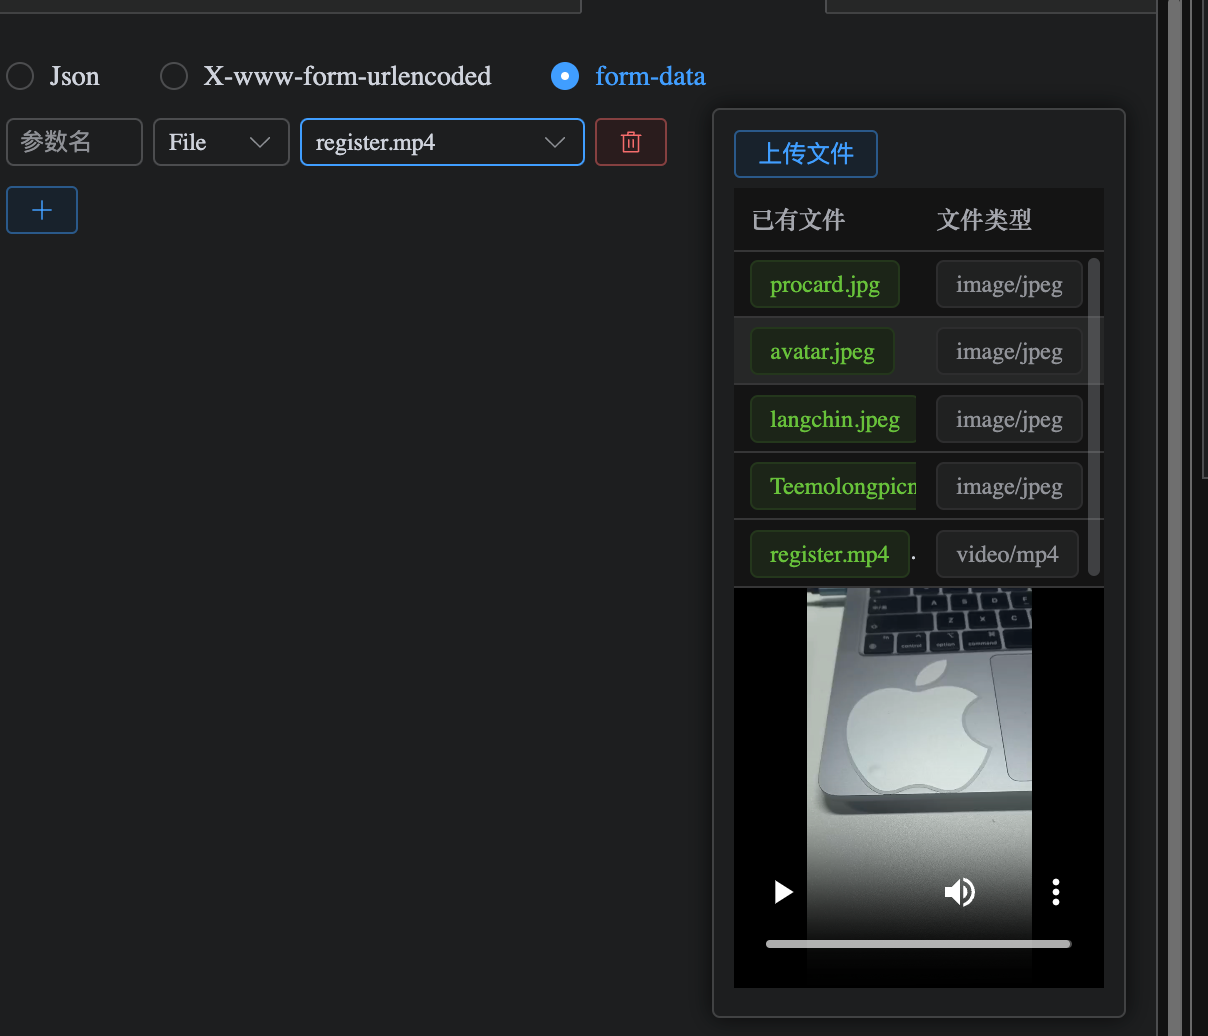
图片与视频预览展示
点击文件名,预览一下图片/视频。给文件名增加点击事件,把info传过去
<el-tag type="success" @click="viewfile( scope.row.info)">{{ scope.row.info[0] }}</el-tag>
点击后,判断点击的是图片还是视频,用不同的标签进行渲染展示
const fileType = ref('image')
const mediaIframe = ref(null);const viewFile = (info) => {mediaIframe.value = info[2];const type = info[1].toLowerCase().split('/')[0];console.log(type)if (type === 'image') {fileType.value = 'image'} else {fileType.value = 'video'}
};
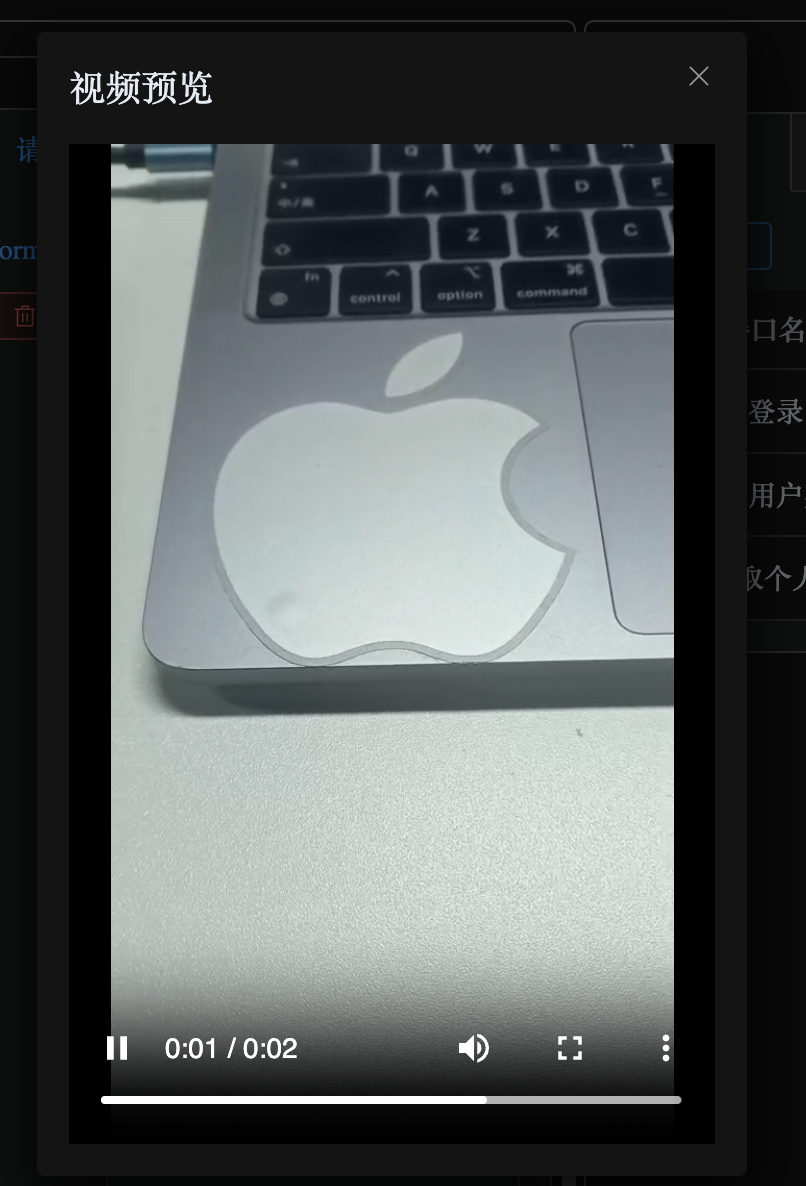
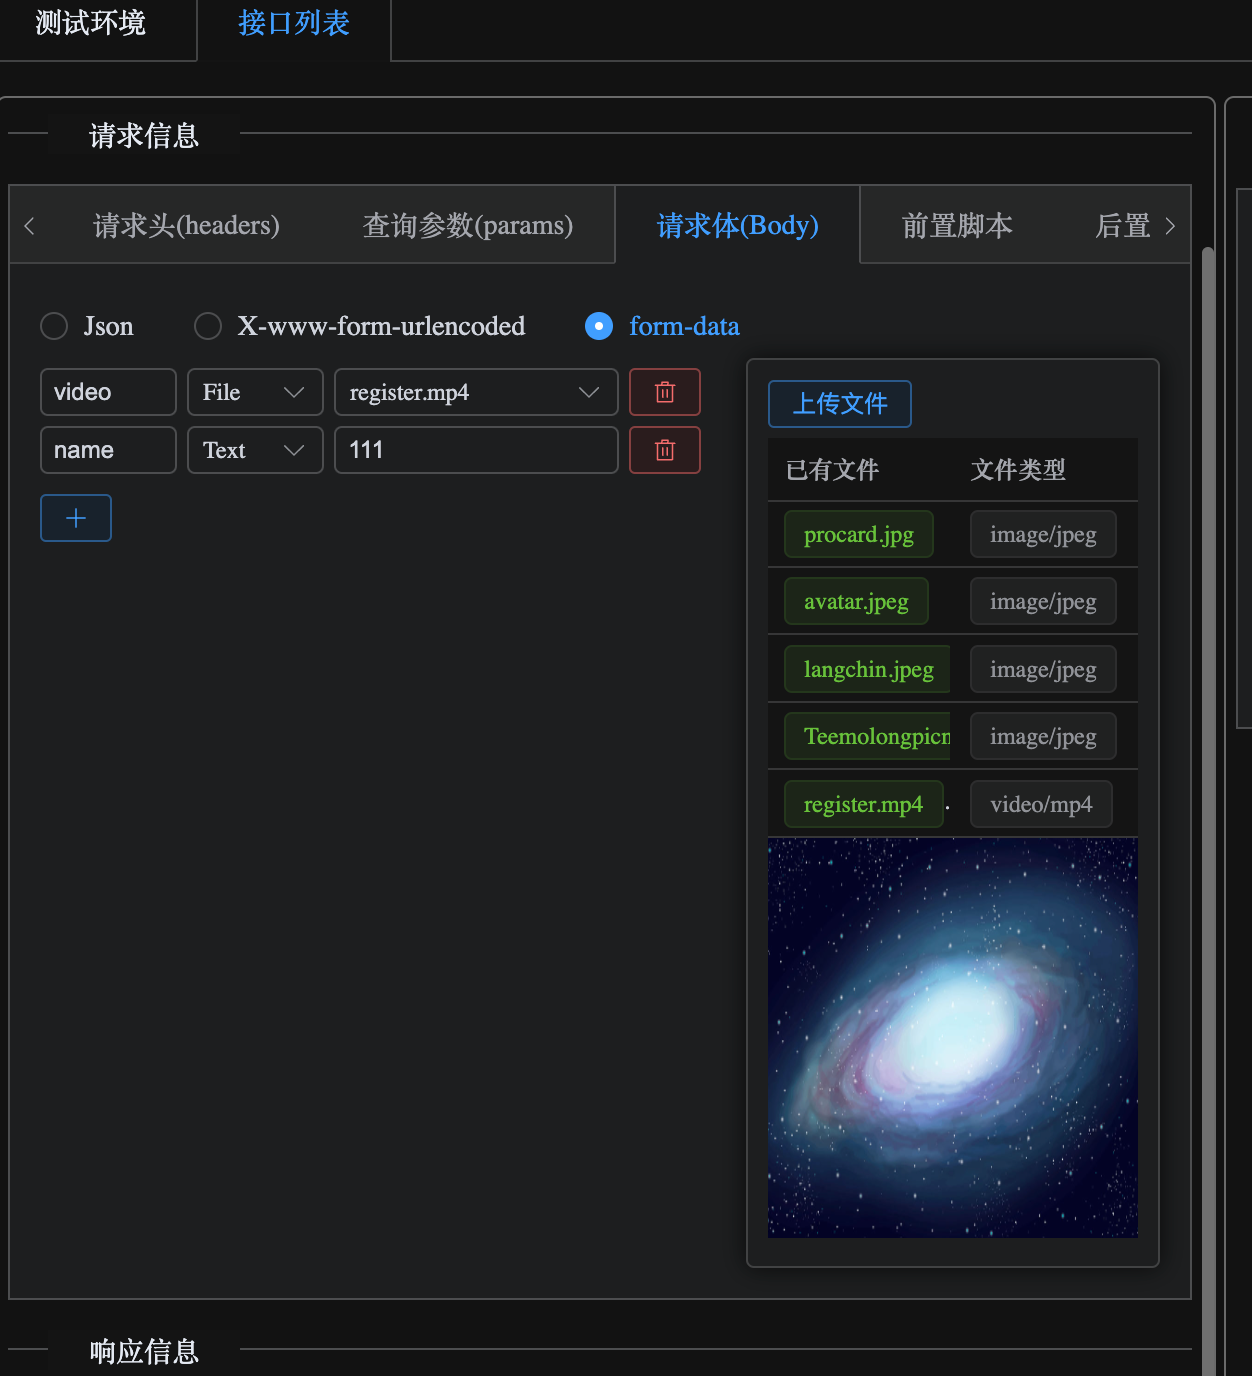
<div v-if="mediaIframe"><img v-if="fileType === 'image'" @click="showFullImg" :src="mediaIframe" style="width: 100%; height: 200px;"alt="预览"><videov-else:src="mediaIframe"@click="showFullImg"controlspreload="metadata"controlsList="nodownload"style="width: 100%; height: 200px;">您的浏览器不支持视频播放</video></div><!-- 添加Dialog组件,用于大屏展示 --><el-dialog v-if="fileType==='image'" v-model="dialogVisible" title="图片预览" width="80%"><img :src="mediaIframe" style="width: 100%; height: auto;" alt="完整图片"></el-dialog><el-dialog v-else v-model="dialogVisible" title="视频预览" :width="dialogWidth" ref="videoDialog"><video:src="mediaIframe"style="width: 100%; height:500px;"controlspreload="auto"controlsList="nodownload"@loadedmetadata="setDialogWidth"autoplay>您的浏览器不支持视频播放</video></el-dialog>
const dialogVisible = ref(false);
const dialogWidth = ref('80%'); // 默认宽度
const videoDialog = ref(null); // 对话框的 ref//点击全屏展示
const showFullImg = () => {dialogVisible.value = true; // 显示Dialog
};// 根据视频本身大小,来设置弹窗宽高。代码用cursor生成的,能用就行
const setDialogWidth = (event) => {const video = event.target;const videoWidth = video.videoWidth;const videoHeight = video.videoHeight;const maxWidth = window.innerWidth * 0.8; // 最大宽度为视口宽度的80%const maxHeight = window.innerHeight * 0.8; // 最大高度为视口高度的80%let dialogWidthValue = (videoWidth / videoHeight) * maxHeight;if (dialogWidthValue > maxWidth) {dialogWidthValue = maxWidth;}dialogWidth.value = `${dialogWidthValue}px`;
};
// 添加视频相关样式 (AI生成的,直接复制的)
video {object-fit: contain;background: #000; /* 添加黑色背景 */cursor: pointer;&::-webkit-media-controls-download-button {display: none; /* 隐藏 Chrome 下载按钮 */}&::-webkit-media-controls-enclosure {overflow: hidden;}
}// 优化弹窗中的视频显示
.el-dialog {.el-dialog__body {padding: 10px;background: #000;video {max-height: 70vh;margin: 0 auto;display: block;}}
}
点击全屏展示:
到此,整个请求体部分就完成了
三、总结
主要还是elment组件的使用,用到了el-upload,el-table,el-row,el-select等等。
video展示那块还得是AI,真是一边写,一边问。才得到结果。