3.THREE.FogExp2 全面详解 + 实例演示 + 深度解析
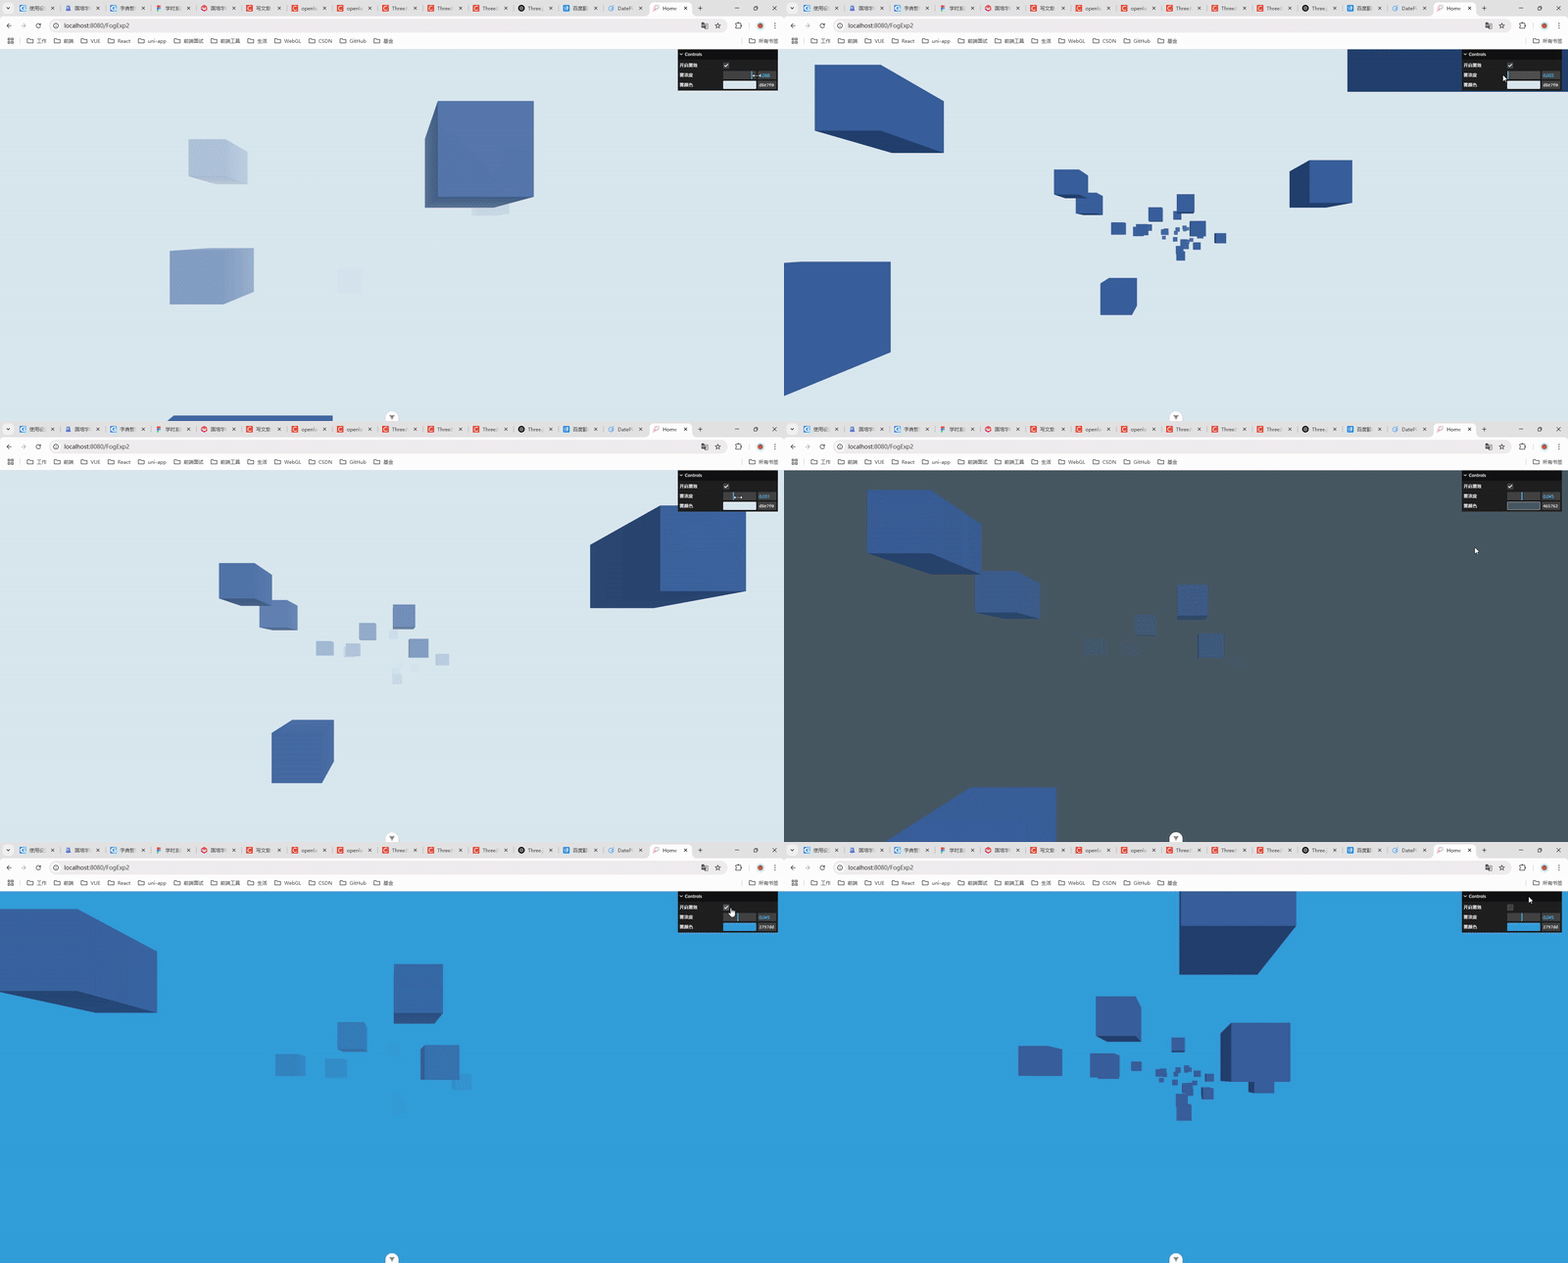
效果展示
本文将带你全面了解
THREE.FogExp2的使用方法及原理,并通过具体的代码示例手把手演示如何为你的三维场景添加真实的雾化效果。🌫️
✨ 一、什么是 FogExp2?
在 Three.js 中,FogExp2 是一种基于指数衰减的雾化效果,它可以模拟远处物体被雾气遮挡的视觉现象,从而提升场景的真实感和空间层次感。
与 THREE.Fog 线性雾不同,THREE.FogExp2 是 指数衰减的雾,雾的浓度随着距离呈指数级增加,视觉效果更自然、更平滑。
📘 二、构造函数与参数说明
const fog = new THREE.FogExp2(color, density);| 参数 | 类型 | 描述 |
|---|---|---|
color | THREE.Color 或 十六进制颜色值 | 雾的颜色,通常与背景色一致,使远处物体“融入背景” |
density | Number | 雾的浓度,值越大雾越浓,越小越淡(推荐值范围:0.0001 ~ 0.1) |
🔧 三、如何使用 FogExp2?
✅ 步骤 1:创建场景并添加雾
const scene = new THREE.Scene();
scene.fog = new THREE.FogExp2(0xffffff, 0.002); // 白色雾,浓度 0.002
✅ 步骤 2:设置渲染器背景色(与雾颜色一致)
const renderer = new THREE.WebGLRenderer();
renderer.setSize(window.innerWidth, window.innerHeight);
renderer.setClearColor(0xffffff); // 设置背景色与雾一致 document.body.appendChild(renderer.domElement);
✅ 步骤 3:正常添加相机、灯光、几何体等
const camera = new THREE.PerspectiveCamera( 75, window.innerWidth / window.innerHeight, 0.1, 1000 );
camera.position.z = 30;
const geometry = new THREE.BoxGeometry(1, 1, 1);
const material = new THREE.MeshStandardMaterial({ color: 0x00ff00 });
const cube = new THREE.Mesh(geometry, material);
scene.add(cube);
✅ 步骤 4:添加环境光和方向光
const light = new THREE.DirectionalLight(0xffffff, 1);
light.position.set(10, 10, 10);
scene.add(light);
scene.add(new THREE.AmbientLight(0xffffff, 0.5));
✅ 步骤 5:开启渲染循环
function animate() { requestAnimationFrame(animate); cube.rotation.x += 0.01; cube.rotation.y += 0.01;renderer.render(scene, camera);
}
animate();
🧪 四、雾的浓度调节效果对比
雾浓度 density | 效果描述 |
|---|---|
0.001 | 雾很淡,物体几乎都清晰 |
0.01 | 中等雾气,远物模糊 |
0.05 | 浓雾,远处物体无法识别 |
0.1 | 超浓,几乎看不到前方 |
你可以尝试动态调节密度值,看看不同浓度带来的空间感变化✨。
🎯 五、与线性雾 Fog 的区别
| 特性 | Fog (线性) | FogExp2 (指数) |
|---|---|---|
| 控制范围 | near, far | 无起止范围,统一密度 |
| 数学模型 | 线性(Linear) | 指数衰减(Exp²) |
| 视觉效果 | 远近之间过渡明显 | 更自然平滑 |
| 使用场景推荐 | 控制范围明确的场景 | 宽阔空间、自然环境场景 |
💡 六、进阶技巧
🌈 动态控制雾浓度(UI调节)
可使用 dat.GUI 控制浓度:
const gui = new dat.GUI();
const fogConfig = { density: 0.002 };
gui.add(fogConfig, 'density', 0.0001, 0.1).onChange(value => { scene.fog.density = value;
});
🌀 与 Shader 配合自定义雾效
你可以在材质中使用 fog: true,然后在 Shader 中接入内置的 fog 模块,支持自定义颜色/形状的雾。
📦 七、完整示例代码 (复制可运行)
<!--* @Author: 彭麒* @Date: 2025/4/21* @Email: 1062470959@qq.com* @Description: 此源码版权归吉檀迦俐所有,可供学习和借鉴或商用。-->
<template><div ref="containerRef" class="w-full h-full"></div>
</template><script setup>
import { ref, onMounted, onBeforeUnmount } from 'vue'
import * as THREE from 'three'
import { GUI } from 'three/addons/libs/lil-gui.module.min.js';const containerRef = ref()
let scene, camera, renderer, gui, animationIdconst fogParams = {enableFog: true,fogColor: '#d8e7f0',fogDensity: 0.035,
}onMounted(() => {const container = containerRef.valueconst width = container.clientWidthconst height = container.clientHeightscene = new THREE.Scene()scene.fog = new THREE.FogExp2(fogParams.fogColor, fogParams.fogDensity)camera = new THREE.PerspectiveCamera(75, width / height, 0.1, 1000)camera.position.set(0, 0, 20)renderer = new THREE.WebGLRenderer({ antialias: true })renderer.setSize(width, height)renderer.setClearColor(fogParams.fogColor)container.appendChild(renderer.domElement)// 光源const ambient = new THREE.AmbientLight(0xffffff, 0.5)scene.add(ambient)const directional = new THREE.DirectionalLight(0xffffff, 1)directional.position.set(10, 10, 10)scene.add(directional)// 创建多个立方体模拟远近效果const boxGeometry = new THREE.BoxGeometry(2, 2, 2)const boxMaterial = new THREE.MeshStandardMaterial({ color: 0x5599ff })for (let i = 0; i < 50; i++) {const box = new THREE.Mesh(boxGeometry, boxMaterial)box.position.set((Math.random() - 0.5) * 20,(Math.random() - 0.5) * 10,-i * 4)scene.add(box)}// GUI 控制面板gui = new GUI()gui.add(fogParams, 'enableFog').name('开启雾效').onChange(updateFog)gui.add(fogParams, 'fogDensity', 0.001, 0.1).step(0.001).name('雾浓度').onChange(updateFog)gui.addColor(fogParams, 'fogColor').name('雾颜色').onChange(updateFog)function updateFog() {if (fogParams.enableFog) {scene.fog = new THREE.FogExp2(fogParams.fogColor, fogParams.fogDensity)renderer.setClearColor(new THREE.Color(fogParams.fogColor))} else {scene.fog = null}}// 动画const animate = () => {animationId = requestAnimationFrame(animate)camera.position.z -= 0.05if (camera.position.z < -200) camera.position.z = 20renderer.render(scene, camera)}animate()
})onBeforeUnmount(() => {cancelAnimationFrame(animationId)gui?.destroy()renderer?.dispose()
})
</script><style scoped>
div {width: 100%;height: 100vh;overflow: hidden;
}
</style>
📚 八、官方文档 & 引用
-
📘 官方文档地址:https://threejs.org/docs/#api/en/scenes/FogExp2
-
🌐 Fog vs FogExp2 简析:https://threejs.org/manual/#en/fog
-
📦 Three.js GitHub 仓库:https://github.com/mrdoob/three.js/
🎉 九、总结
THREE.FogExp2 是一个简单但非常实用的工具,它不仅能快速增强场景空间感,还能提升视觉层次,是打造沉浸式 3D 场景的利器。如果你正在构建大场景、森林、山脉等视觉效果场合,不妨加上 FogExp2 来试试!🌫️
如果你觉得这篇文章对你有帮助,欢迎一键三连 ⭐️ 点赞 👍 收藏 📁 留言 📝

