Spring是如何实现资源文件的加载
一,如何加载资源文件
上篇内容:Spring是如何通过BeanDefinition定义Bean
Spring资源文件的加载依赖于Resource与ResourceLoader这两个类,采用采用的是策略模式与工厂方法相结合实现的
其中Resource是所有资源类型的父类,可以通过继承该类实现其getInputStream方法,获取资源文件的输入流,之后用过该输入流对象就可以实现对文件内容的读取。
除此之外为了更好的获取不同资源文件的Resource对象,这里采用了策略模式来根据不同的location获取获取Resource
手下我们需要创建一个Resource作为资源实现的接口,在该类当中定义了一个getInputStream方法,我们可以通过子类重写该方法,以实现不同类型资源的读取
1,Resouce
public interface Resource { /** * 获取资源的输入流。 * @return 资源的输入流 */ InputStream getInputStream() throws IOException; }
ClassPathResource
public class ClassPathResource implements Resource{  // 文件相对路径  private final String path;  private final ClassLoader classLoader;  public ClassPathResource(String path) {  this.path = path;  this.classLoader = this.getClass().getClassLoader();  }  @Override  public InputStream getInputStream() throws FileNotFoundException {  InputStream inputStream = classLoader.getResourceAsStream(path);  if (inputStream == null){  throw new FileNotFoundException(String.format("%s,文件不存在",this.path));  }  return inputStream;  }
}
FileSystemResource
public class FileSystemResource implements Resource{  private final String filePath;  public FileSystemResource(String filePath) {  this.filePath = filePath;  }  /**  * 获取资源的输入流。  *  * @return 资源的输入流  */  @Override  public InputStream getInputStream() throws FileNotFoundException {  try {  Path path = new File(this.filePath).toPath();  InputStream inputStream = Files.newInputStream(path);  return inputStream;  } catch (IOException e) {  throw new FileNotFoundException(String.format("%s,文件不存在",this.filePath));  }  }
}
URLResource
public class URLResource implements Resource{  private final URL url;  public URLResource(URL url) {  this.url = url;  }  /**  * 获取资源的输入流。  *  * @return 资源的输入流  */  @Override  public InputStream getInputStream() throws IOException {  URLConnection urlConnection = this.url.openConnection();  InputStream inputStream = null;  inputStream = urlConnection.getInputStream();  return inputStream;  }
}
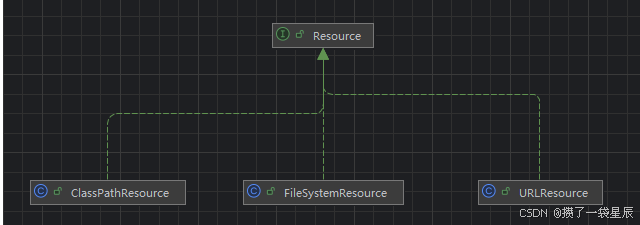
通过以上三者就可以实现对ClassPath,系统文件,URL文件的解析
2,ResourceLoad
现在文件的解析方法定义好了,那何时解析调用哪种方式解析又成为了一个问题。在这里我们就通过策略模式来实现
在这里我们定义了一个ResourceLoader接口,并定义了getResource的一个抽象方法
public interface ResourceLoader {  /**  * 根据指定的位置获取资源  *  * @param location 资源的位置,通常是一个路径或URL  * @return 返回一个Resource对象,表示加载的资源  */  Resource getResource(String location);
}
在此之后,再次定义一个默认的资源文件加载器实现ResourceLoader,在getResource方法当中会根据传入的location格式动态匹配对应的解析方法。
public class DefaultResourceLoader implements ResourceLoader{  // Classpath前缀  private final String CLASSPATH_URL_PREFIX = "classpath:";  /**  * 根据指定的位置获取资源  * 目前只实现了Classpath,URL,File  *     * @param location 资源的位置,通常是一个路径或URL  * @return 返回一个Resource对象,表示加载的资源  */  @Override  public Resource getResource(String location) {  // 加载ClassPath路径下的资源文件  if (location.startsWith(CLASSPATH_URL_PREFIX)){  return new ClassPathResource(location.substring(CLASSPATH_URL_PREFIX.length()));  }  // 加载路径资源文件  else if (location.startsWith("/")){  return new FileSystemResource(location.substring(1));  }  // 加载URl资源文件  else {  try {  URL url = new URL(location);  return new URLResource(url);  } catch (MalformedURLException e) {  return new FileSystemResource(location);  }  }  }
}
现在我们就可以来测试一下
@Test
public void testClassPathResource() throws IOException {  DefaultResourceLoader defaultResourceLoader = new DefaultResourceLoader();  Resource resource = defaultResourceLoader.getResource("classpath:hello.txt");  InputStream inputStream = resource.getInputStream();  String read = IoUtil.readUtf8(inputStream);  System.out.println(read);
}
二,如何实现Bean属性注入的
1,为什么要为Bean注入属性
在Bean实例化之后需要对其中的属性进行注入,如下我们定义了一个People,现在需要将其加入到Spring容器当中,其中还包含了两个属性name,age
public class People {  private String name;  private Integer age;  public String getName() {  return name;  }  public void setName(String name) {  this.name = name;  }  public Integer getAge() {  return age;  }  public void setAge(Integer age) {  this.age = age;  }  @Override  public String toString() {  return "People{" +  "name='" + name + '\'' +  ", age=" + age +  '}';  }
}
最终我们需要实现在BeanDefinition当中注入属性,如下
@Test
public void  testBeanPropertyValue(){  DefaultListableBeanFactory factory = new DefaultListableBeanFactory();  PropertyValues propertyValues = new PropertyValues();  propertyValues.addPropertyValue(new PropertyValue("age",20));  propertyValues.addPropertyValue(new PropertyValue("name","jixu"));  BeanDefinition beanDefinition = new BeanDefinition(People.class, propertyValues);  factory.registerBeanDefinition("people",beanDefinition);  People people = (People) factory.getBean("people");  System.out.println(people.toString());  Assertions.assertThat(people.getAge()).isEqualTo(20);  Assertions.assertThat(people.getName()).isEqualTo("jixu");  }
2,PropertyValues与PropertyValue
首先我们需要创建PropertyValue类作为Bean属性的存储对象,那么对于一个Bean来说可能有多个属性,单靠一个PropertyValue无法实现,我们需要一个列表来储存Property。所以我们还需要抽取一个PropertyValues,同时还可以在该类当中定义一些工具方法。
public class PropertyValue {  private final String name;  private final Object value;  public PropertyValue(String name, Object value) {  this.name = name;  this.value = value;  }  public String getName() {  return name;  }  public Object getValue() {  return value;  }
}
/*** Bean属性列表** 该类用于管理Bean的属性集合,提供属性的添加和获取功能** @author jixu* @title PropertyValues* @date 2025/4/6 23:00*/
public class PropertyValues {// 定义一个列表用于保存Bean的PropertyValueprivate final List<PropertyValue> propertyValueList = new ArrayList<>();/*** 获取所有属性值数组** @return PropertyValue[] 当前所有的属性值数组*/public PropertyValue[] getPropertyValueList(){return propertyValueList.toArray(new PropertyValue[0]);}/*** 添加一个属性值** @param propertyValue 要添加的属性值对象*/public void addPropertyValue(PropertyValue propertyValue){this.propertyValueList.add(propertyValue);}/*** 根据属性名称获取属性值** 此方法遍历propertyValueList列表,查找与给定名称匹配的PropertyValue对象如果找到匹配的属性名,* 则返回对应的PropertyValue对象;如果没有找到,则返回null** @param propertyName 要获取的属性名称* @return PropertyValue 匹配的属性值对象,如果不存在则返回null*/public PropertyValue getPropertyValue(String propertyName){for (PropertyValue propertyValue : propertyValueList) {String name = propertyValue.getName();if (name.equals(propertyName)){return propertyValue;}}return null;}}之后我们只需要修改AbstractAutowireCapableBeanFactory当中的doCreate方法
// 为Bean的属性进行赋值
applyPropertyValues(bean , beanDefinition , name);
/**  * 根据BeanDefinition中的属性信息,为指定的bean对象应用属性值  * 此方法主要用于依赖注入过程,通过反射机制将属性值注入到bean实例中  *  * @param bean 要应用属性值的目标bean对象  * @param beanDefinition 包含bean定义和属性信息的对象  * @param beanName bean的名称,用于错误信息或日志记录中  */
private void applyPropertyValues(Object bean, BeanDefinition beanDefinition, String beanName) {  try {  // 获取到要操作Bean到Class对象  Class beanClass = beanDefinition.getBeanClass();  // 循环获取当前Bean的所有属性  for (PropertyValue propertyValue : beanDefinition.getPropertyValues().getPropertyValueList()) {  // 对于属性的赋值要通过对应的set方法,构造出set方法的方法名  String name = propertyValue.getName();  String setMethodName = "set" + name.substring(0, 1).toUpperCase() + name.substring(1);  //通过属性的set方法设置属性  Class<?> type = beanClass.getDeclaredField(name).getType();  // 通过反射动态调用  Method declaredMethod = beanClass.getDeclaredMethod(setMethodName, type);  declaredMethod.invoke(bean,propertyValue.getValue());  }  }catch (Exception e){  throw new BeanException(String.format("bean 属性注入异常[%s]",beanName) ,  e);  }
}