【SpringMVC】概念引入与连接

目录
1.前言
2.正文
2.1SpringMVC是什么
2.2详解@RequestMapping注解
2.3创建Spring项目
2.4建立连接
2.5Postman
3.小结
1.前言
哈喽大家好,今天来给大家带来Spring相关的学习,主要内容有概念的讲解以及如何分别通过Java代码和工具Postman来建立连接,那么话不多说让我们开始吧。
2.正文
2.1SpringMVC是什么
Spring MVC 是 Spring 框架的一个模块,专门用于构建 Web 应用程序。它基于经典的 MVC 设计模式(Model-View-Controller),将应用程序分为三层:
Model(模型):封装数据(如数据库查询结果)。
View(视图):展示数据(如 HTML 页面)。
Controller(控制器):处理用户请求,协调 Model 和 View。
官方文档:
Spring Web MVC :: Spring Framework![]() https://docs.spring.io/spring-framework/reference/web/webmvc.html
https://docs.spring.io/spring-framework/reference/web/webmvc.html
使用它有哪些优点呢:
简化开发:通过注解和配置减少代码量。
灵活扩展:支持多种视图技术(JSP、Thymeleaf 等)。
与 Spring 生态无缝集成:如 Spring Security、Spring Data 等。
那么SpringMVC是如何处理用户发送过来的Http请求呢:
DispatcherServlet(前端控制器)
- 所有请求的入口,相当于“调度中心”。
- 负责将请求分发给对应的 Controller。
HandlerMapping(处理器映射器)
- 根据请求的 URL,找到对应的 Controller 和方法。
Controller(控制器)
- 处理业务逻辑(如查询数据库),返回 Model 和视图名称。
ViewResolver(视图解析器)
- 将视图名称(如
"home")解析为具体的视图(如/WEB-INF/home.jsp)。View(视图)
- 渲染页面,将 Model 数据展示给用户。
流程:
用户请求 → DispatcherServlet → HandlerMapping → Controller → 返回 ModelAndView → ViewResolver → View → 响应给用户2.2详解@RequestMapping注解
@RequestMapping 是 Spring MVC 中最核心的注解之一,用于将 HTTP 请求映射到具体的控制器方法。它支持灵活的 URL 匹配、请求方法限制、参数过滤等功能。(学习这一部分时,建议搭配后文使用)
基本用法:在类或方法上使用 @RequestMapping,指定 URL 路径:
@Controller
@RequestMapping("/user")  // 类级别的公共路径,类路径
public class UserController {@RequestMapping("/info")  // 完整路径是 /user/info,方法路径public String getUserInfo() {return "user_info"; }
}
那么该注解到底是GET请求还是POST请求呢?这个时候我们就要来借助以下抓包工具:
测试代码:
package com.example.demo;import org.springframework.web.bind.annotation.RequestMapping;
import org.springframework.web.bind.annotation.RestController;@RestController
public class test1 {@RequestMapping("/hello")public String hello(){return "hello";}}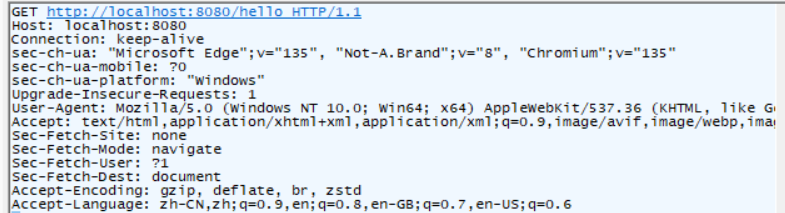
此时可以看出来是GET请求。那有没有可能是POST请求呢?让我们来测试下:
我们在static创建一个HTML文件:
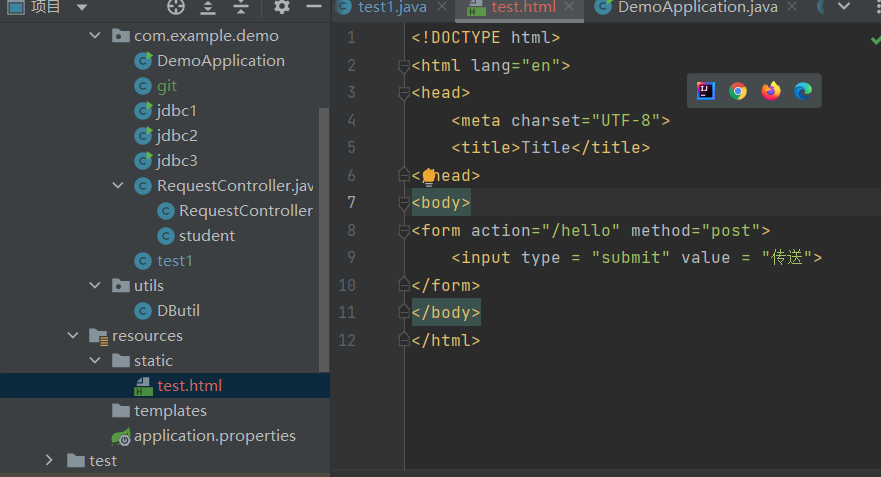
<!DOCTYPE html>
<html lang="en">
<head><meta charset="UTF-8"><title>Title</title>
</head>
<body>
<form action="/hello" method="post"><input type = "submit" value = "传送">
</form>
</body>
</html>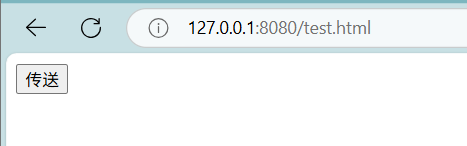
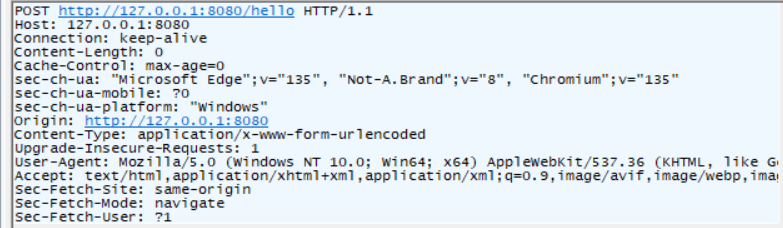
就会发现此时是POST请求 。
那么我们如何定义该注解是GET请求还是POST请求呢?
@RequestMapping(method=GET)
@RequestMapping(method=POST)
利用method设置一下即可。
总结下核心属性:
| 属性 | 作用 | 示例 |
|---|---|---|
value 或 path | 指定 URL 路径 | @RequestMapping("/user") |
method | 限制请求方法(GET、POST 等) | method = RequestMethod.POST |
params | 要求请求必须包含特定参数 | params = "id=100"(参数 id 必须为 100) |
headers | 要求请求头包含特定字段 | headers = "Content-Type=text/json" |
consumes | 限制请求的 Content-Type(如接收 JSON) | consumes = "application/json" |
produces | 指定响应的 Content-Type(如返回 JSON) | produces = "application/json" |
2.3创建Spring项目
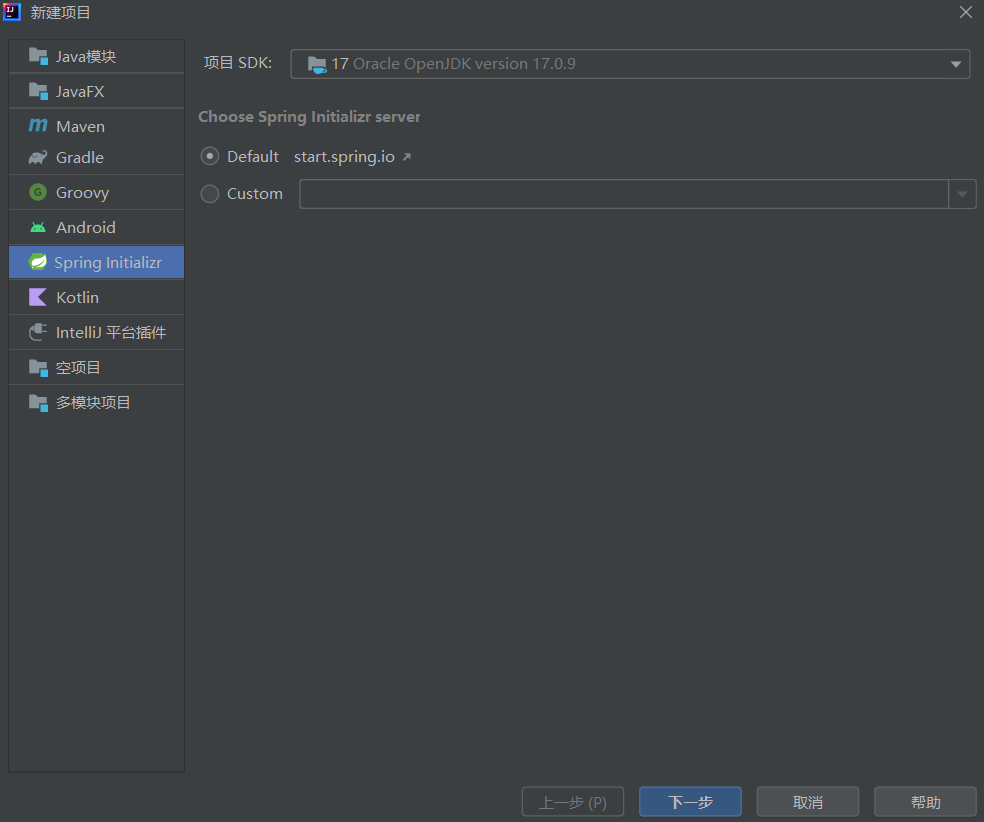
既然我们学习了该注解,那么就要想办法应用出来,所以我们们需要先创建一个Spring项目
在idea社区版装上Spring插件或者使用Spring专业版,创建项目时勾选:
接着导入SpringWeb相关模块:
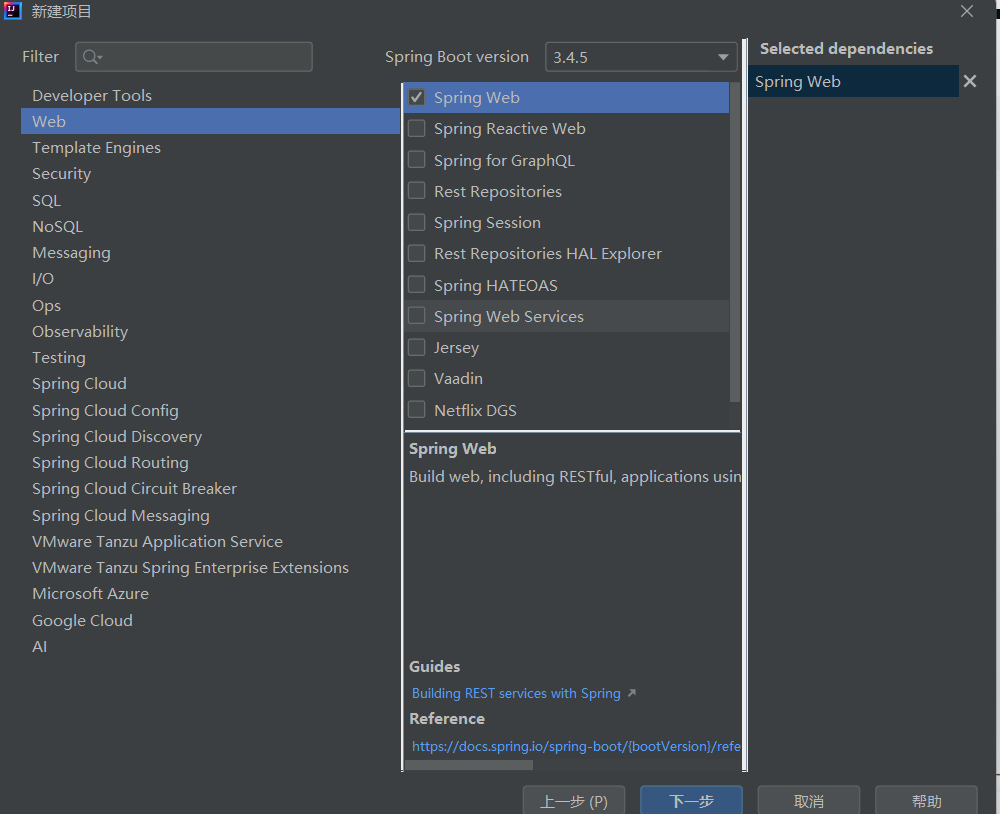
这样就完成了Spring项目的创建。
2.4建立连接
下面我们在idea中建立连接:
package com.example.demo;import org.springframework.web.bind.annotation.RequestMapping;
import org.springframework.web.bind.annotation.RestController;@RestController
public class test1 {@RequestMapping("/hello")public String hello(){return "hello";}}
资源路径:类路径+方法路径。
核心注解说明:
1.
@RestController
是
@Controller+@ResponseBody的组合注解。作用:
标记这个类是一个控制器,能接收 HTTP 请求。
所有方法的返回值会直接写入 HTTP 响应体(Response Body),而不是跳转到视图页面。
适合场景:开发 RESTful API(返回 JSON/XML 数据)。
2.
@RequestMapping("/hello")
作用:将 HTTP 请求路径
/hello映射到hello()方法。默认行为:
支持所有 HTTP 方法(GET、POST、PUT 等)。
返回的字符串 "hello" 会直接作为响应内容返回给客户端。
当我们运行项目并在浏览器访问访问 http://localhost:8080/hello时:
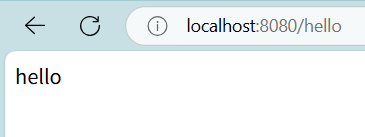
这样就代表连接成功。
如果注解相同,那么就必须保证资源路径(类路径+方法路径)不同:
package com.example.demo;import org.springframework.web.bind.annotation.RequestMapping;
import org.springframework.web.bind.annotation.RestController;@RestController
public class test1 {@RequestMapping("/hello")public String hello(){return "hello";}@RequestMapping("/hello")public String hello1(String name){ return "hello" + name; }
}
项目直接启动报错并退出:

红线标注部分“error”就是错误日志了。
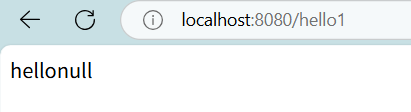
package com.example.demo;import org.springframework.web.bind.annotation.RequestMapping;
import org.springframework.web.bind.annotation.RestController;@RestController
public class test1 {@RequestMapping("/hello")public String hello(){return "hello";}@RequestMapping("/hello1")public String hello1(String name){ return "hello" + name; }
}
这样即可正常运行:
2.5Postman
官网:Download Postman | Get Started for Free![]() https://www.postman.com/downloads/
https://www.postman.com/downloads/
Postman是什么呢:
Postman 是一款API 开发与测试工具,被广泛用于设计、调试、测试和文档化 HTTP 接口。无论是后端开发者、测试工程师,还是前端开发者,都可以用它快速验证 API 的功能和可靠性。
发送 HTTP 请求(GET/POST/PUT/DELETE 等)。
自动化测试 API 接口。
管理 API 集合(分类、分组、共享)。
生成 API 文档。
模拟服务器(Mock Server)。
团队协作(共享工作区)。
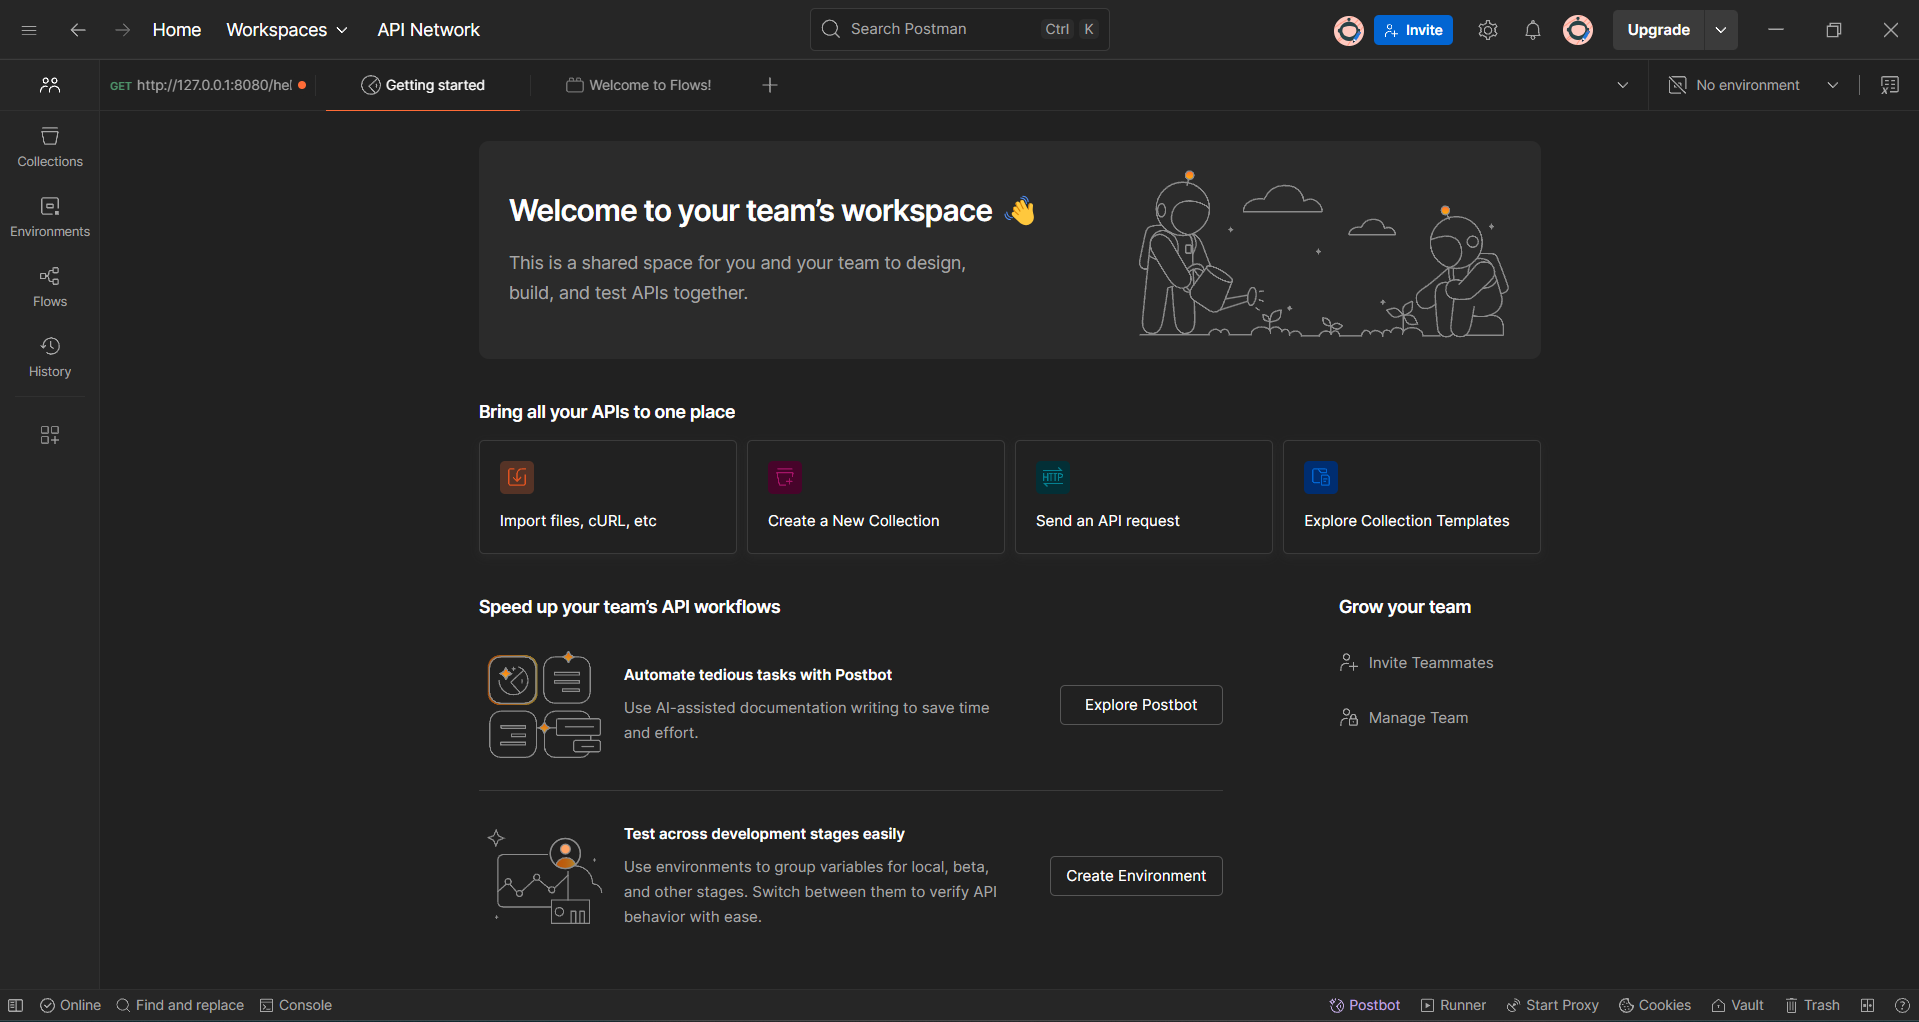
页面看起来还是很清新的。
就还拿上一段代码来测试,第二个方法还有一个参数name,我们在Postman里可以快捷在请求中添加参数,注意参数名一定要相同。
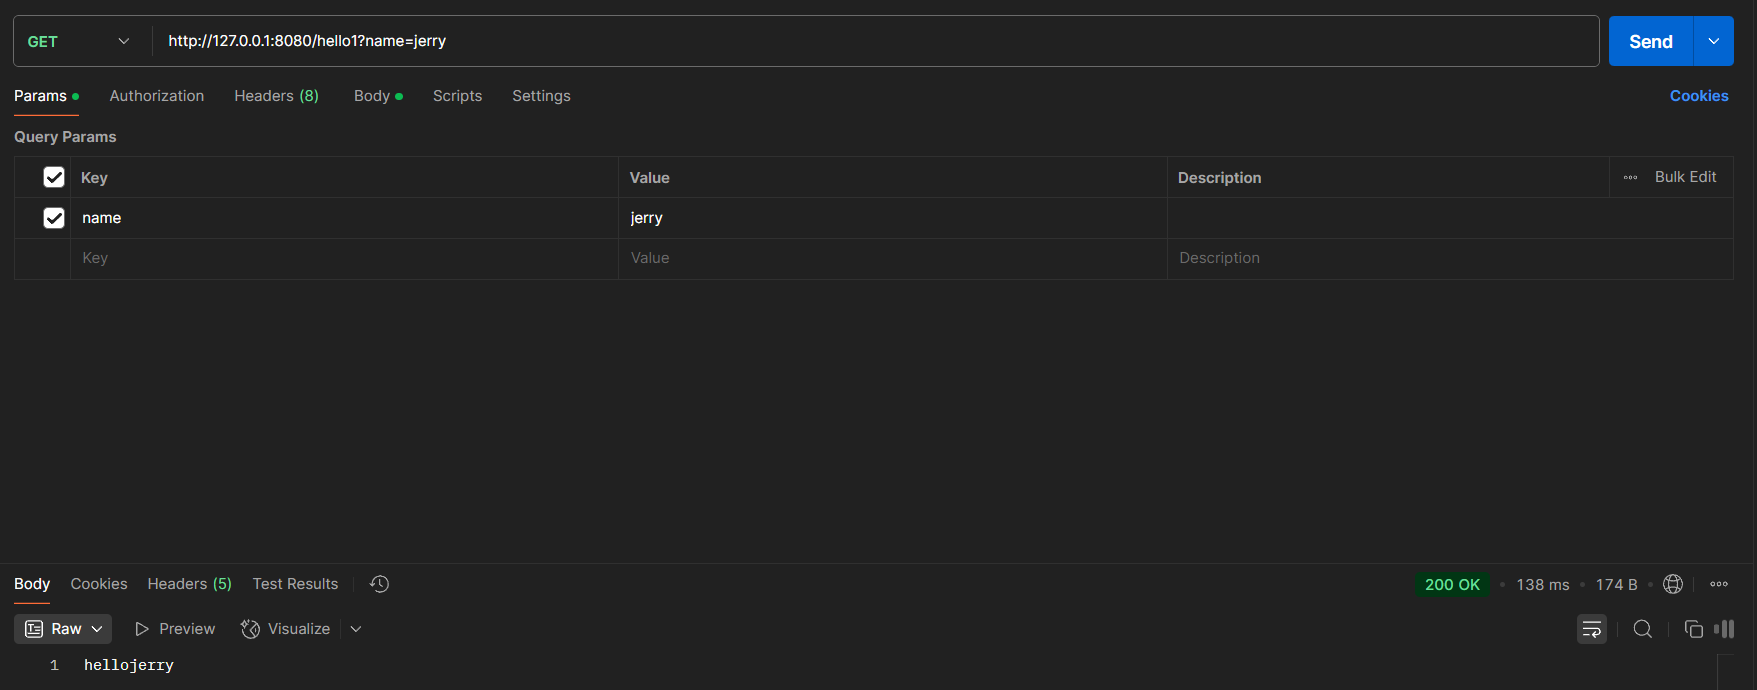
发送成功。
3.小结
今天的分享到这里就结束了,喜欢的小伙伴点点赞点点关注,你的支持就是对我最大的鼓励,大家加油!