Opencv图像处理:旋转、打包、多图像匹配
文章目录
- 一、图像的旋转
- 1、使用numpy方法实现旋转
- 1)顺时针旋转90度
- 2)逆时针旋转90度
- 2、使用opencv的方法实现图像旋转
- 1)顺时针旋转90度
- 2)逆时针旋转90度
- 3)旋转180度
- 3、效果
- 二、多图像匹配
- 1、模板
- 2、匹配对象
- 3、代码实现
- 1)预处理
- 2)定义find_temp函数
- 3)进行模板匹配
- 三、打包与np.where()函数
- 1、np.where()函数
- 1)作为条件选择器
- 2)作为条件索引获取器(省略 x 和 y)
- 2、打包与解包
- 1)打包
- 2)解包
一、图像的旋转
1、使用numpy方法实现旋转
- 读取图片并重设图片大小
import cv2
import numpy as npimg=cv2.imread("kele.png")
img=cv2.resize(img,dsize=None,fx=0.5,fy=0.5)cv2.imshow('yuantu',img)
1)顺时针旋转90度
# 旋转90度,k=-1,表示顺时针旋转90度
rotated_image1=np.rot90(img,k=-1)
cv2.imshow('totated_image1',rotated_image1)
2)逆时针旋转90度
# 旋转90度,k=-1,表示顺时针旋转90度
rotated_image1=np.rot90(img,k=-1)
cv2.imshow('totated_image1',rotated_image1)
2、使用opencv的方法实现图像旋转
1)顺时针旋转90度
rotated_image=cv2.rotate(img,cv2.ROTATE_90_CLOCKWISE)   #顺时针旋转90
cv2.imshow('shun90',img)
2)逆时针旋转90度
rotated_image1=cv2.rotate(img,cv2.ROTATE_90_COUNTERCLOCKWISE)   #逆时针旋转90度
cv2.imshow('ni90',rotated_image1)
3)旋转180度
rotated_image2=cv2.rotate(img,cv2.ROTATE_180)   #旋转180度
cv2.imshow('180',rotated_image2)
cv2.waitKey(0)
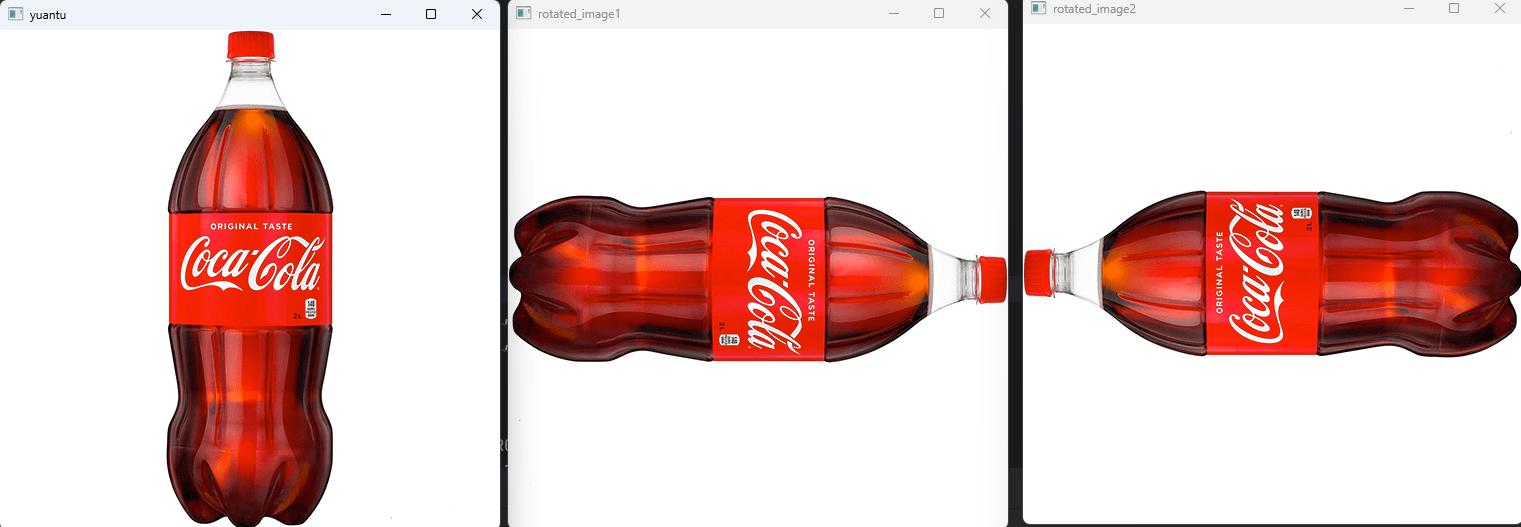
3、效果
二、多图像匹配
- 这是之前写的单模板、多模板匹配,可以先去看一下方便理解:Opencv图像处理:模板匹配对象
1、模板

2、匹配对象

3、代码实现
1)预处理
import cv2
import numpy as npimg_rgb=cv2.imread('image.jpg')
img_gray=cv2.cvtColor(img_rgb,cv2.COLOR_BGR2GRAY)
template=cv2.imread('tem.jpg',0)
template1 = np.rot90(template,k=-1)
template2 = np.rot90(template,k=1)
h,w=template.shape[:2]
2)定义find_temp函数
def find_temp(temp):res=cv2.matchTemplate(img_gray,temp,cv2.TM_CCOEFF_NORMED)threshold=0.9loc=np.where(res>=threshold)for pt in zip(*loc[::-1]):cv2.rectangle(img_rgb,pt,(pt[0]+w,pt[1]+h),(0,0,255),1)
3)进行模板匹配
find_temp(template)
find_temp(template1)
find_temp(template2)
cv2.imshow('', img_rgb)
cv2.waitKey(0)
三、打包与np.where()函数
1、np.where()函数
1)作为条件选择器
np.where(condition, x=None, y=None)
- condition:布尔数组或表达式,用于指定条件。
- x, y(可选):当条件为 True 时返回 x 对应位置的元素,为 False 时返回 y 对应位置的元素。
- 返回值:形状与 condition 相同的数组,元素来自 x 或 y。
import numpy as npa = np.array([1, 2, 3, 4, 5])
# 将大于 3 的元素替换为 10,否则保持原值
result = np.where(a > 3, 10, a)
print(result)  # 输出: [ 1  2  3 10 10]# 更复杂的条件(结合逻辑运算)
b = np.array([10, 20, 30, 40])
condition = (a > 2) & (b < 35)  # 同时满足两个条件
result = np.where(condition, a * 2, b // 2)
print(result)  # 输出: [ 2  4  6 20](仅前3个元素满足条件,最后一个不满足,取 b//2=20)
2)作为条件索引获取器(省略 x 和 y)
np.where(condition)
- 作用:返回满足条件 condition 的元素的索引(以元组形式表示,每个元素对应数组的一个维度)。
- 返回值:元组 (ind1, ind2, …, indn),其中 indi 是第 i 维满足条件的索引数组。
a = np.array([1, 2, 3, 4, 4, 5])
# 获取值为 4 的元素的索引
indices = np.where(a == 4)
print(indices)  # 输出: (array([3, 4]),)(一维数组,索引为 3 和 4)# 二维数组示例
b = np.array([[1, 2, 3], [4, 5, 6], [7, 8, 9]])
condition = b > 5
indices = np.where(condition)
print(indices)  # 输出: (array([1, 2, 2]), array([2, 0, 1, 2])),对应行和列的索引
2、打包与解包
1)打包
a=[1,2,3]
b=[4,5,6]# 使用zip将他们按位置进行配对
zipped=zip(a,b)
print(list(zipped))
# 输出:[(1,4),(2,5),(3,6)]
2)解包
zip()将多个可迭代对象(列表、元组)进行解压操作
# 假设我们已经有了一个打包好的zip对象
zipped=zip(a,b)# #使用*运算符解包,得到转置的结果
unzipped=zip(*zipped)
loc = [[1, 2, 3], [4, 5, 6], [7, 8, 9]]# 1. loc[::-1]:反转列表
reversed_loc = loc[::-1]
print(reversed_loc)  # 输出: [[7, 8, 9], [4, 5, 6], [1, 2, 3]]# 2. *reversed_loc:解包列表
# 此时相当于 zip([7, 8, 9], [4, 5, 6], [1, 2, 3])# 3. zip(*reversed_loc):使用 zip 函数进行打包
zipped = zip(*reversed_loc)
for pt in zipped:print(pt)
# 输出:
# (7, 4, 1)
# (8, 5, 2)
# (9, 6, 3)