netcore8.0项目部署到windows服务器中(或个人windows电脑),利用nginx反向代理
1、发布netcore项目,默认即可
1.1、前提,需在appsettings添加Kestrel代理
配置如下:
{"Kestrel": {"Endpoints": {"http": {"Url": "http://localhost:7022"},"Https": {"Url": "https://localhost:7023","Certificate": {"Path": "C:\\Users\\Administrator\\Desktop\\nginx-1.27.4\\localhost.pfx","Password": "123456"}}}},"Logging": {"LogLevel": {"Default": "Information","Microsoft.AspNetCore": "Warning"}},"AllowedHosts": "*"
}
1.2、在Program.cs中添加:
// 添加Nginx反向代理支持
builder.Services.Configure<ForwardedHeadersOptions>(options =>
{options.ForwardedHeaders = ForwardedHeaders.XForwardedFor | ForwardedHeaders.XForwardedProto;options.KnownNetworks.Clear();options.KnownProxies.Clear();
});
var app = builder.Build();app.UseForwardedHeaders();// 使用转发头中间件
1.3、发布
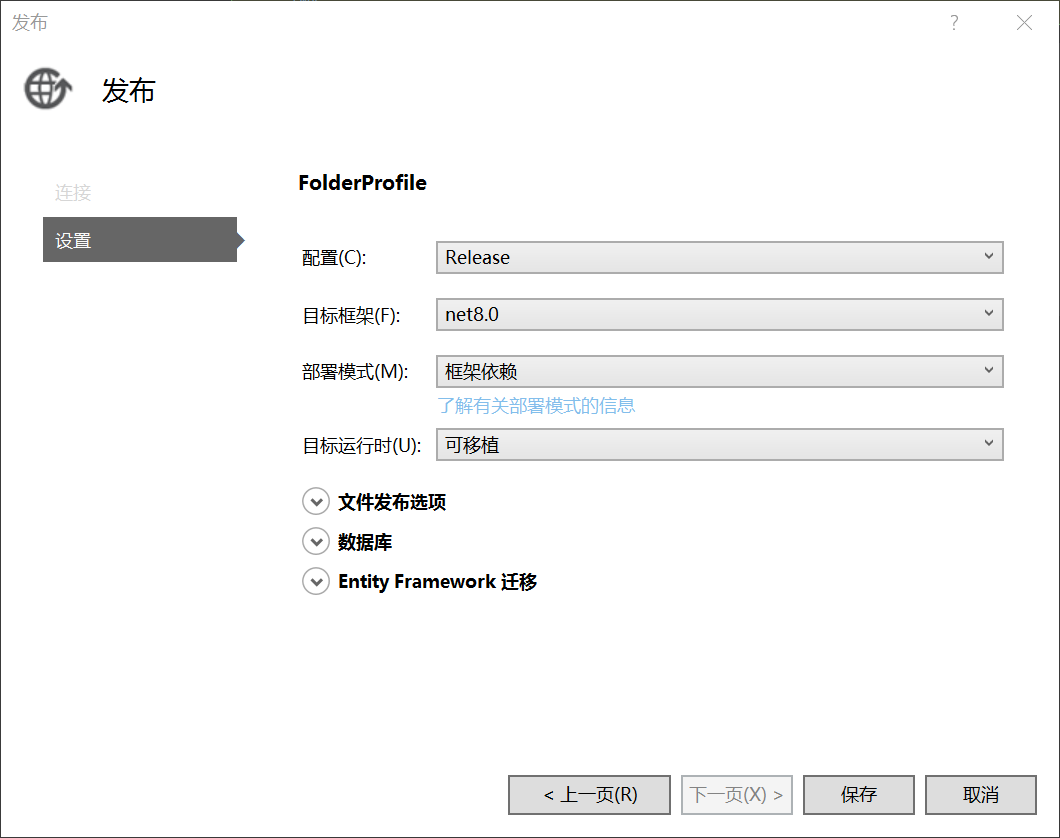
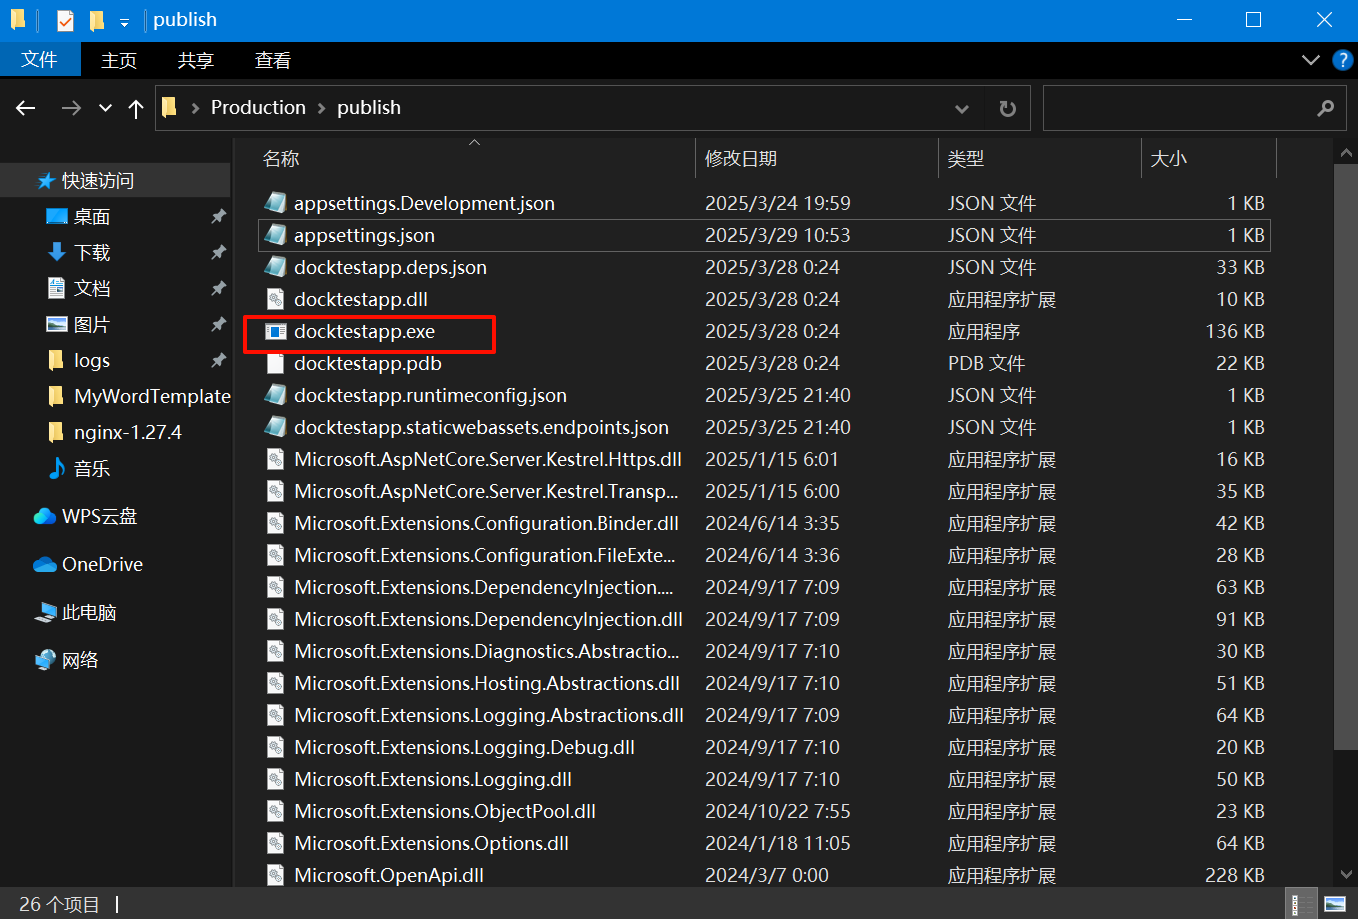
将publish文件夹复制到服务器
接下来服务器操作
2、安装dotnet-hosting-8.0.14-win,下载链接
下载 ASP.NET Core 8.0 Runtime (v8.0.14) - Windows Hosting Bundle Installer
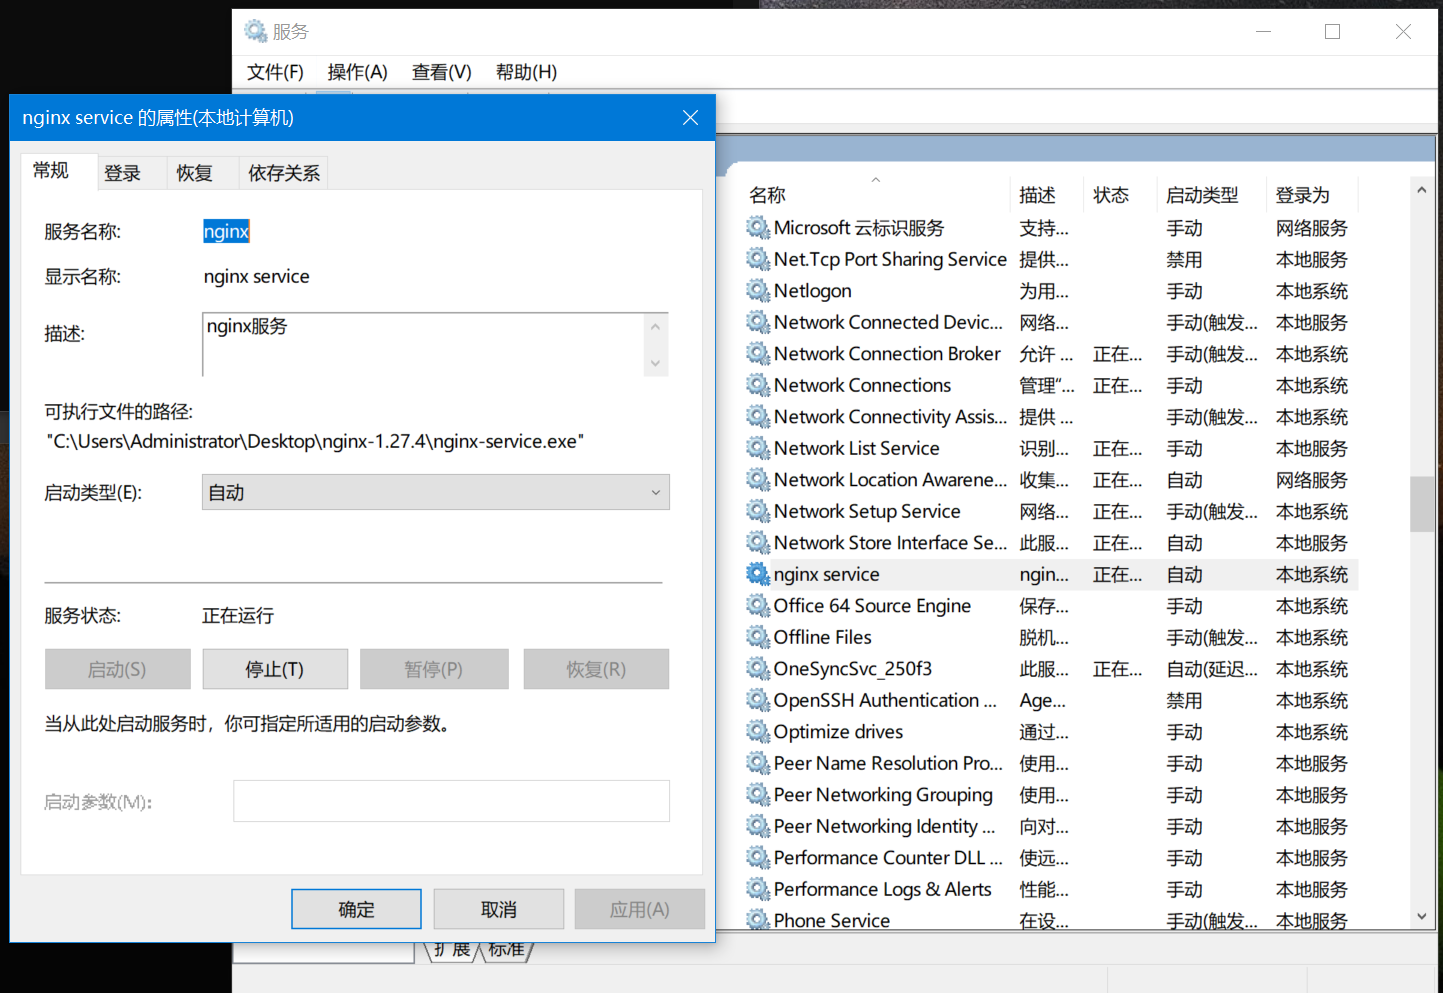
3、下载nginx,解压,将nginx注册为服务,方便实现自启动
winsw/winsw: A wrapper executable that can run any executable as a Windows service, in a permissive license.
3.1按需求修改\nginx-1.27.4\conf,示例:
#user  nobody;
worker_processes  1;#error_log  logs/error.log;
#error_log  logs/error.log  notice;
#error_log  logs/error.log  info;#pid        logs/nginx.pid;events {worker_connections  1024;
}http {include       mime.types;default_type  application/octet-stream;#log_format  main  '$remote_addr - $remote_user [$time_local] "$request" '#                  '$status $body_bytes_sent "$http_referer" '#                  '"$http_user_agent" "$http_x_forwarded_for"';#access_log  logs/access.log  main;sendfile        on;#tcp_nopush     on;#keepalive_timeout  0;keepalive_timeout  65;#gzip  on;server {listen       88;server_name  localhost;#charset koi8-r;#access_log  logs/host.access.log  main;#将http重定向https这里要用IP地址,不然无法实现跳转,如果用localhost就只能本机跳转,如果不要要https可以注释下面语句return 301 https://192.168.1.5:89;location / {proxy_pass         http://localhost:7022;proxy_http_version 1.1;proxy_set_header   Upgrade $http_upgrade;proxy_set_header   Connection keep-alive;proxy_set_header   Host $host;proxy_cache_bypass $http_upgrade;proxy_set_header   X-Forwarded-For $proxy_add_x_forwarded_for;proxy_set_header   X-Forwarded-Proto $scheme;# 增加超时设置proxy_connect_timeout       600;proxy_send_timeout          600;proxy_read_timeout          600;send_timeout                600;}#error_page  404              /404.html;# redirect server error pages to the static page /50x.html#error_page   500 502 503 504  /50x.html;location = /50x.html {root   html;}# proxy the PHP scripts to Apache listening on 127.0.0.1:80##location ~ \.php$ {#    proxy_pass   http://127.0.0.1;#}# pass the PHP scripts to FastCGI server listening on 127.0.0.1:9000##location ~ \.php$ {#    root           html;#    fastcgi_pass   127.0.0.1:9000;#    fastcgi_index  index.php;#    fastcgi_param  SCRIPT_FILENAME  /scripts$fastcgi_script_name;#    include        fastcgi_params;#}# deny access to .htaccess files, if Apache's document root# concurs with nginx's one##location ~ /\.ht {#    deny  all;#}}# another virtual host using mix of IP-, name-, and port-based configuration##server {#    listen       8000;#    listen       somename:8080;#    server_name  somename  alias  another.alias;#    location / {#        root   html;#        index  index.html index.htm;#    }#}# HTTPS server#server {listen       89 ssl;server_name  localhost;#注意证书路径 使用“/”ssl_certificate      C:/Users/Administrator/Desktop/nginx-1.27.4/localhost.pem;ssl_certificate_key  C:/Users/Administrator/Desktop/nginx-1.27.4/localhost.key;ssl_session_cache    shared:SSL:1m;ssl_session_timeout  5m;ssl_ciphers  HIGH:!aNULL:!MD5;ssl_prefer_server_ciphers  on;location / {proxy_pass https://localhost:7023;proxy_set_header Host $host;proxy_set_header X-Real-IP $remote_addr;}}}
3.2、将利用openssl生成的证书复制到nginx-1.27.4目录下
最后的配置如下

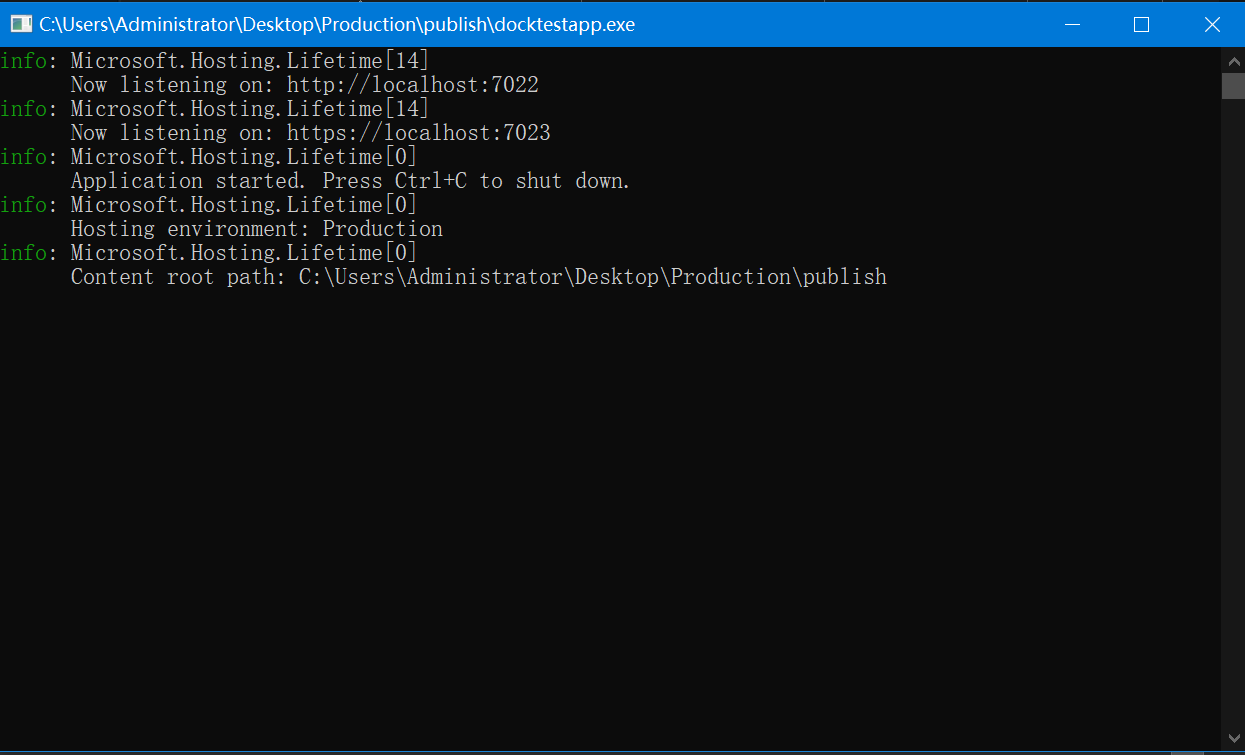
4、启动项目
4.1、netcore项目
4.2启动nginx服务:
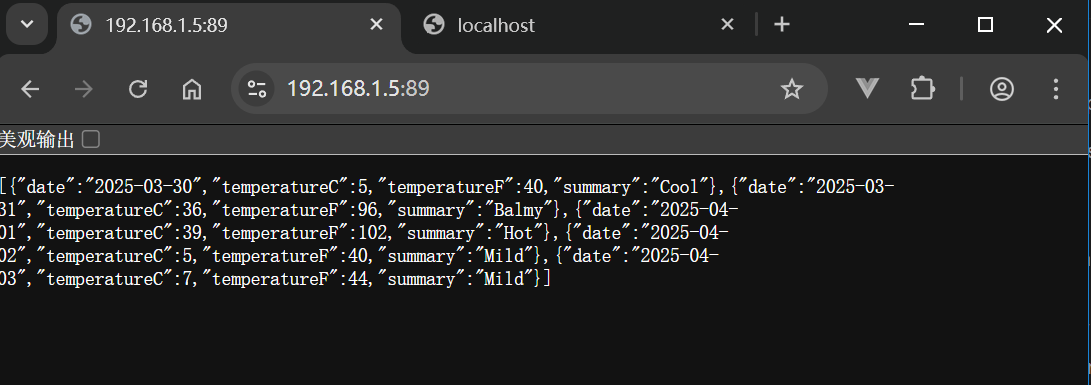
5、测试
在客户端用浏览器测试
https://192.168.1.5:89/
如果访问 http://192.168.1.5:88/ 会自动重定向https://192.168.1.5:89/
netcore项目源码见
githubK4Android/docktestapp
gitee文艺不会丢失./docktestapp