基于 IPMI + Kickstart + Jenkins 的 OS 自动化安装
Author:Arsen
Date:2025/04/26
目录
- 环境要求
- 实现步骤
- 自定义 ISO
- 安装 ipmitool
- 安装 NFS
- 定义 ks.cfg
- 安装 HTTP
- 编写 Pipeline
- 功能验证
环境要求
目标服务器支持 IPMI / Redfish 远程管理(如 DELL iDRAC、HPE iLO、华为 iBMC),且服务器支持从虚拟光驱(ISO)启动。
实现步骤
自定义 ISO
挂载 ISO 镜像
mkdir -p /mnt/iso /home/openEuler
mount -o loop /opt/tools/openEuler-22.03-LTS-aarch64-dvd.iso /mnt/iso
cp -a /mnt/iso/* /home/openEuler
cp -a /mnt/iso/.discinfo /home/openEuler
cp -a /mnt/iso/.treeinfo /home/openEuler
umount /mnt/iso
修改 grub.cfg 配置文件
grub.cfg 指定 ks.cfg 配置文件 http 地址(httpd 服务安装看 4.5 部分),使得安装操作系统时自动加载 ks.cfg 配置文件。
vim /home/openEuler/EFI/BOOT/grub.cfg
# 保留menuentry 'Install openEuler 22.03-LTS'即可
# 可以把多余的配置删除:
# 	menuentry 'Test this media & install openEuler 22.03-LTS'
# 	submenu 'Troubleshooting -->'
#
...
menuentry 'Install openEuler 22.03-LTS' --class red --class gnu-linux --class gnu --class os {linux /images/pxeboot/vmlinuz inst.stage2=hd:LABEL=openEuler-22.03-LTS-aarch64 ro inst.geoloc=0 console=tty0 smmu.bypassdev=0x1000:0x17 smmu.bypassdev=0x1000:0x15 video=efifb:off video=VGA-1:640x480-32@60me fpi_to_tail=off inst.ks=http://x.x.x.x/ks.cfginitrd /images/pxeboot/initrd.img
}
...
重新打包 ISO 镜像
注意1:需在与 ISO 相同的架构类型(aarch64/x86)服务器上打包。
注意2:grub.cfg 配置文件中
inst.stage2=hd:LABEL=指定的 ISO 卷标一定要和你制作镜像时 -volid 指定的卷标保持一致,否则将无法安装。
# 注意:xorriso 命令不存在则安装 yum install -y xorriso
cd /home/openEuler
xorriso -as mkisofs \-o /opt/openEuler-22.03-LTS-aarch64-dvd-custom.iso \-iso-level 3 \-full-iso9660-filenames \-volid "openEuler-22.03-LTS-aarch64" \-eltorito-alt-boot \-e images/efiboot.img \-no-emul-boot \-isohybrid-gpt-basdat \-R -J -v -T \.# 或以下命令打包也是可以的,只不过是xorriso是mkisofs的替代品,同时也兼容mkisofs,且速度比 mkisofs 快
cd /home/openEuler
mkisofs -R -J -T -r -l -d -joliet-long \-allow-multidot -allow-leading-dots -no-bak \-V "openEuler-22.03-LTS-aarch64" \-o "/opt/openEuler-22.03-LTS-aarch64-dvd-custom.iso" \-e images/efiboot.img -no-emul-boot "./"
| 参数 | 说明 |
|---|---|
-o | 输出 ISO 路径 |
-iso-level 3 | 支持长文件名 |
-full-iso9660-filenames | 支持完整文件名格式 |
-volid | 设置 ISO 卷标(可自定义,需与 grub.cfg 配置文件中 inst.stage2=hd:LABEL= 对应) |
-eltorito-alt-boot | 启用备用启动方式(用于 UEFI) |
-e images/efiboot.img | 指定 UEFI 启动文件 |
-no-emul-boot | 指定 UEFI 启动使用 no emulation 模式 |
-isohybrid-gpt-basdat | 创建支持 BIOS+UEFI 的混合启动镜像(关键) |
-R -J -v -T | 生成 Rock Ridge / Joliet 扩展,启用详细模式和 TRANS.TBL 文件 |
. | 当前目录为打包源(必须是包含 EFI、Packages 等内容的根目录) |
安装 ipmitool
安装 ipmitool
该工具支持 IPMI / Redfish 远程管理(如 DELL iDRAC、HPE iLO、华为 iBMC),在 jenkins 服务器上安装,因为我们正是通过 jenkins 实现自动化安装 OS 的。
yum install -y ipmitool
验证(以 iBMC 为例)
# 设置服务器启动顺序为光驱
ipmitool -I lanplus -H <iBMC的IP地址> -U <iBMC的登录用户> -P <iBMC的登录密码> chassis bootdev cdrom# 服务器强制下电再上电
ipmitool -I lanplus -H <iBMC的IP地址> -U <iBMC的登录用户> -P <iBMC的登录密码> power cycle
注意的是,挂载ISO时,华为系列服务器不支持该指令:
ipmitool -I lanplus -H 172.16.10.97 -U Administrator -P Allcam@1024! cd set http://172.16.11.106/CentOS.iso
华的使用的是 ipmcset/ipmcget 操作 iBMC
# 登录 iBMC 并挂载
sshpass -p '<iBMC的登录密码>' ssh <iBMC的登录用户>@<iBMC的IP地址>
iBMC:/->ipmcset -t vmm -d connect -v "https://x.x.x.x/iso/openEuler-22.03-LTS-aarch64-dvd.iso"# 登录 iBMC 并挂载(非交互式方式)
sshpass -p '<iBMC的登录密码>' ssh -o StrictHostKeyChecking=no <iBMC的登录用户>@<iBMC的IP地址> 'ipmcset -t vmm -d connect -v "https://x.x.x.x/iso/openEuler-22.03-LTS-aarch64-dvd.iso"'
注意:通过 ipmcset 挂载时,如果已经有 iso 占用(连接)虚拟媒体了,执行挂载时会报如下错:
.........
You cannot use the virtual media because it is being used by another user.
解决方案:手动登录iBMC断开与虚拟媒体的连接或通过命令断开后,再执行挂载操作,如下:
iBMC:/->ipmcset -t vmm -d disconnect
iBMC:/->ipmcset -t vmm -d connect -v "https://x.x.x.x/iso/openEuler-22.03-LTS-aarch64-dvd.iso"
Connect virtual media...
...........
Connect virtual media successfully.
因此,我们可将 ipmitool 与 ipmcset/ipmcget 结合使用。
安装 NFS
注意,华为 iBMC 只支持 nfs, cifs, or https 协议挂载 ISO,否则会报如下错,如果你是 Nginx 自签 SSL 证书,那 ipmcset 将认为是无效的,因此我们可以采用 NFS 作为 ISO 镜像源,如果你使用的其他协议共享文件,则忽略该部分。
iBMC:/->ipmcset -t vmm -d connect -v "http://x.x.x.x/iso/openEuler-22.03-LTS-aarch64-dvd-custom.iso
Usage: ipmcset -t vmm -d connect -v <URL>
URL      e.g.: protocol://[username:password@]IP[:port]/directory/filenameThe parameters in the URL are described as follows:The protocol must be nfs, cifs, or https.The URL can contain only letters, digits, and special characters. The directory or file name cannot contain @. The password cannot contain commas (,).Use double quotation marks (") to enclose the URL that contains a space or double quotation marks ("). Escape the double quotation marks (") and back slash (\) contained in the URL.For example, if you want to enter:a b\cd"Enter:"a b\\cd\""
安装 NFS
yum -y install rpcbind
yum -y install nfs-utils
启动 NFS
systemctl start nfs-server
systemctl enable nfs-server
systemctl start rpcbind
systemctl enable rpcbind
编辑共享文件
vim /etc/exports
/data/nginx/html/iso x.x.x.0/24(rw,no_root_squash,sync)# 共享目录:/data/nginx/html/iso
# 共享网络范围:x.x.x.0/24(rw,no_root_squash,sync)
重启 NFS
systemctl restart nfs-server
确认 NFS 是否启动
exportfs -v
使 NFS 配置生效
exportfs -a
NFS 安装完成后,将我们 4.1 部分修改过的 ISO 镜像文件上传到共享目录 /data/nginx/html/iso 下。
定义 ks.cfg
该配置文件其实就是我们操作系统 /root 目录下的 anaconda-ks.cfg 配置文件,不管是手动/自动安装的操作系统,都有该文件,其实我们的操作系统就是按照该配置文件的约定来进行安装的。因此,你可以从你的服务器上拿到你本地优化一下,形成你自己的配置文件,让服务器按照你自定义的 ks.cfg 约定进行操作系统安装。
# Disk partitioning information
%pre
#!/bin/bash
# Obtain all disk names and sizes, and sort them in descending order by size
DISKS=($(lsblk -b -d -n -o NAME,SIZE | sort -k2 -nr | awk '{print "/dev/"$1}'))
# Allocate the first three plates
DATA_DISK=${DISKS[0]}
SYS_DISK=${DISKS[1]}
cat > /tmp/disk_rules.cfg <<EOF
ignoredisk --only-use=${SYS_DISK},${DATA_DISK_MVS},${DATA_DISK_MIO}
clearpart --all --initlabel --drives=${SYS_DISK},${DATA_DISK_MVS},${DATA_DISK_MIO}
# SYS_DISK
part /boot/efi --fstype="efi" --ondisk=${SYS_DISK} --size=256 --fsoptions="umask=0077,shortname=winnt"
part /boot --fstype="ext4" --ondisk=${SYS_DISK} --size=512
part pv.sys --fstype="lvmpv" --ondisk=${SYS_DISK} --size=1 --grow
volgroup sysvg --pesize=4096 pv.sys
logvol / --fstype="ext4" --size=1 --grow --name=root --vgname=sysvg
logvol /home --fstype="ext4" --size=153600 --name=home --vgname=sysvg
# DATA_DISK
part pv.mvs --fstype="lvmpv" --ondisk=${DATA_DISK} --size=1 --grow
volgroup datavgmvs pv.mvs
logvol /data --fstype="ext4" --size=1 --grow --name=milvus --vgname=datavgmvs
EOF
%end
%include /tmp/disk_rules.cfg# Use graphical install
graphical# Use CDROM installation media
cdrom# Keyboard layouts
keyboard --vckeymap=us --xlayouts='us'# System language
lang en_US.UTF-8# Network information
network --device=eth0 --bootproto=static --ip=x.x.x.x --netmask=x.x.x.x --gateway=x.x.x.x --nameserver=x.x.x.x --onboot=yes --ipv6=auto --activate --hostname=localhost.localdomain# Root password
rootpw --iscrypted $6$Czg4S0A2ZjCZC8HK$G.Yiio2kX/1ibv7nmcH/XxqxBcK7mc1OLNTZn4R4c2fcIIRQWeQFkbl4aUNEKcSAK4msnm3640QKI4HCu8.r6.# Run the Setup Agent on first boot
firstboot --enable# Do not configure the X Window System
skipx# System services
services --enabled="chronyd"# System timezone
timezone Asia/Shanghai --utc --nontp%packages
@^minimal-environment
@container-management
@development
@headless-management
@legacy-unix
@network-server
@scientific
@security-tools
@smart-card
@standard
@system-tools
%end%anaconda
pwpolicy root --minlen=8 --minquality=1 --notstrict --nochanges --notempty
pwpolicy user --minlen=8 --minquality=1 --notstrict --nochanges --emptyok
pwpolicy luks --minlen=8 --minquality=1 --notstrict --nochanges --notempty
%end%addon com_redhat_kdump --disable --reserve-mb='128'
%end#%post
#%endreboot
安装 HTTP
提供 ks.cfg 文件服务,或使用主流的 Nginx 服务也是没问题的。
yum install httpd -y
systemctl start httpd
systemctl enable httpd# 默认配置文件目录:/etc/httpd/
# 默认网站发布目录:/var/www/html/
安装完成后,将 4.4 部分的 ks.cfg 文件上传至 /var/www/html/ 目录下,这样安装操作系统时会自动拉取该配置文件,因为我们在 4.1 部分 grub.cfg 就内嵌了 ks.cfg 的路径了。
编写 Pipeline
整体思路就是:
# 取消ISO挂载
sshpass -p '<iBMC的登录密码>' ssh -o StrictHostKeyChecking=no <iBMC的登录用户>@<iBMC的IP地址> 'ipmcset -t vmm -d disconnect'# 进行ISO挂载
sshpass -p '<iBMC的登录密码>' ssh -o StrictHostKeyChecking=no <iBMC的登录用户>@<iBMC的IP地址> 'ipmcset -t vmm -d connect -v "nfs://x.x.x.x:/data/nginx/html/iso/openEuler-22.03-LTS-aarch64-dvd-custom.iso"'# 设置服务器启动顺序为光驱
ipmitool -I lanplus -H <iBMC的IP地址> -U <iBMC的登录用户> -P <iBMC的登录密码> chassis bootdev cdrom# 强制服务器下电再上电,进入自动化安装
ipmitool -I lanplus -H <iBMC的IP地址> -U <iBMC的登录用户> -P <iBMC的登录密码> power cycle
Pipeline 流水线脚本就交给你们去编写了,如果你选择看了这篇文章,那就说明你的具备一定的 Pipeline 脚本编写能力。
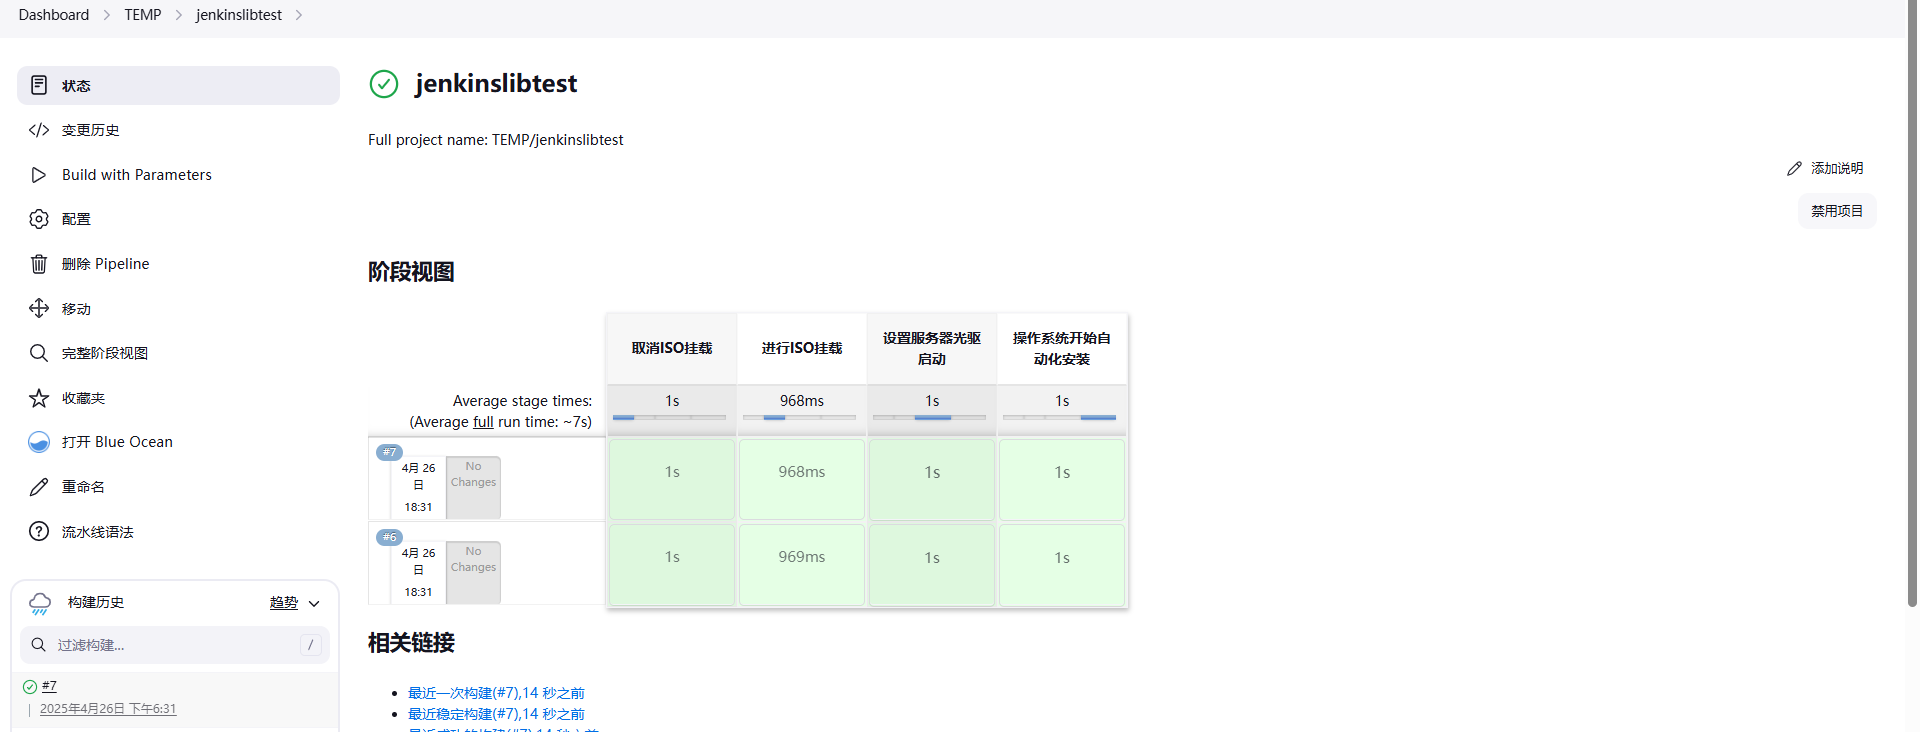
功能验证
执行 Jenkins 构建
操作系统登录验证
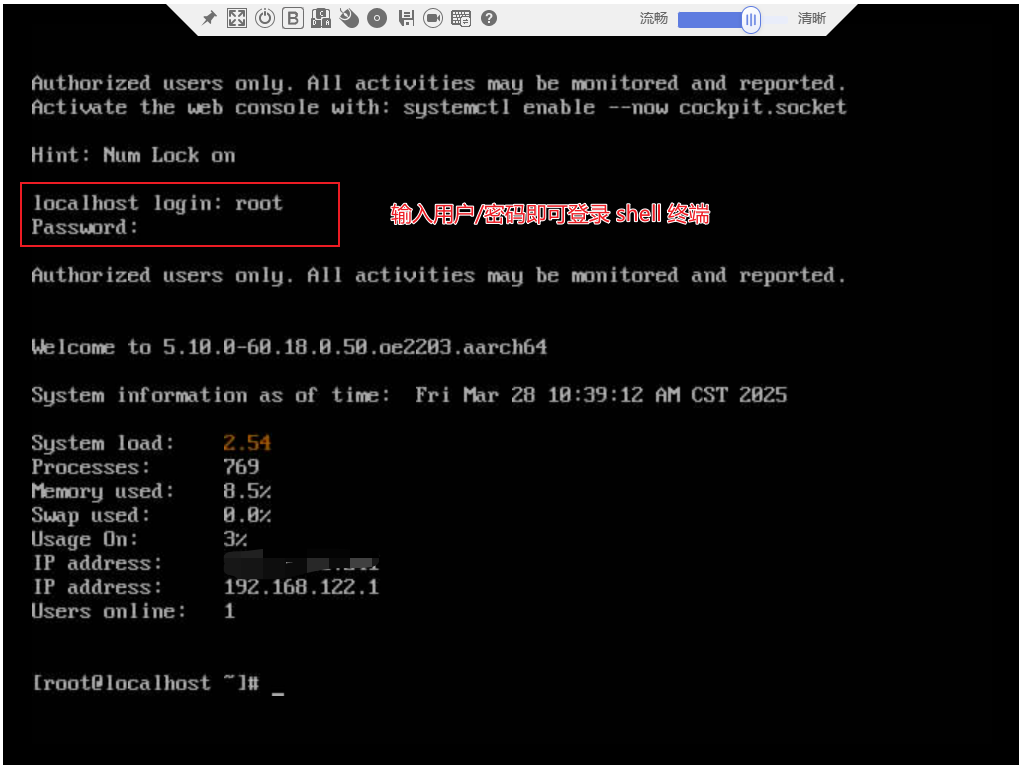
至此,OS 自动化安装就完成了。