【angular19】入门基础教程(二):组件的创建与使用
现代化前端,基本都是工程化的项目。而工程化的项目,组织方式又是组件化的方式。那么在angular中,如何创建一个组件并相互引用来编写需求业务呢?
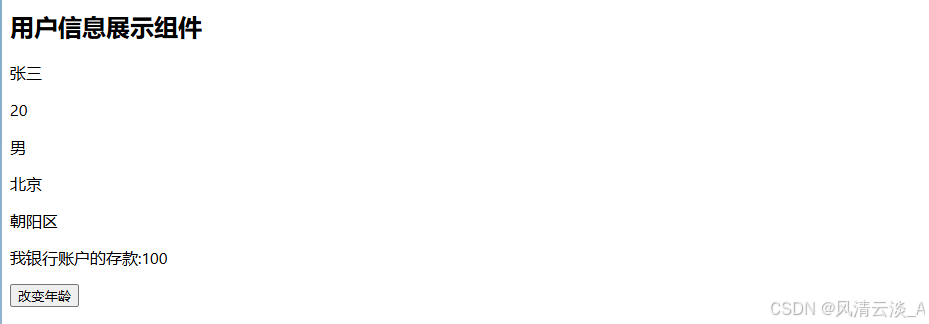
实现效果
- 页面效果
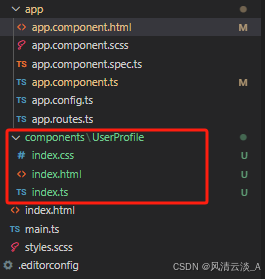
- 在src目录下面创建如下的组件UserProfile,包含对应的ts,css和html文件,进行独立管理
- 组件内容
import { Component, signal } from '@angular/core';@Component({selector: 'UserProfile',templateUrl: './index.html',styleUrls: ['./index.css'],
})
export class UserProfile {title = '用户信息展示组件';userInfo = {name: '张三',age: 20,sex: '男',address: {city: '北京',street: '朝阳区',},};money = signal(100);handleChangeAge = () => {this.money.update((v) => v + 100);};
}
从@angular/core包中引入组件装饰器api,@Component就是我们来组织组件的js逻辑,css样式及页面模版html内容的。
**注意:** selector里面的名字就是组件的名称,也是我们在其他组件中导入该组件后,在html里面使用的时候的写法,,必须保持一样,可以是大驼峰,或者是-链接的命名形式。看个人喜好吧,官网两种方式都用到了。
- 在app组件中引入
import { Component } from '@angular/core';
// import { RouterOutlet } from '@angular/router';
import { UserProfile } from '../components/UserProfile';@Component({selector: 'app-root',imports: [UserProfile],templateUrl: './app.component.html',styleUrl: './app.component.scss',
})
export class AppComponent {title = 'Hello angular!';
}- 在页面模版中使用
<main class="main"><div class="content"><UserProfile /></div>
</main>
这样,我们就能在浏览器中看到这个组件的内容了。