vue3+ts+pinia+vite实战后台管理系统一(框架搭建和配置)
项目搭建
通过下面的命令开始安装
npm init vue@latest
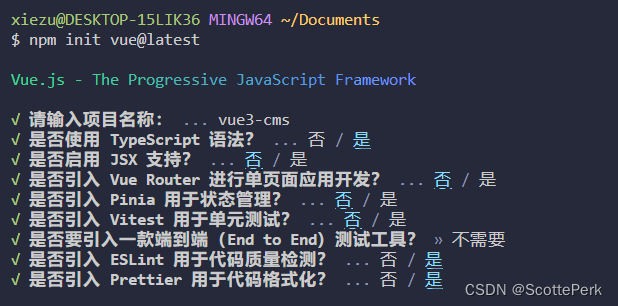
照下面这样执行一遍:
主要是ts,ESLint,Prettier。Vue Router和Pinia我们手动配置。
执行下面的命令开始安装:
cd vue3-cmsnpm installnpm run formatnpm run dev
安装完成后,vscode会自动提示我们安装下面的插件,如果你没有安装的话。
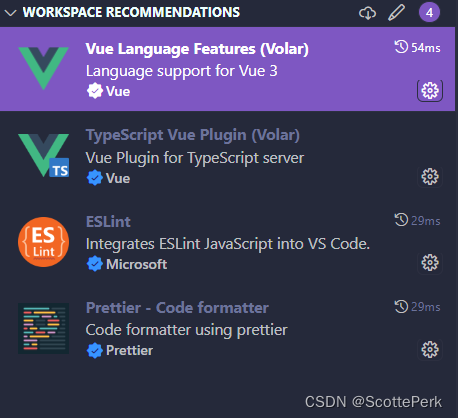
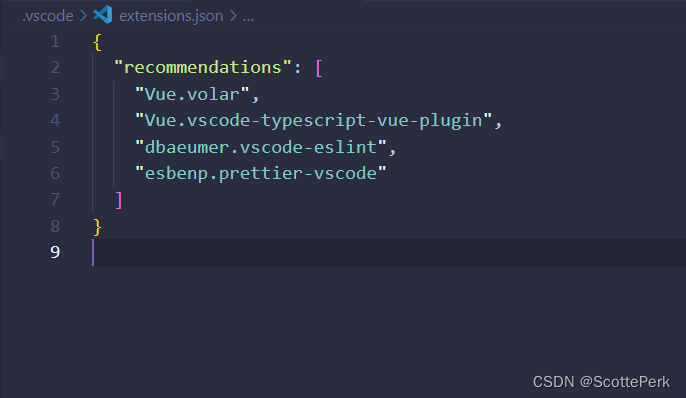
这些推荐来自这个文件,是vscode自动生成的。
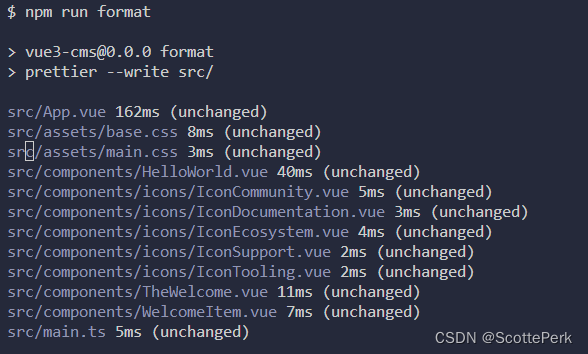
这里比以往多了一个npm run format命令。执行这个命令会运行Prettier来美化代码,和没执行是一样的,因为生成的代码非常完美,不需要美化。
运行一下项目,正式开始。
.vue文件类型的声明
在env.d.ts中添加下面这段代码。这样ts就能够识别.vue文件了。
declare module "*.vue" {import {DefineComponent} from "vue";const component:DefineComponentexport default component
}
这里有个非常奇怪的问题:为什么我们要手动配置这段代码,难道vite就不能帮我们自动生成吗?问chat,chat的回答是并不是所有的vue3+ts都需要这段代码,还有vite是轻量级等等。我认为是在鬼扯。不过chat说的webpack是会帮我们生成这段代码倒是真的。下面的代码是使用vue cli的时候shims-vue.d.ts生成的代码。
不过,我相信,vite应该还是出于某种原因导致他不能自动帮我们配这段代码,不然要我们手动配实在是说不过去的。
declare module '*.vue' {import type { DefineComponent } from 'vue'const component: DefineComponentexport default component
}
更新:
这段代码想要实现的目的是在鼠标悬停的时候,可以看到.vue的ts类型提示。但在新版本的volar或者vue-official里面已经没有作用了。以前配置这段代码是因为不配置会报错,vue默认只配置了html,css等这些类型。现在应该是不需要这段代码了,因为已经没有报错了,想看源码,能点击直接跳转。
配置editconfig
这个文件实际就是用于不同的ide之间的。比如多人开发的时候,有人用vscode,有人用webstorm,有人用hbuilder.会导致代码格式化的时候不一样,造成合并冲突。或者出现不统一的风格,影响阅读性。
虽然后来的prettier可以替代editconfig,但是他们是可以共存的,例如react项目就同时存在editconfig,prettier和eslint这三个配置文件。
现在,你用vite创建vue3项目的时候是没有这个文件的。
最大的问题就是不能写注释,写注释会被当做配置内容。
# https://editorconfig.orgroot = true[*] //表示所有的文件都可用
charset = utf-8 //设置文件的字符集
indent_style = space //缩进的风格是space 回车键
indent_size = 2//缩进大小是2
end_of_line = lf //缩进类型视lf
insert_final_newline = true //始终再文章末尾进入一个新行
trim_trailing_whitespace = true //移除无效空格[*.md] //表示md文档只需要尊行以下规则
insert_final_newline = false
trim_trailing_whitespace = false
在vscode里面使用这个,需要安装对应的插件。webstorm默认已经有了。
配置prettier
用vite生成代码的时候已经自动生成了配置文件。
{"$schema": "https://json.schemastore.org/prettierrc","semi": false,"tabWidth": 2,"singleQuote": true,"printWidth": 100,"trailingComma": "none"
}
webstorm配置
webstorm需要在设置里面添加识别vue。并且在保存或者格式化的时候执行对应的格式化脚本。
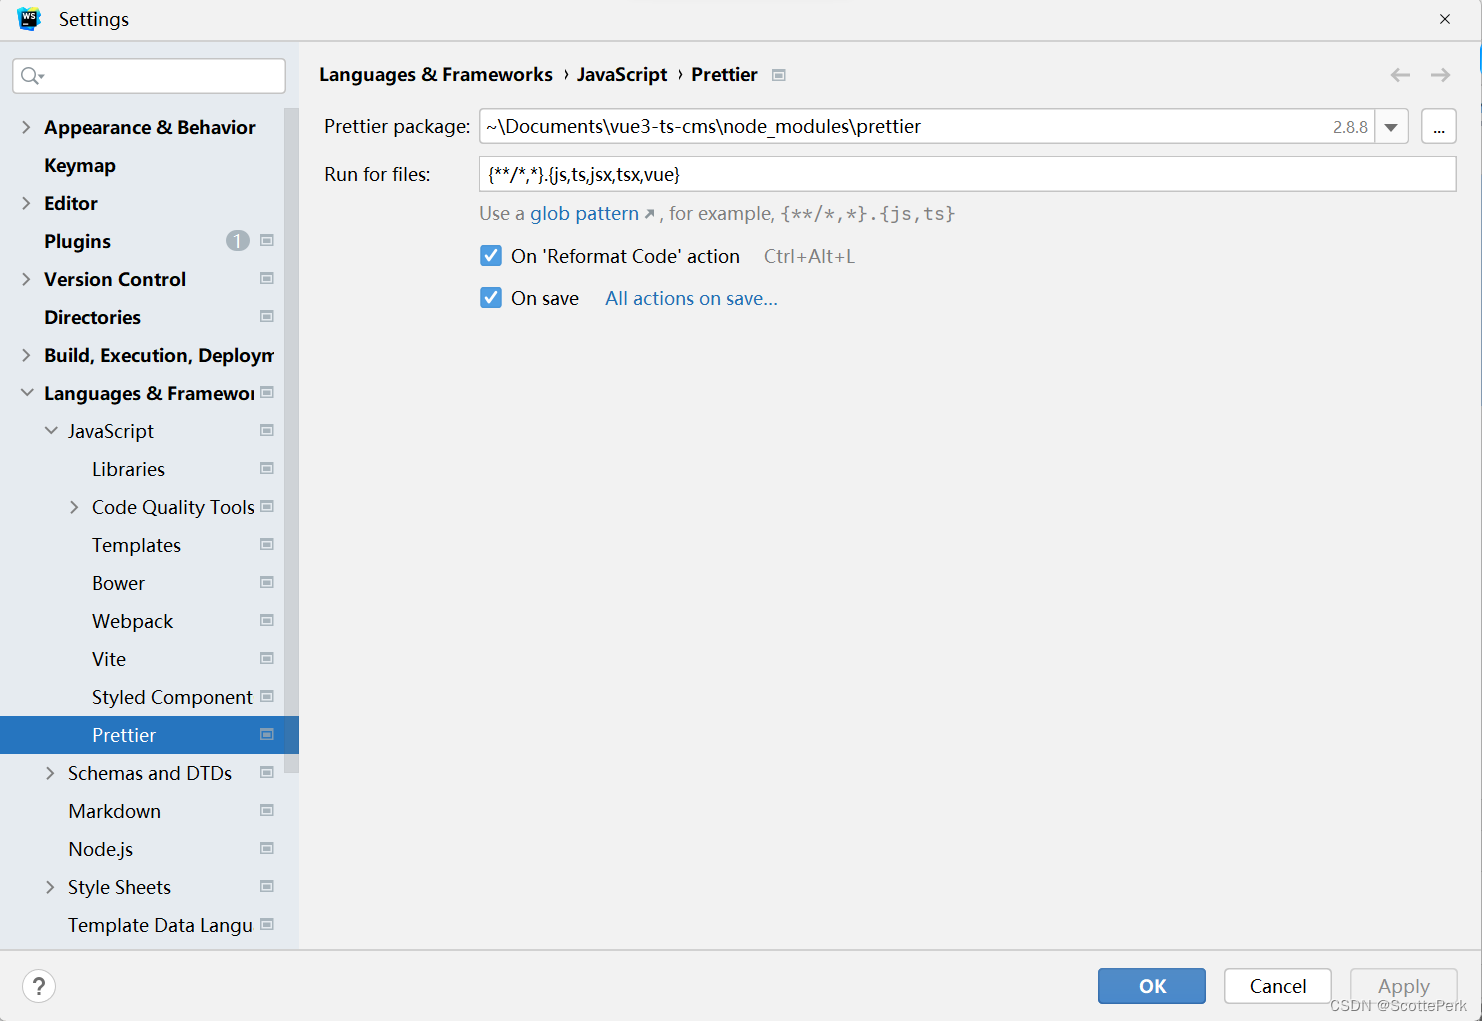
执行的脚本就是在package.json里面的这段脚本。
"format": "prettier --write src/"
手动执行也是可以的。
npm run format
配置忽略文件:
/dist/*
.local
.output.js
/node_modules/****/*.svg
**/*.sh/public/*
/.vscode/**
/.idea/**
vscode配置
需要下载对应的prettier插件,直接搜名字安装就可以。
在设置里面直接搜索prettier或者下面的关键字,就可以找到这个配置选项。把默认的格式工具改为prettier就行了。

eslint配置
有个麻烦的地方是,因为eslint的版本不一样,配置也不一样,导致理解比较困难。
eslint 8.0之前的配置
也在package.json里面配置了命令
// 不知道为什么写了下面这段,好像没什么用
"lint": "eslint . --ext .vue,.js,.jsx,.cjs,.mjs,.ts,.tsx,.cts,.mts --fix --ignore-path .gitignore",
为了让eslint使用prettier的规则,需要安装下面的插件。
npm i eslint-plugin-prettier -D
并且需要在eslintrc.cjs做下面的配置:
'plugin:prettier/recommended',
本来是还需要配置下面的插件的,不过vue3已经帮我们安装好了。
eslint-config-prettier
其实我们就多配了一个集成prettier规则的插件。别的vite已经帮我们做好了。vite运行完已经有提示了。
eslint 8.0之后的配置
这是项目默认生成的eslint配置。和8.0之前是完全不一样的。
// 用于处理Vue文件的最基本eslint规则
import pluginVue from 'eslint-plugin-vue'
// 分别用于定义和配置TS的eslint规则
import { defineConfigWithVueTs, vueTsConfigs } from '@vue/eslint-config-typescript'
// 用于跳过格式化规则,避免和prettier冲突
import skipFormatting from '@vue/eslint-config-prettier/skip-formatting'// To allow more languages other than `ts` in `.vue` files, uncomment the following lines:
// import { configureVueProject } from '@vue/eslint-config-typescript'
// configureVueProject({ scriptLangs: ['ts', 'tsx'] })
// More info at https://github.com/vuejs/eslint-config-typescript/#advanced-setup// 定义Vue文件TS规则
export default defineConfigWithVueTs({name: 'app/files-to-lint',files: ['**/*.{ts,mts,tsx,vue}']},{name: 'app/files-to-ignore',ignores: ['**/dist/**', '**/dist-ssr/**', '**/coverage/**']},// 用于处理Vue文件的最基本eslint规则pluginVue.configs['flat/essential'],// 使用推荐的Vue+TS规则vueTsConfigs.recommended,// 用于跳过格式化规则,避免和prettier冲突skipFormatting
)
安装prettier相关插件。eslint-config-prettier好像已经默认安装了,可以不用安装。
npm install --save-dev eslint-plugin-prettier eslint-config-prettier
// 其他导入
import prettier from 'eslint-config-prettier'
import pluginPrettier from 'eslint-plugin-prettier'export default defineConfigWithVueTs({name: 'app/files-to-lint',files: ['**/*.{ts,mts,tsx,vue}'],},{name: 'app/files-to-ignore',ignores: ['**/dist/**', '**/dist-ssr/**', '**/coverage/**'],},pluginVue.configs['flat/essential'],vueTsConfigs.recommended,skipFormatting,// prettier相关配置prettier,{plugins: {prettier: pluginPrettier,},rules: {'prettier/prettier': 'error',},}
)
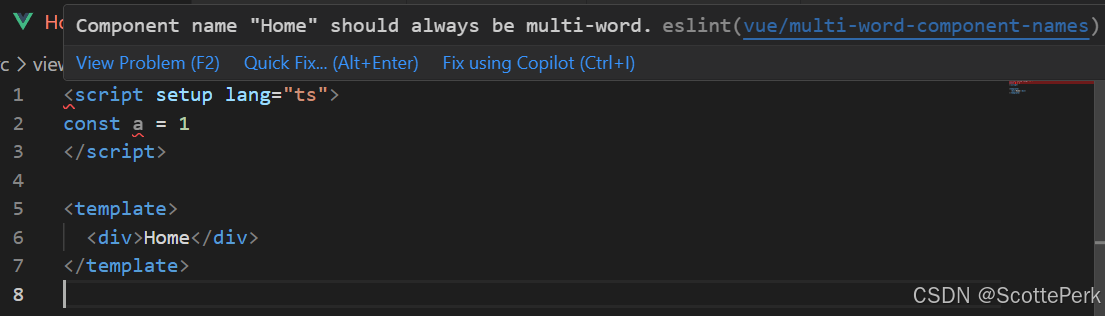
验证是否配置eslint成功
我们新建一个叫Home.vue的文件。会报下面的错误,意思是不能取Home.vue这样的名字,必须要两个及以上的单词作为名称才可以。可以通过自定义规则关闭。
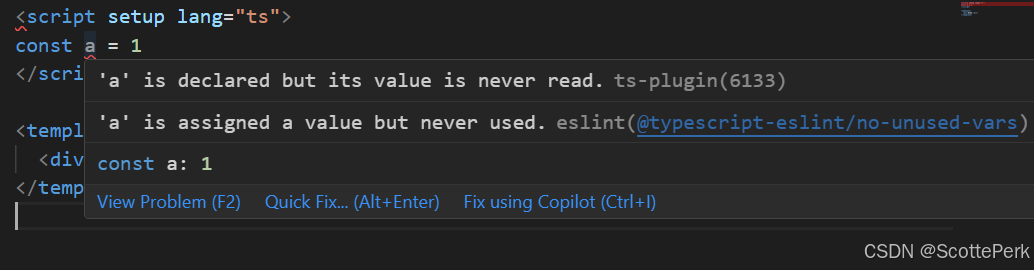
我们随便定义一个变量,这个变量会报未使用的错误。也可以用于验证eslint是否配置成功。
自定义规则
如果你的组件是Home.vue,About.vue这样的名字,那么会报multi-word的错误。意思就是不能这样取名字。把下面的自定义规则加上就可以关闭这个检查。
module.exports = {rules:{'vue/multi-word-component-names':'off'}
}
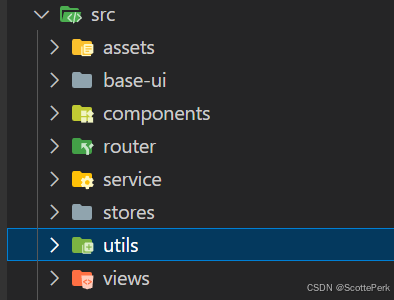
常见目录创建
utils,service,base-ui。
css重置
主要是使用normalize.css和一些常见的reset.less。分别用于处理兼容性问题和默认样式重置。
使用normalize.css。
npm i normalize.css
在main.js中导入。
import 'normalize.css'
创建下面的目录:
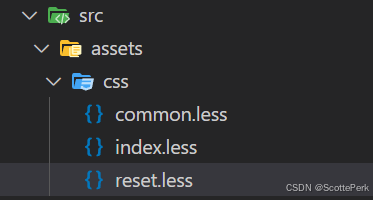
reset.less重置一些常见样式。
/* reset.css样式重置文件 */
/* margin/padding重置 */
body, h1, h2, h3, ul, ol, li, p, dl, dt, dd {padding: 0;margin: 0;
}/* a元素重置 */
a {text-decoration: none;color: #333;
}/* img的vertical-align重置 */
img {vertical-align: top;
}/* ul, ol, li重置 */
ul, ol, li {list-style: none;
}/* 对斜体元素重置 */
i, em {font-style: normal;
}
在index.less做统一导入:
@import是less的语法,用于导入别的less文件
@import './reset.less';
@import './common.less';
在main.js中引入:
import './assets/css/index.less'
文件和文件夹命名规则
有下面两个命名方式。第一种就是文件夹和下面的主页面使用一样的名字。优点是非常的直观,缺点是命名重复。另一种是主页都用index命名。优点是符合直观感受,但缺点是在ide的标签页里面看到是一堆叫index的标签页。找文件非常的困难。
src/views/login/login.vue
src/views/login/index.vue
最开始我是喜欢第一种方式的,但是名字很长的时候,重复名字看起来就非常的不合理。
而index的方式,在一堆index标签页里面找文件非常的困难,我更不喜欢。最后,我发现可以通过设置,让标签页显示更多的内容从而缓解这样尴尬的情况,这种情况下,使用第二种方式可能是更加合理的。
使用ctrl+逗号,输入workbench.editor.labelFormat可以控制标签页的内容,选择medium比较合适。

router配置
默认已经有配置了。这个路由模式使用createWebHashHistory。
同时我们创建两个基本页面,首页重定向到main页面。
随便配置一下not-found页面。
import { createRouter, createWebHashHistory, createWebHistory } from 'vue-router'const router = createRouter({// history: createWebHistory(import.meta.env.BASE_URL),history: createWebHashHistory(),routes: [{path: '/',redirect: '/main'},{path: '/main',name: 'main',component: () => import('../views/main/index.vue')},{path: '/login',name: 'login',component: () => import('../views/login/index.vue')},{path: '/:pathMatch(.*)',component: () => import('../views/not-found/index.vue')}]
})export default router
App.vue把无关代码删除,替代成下面的代码。
<script setup lang="ts">
import { RouterLink, RouterView } from 'vue-router'
</script><template><header><div class="wrapper"><nav><RouterLink to="/">Main</RouterLink><RouterLink to="/login">Login</RouterLink></nav></div></header><RouterView />
</template><style scoped></style>
pinia配置
需要注意的是,vite默认创建的pinia是一个counter.ts。而不是index.ts。这实际上是在告诉我们不需要index.ts。pinia直接使用功能模块命名就可以了。
并且需要注意的是,这个counter.ts例子使用的是新语法,不需要写state,getters,actions属性,更加的简洁。
并且pinia不像vuex那么有mutation。他是可以直接操作state的,没有什么不妥,非常的简洁。你不需要写dispatch。
import { ref, computed } from 'vue'
import { defineStore } from 'pinia'export const useCounterStore = defineStore('counter', () => {// stateconst count = ref(0)// gettersconst doubleCount = computed(() => count.value * 2)// actionsfunction increment() {count.value++}return { count, doubleCount, increment }
})
axios的封装
二次封装一下。
直接使用就好了。request/index.ts会报eslint错误,不是eslint版本的原因,但一定是环境的原因,代码是没有问题的,原工程没有报错误。

service/index.ts
import { BASE_URL, TIME_OUT } from './config'
import HYRequest from './request'const hyRequest = new HYRequest({baseURL: BASE_URL,timeout: TIME_OUT
})export default hyRequest
config/index.ts
// 1.区分开发环境和生产环境
// export const BASE_URL = 'http://coderwhy.dev:8000'
// export const BASE_URL = 'http://codercba.prod:8000'// 2.代码逻辑判断, 判断当前环境
// vite默认提供的环境变量
// console.log(import.meta.env.MODE)
console.log(import.meta.env.DEV) // 是否开发环境
console.log(import.meta.env.PROD) // 是否生产环境
console.log(import.meta.env.SSR) // 是否是服务器端渲染(server side render)let BASE_URL = ''
if (import.meta.env.PROD) {BASE_URL = 'http://codercba.prod:8000'
} else {BASE_URL = 'http://coderwhy.dev:8000'
}console.log(BASE_URL)// 3.通过创建.env文件直接创建变量
console.log(import.meta.env.VITE_URL)export const TIME_OUT = 10000
export { BASE_URL }
request/index.ts
import axios from 'axios'
import type { AxiosInstance } from 'axios'
import type { HYRequestConfig } from './type'// 拦截器: 蒙版Loading/token/修改配置/*** 两个难点:*  1.拦截器进行精细控制*    > 全局拦截器*    > 实例拦截器*    > 单次请求拦截器**  2.响应结果的类型处理(泛型)*/class HYRequest {instance: AxiosInstance// request实例 => axios的实例constructor(config: HYRequestConfig) {this.instance = axios.create(config)// 每个instance实例都添加拦截器this.instance.interceptors.request.use((config) => {// loading/tokenreturn config},(err) => {return err})this.instance.interceptors.response.use((res) => {return res.data},(err) => {return err})// 针对特定的hyRequest实例添加拦截器this.instance.interceptors.request.use(config.interceptors?.requestSuccessFn,config.interceptors?.requestFailureFn)this.instance.interceptors.response.use(config.interceptors?.responseSuccessFn,config.interceptors?.responseFailureFn)}// 封装网络请求的方法// T => IHomeDatarequest<T = any>(config: HYRequestConfig<T>) {// 单次请求的成功拦截处理if (config.interceptors?.requestSuccessFn) {config = config.interceptors.requestSuccessFn(config)}// 返回Promisereturn new Promise<T>((resolve, reject) => {this.instance.request<any, T>(config).then((res) => {// 单词响应的成功拦截处理if (config.interceptors?.responseSuccessFn) {res = config.interceptors.responseSuccessFn(res)}resolve(res)}).catch((err) => {reject(err)})})}get<T = any>(config: HYRequestConfig<T>) {return this.request({ ...config, method: 'GET' })}post<T = any>(config: HYRequestConfig<T>) {return this.request({ ...config, method: 'POST' })}delete<T = any>(config: HYRequestConfig<T>) {return this.request({ ...config, method: 'DELETE' })}patch<T = any>(config: HYRequestConfig<T>) {return this.request({ ...config, method: 'PATCH' })}
}export default HYRequest
request/type.ts
import type { AxiosRequestConfig, AxiosResponse } from 'axios'// 针对AxiosRequestConfig配置进行扩展
export interface HYInterceptors<T = AxiosResponse> {requestSuccessFn?: (config: AxiosRequestConfig) => AxiosRequestConfigrequestFailureFn?: (err: any) => anyresponseSuccessFn?: (res: T) => TresponseFailureFn?: (err: any) => any
}export interface HYRequestConfig<T = AxiosResponse> extends AxiosRequestConfig {interceptors?: HYInterceptors<T>
}
开发环境和生产环境的配置
1.通过手动修改BASE_URL(不推荐)
手动注释开发环境和生产环境,这样非常的危险,因为可能发布的时候忘记修改了。
// 1.区分开发环境和生产环境
// 手动注释开发环境和生产环境,这样非常的危险,因为可能发布的时候忘记修改了。
// export const BASE_URL = 'http://coderwhy.dev:8000'
// export const BASE_URL = 'http://codercba.prod:8000'
2.通过vite变量自动判断开发环境和生产环境
vite提供了环境变量用来区分开发环境和生产环境。直接利用这些变量做判断。
可以通过import.meta.env.MODE这个变量来判断是哪个模式。
// 2.代码逻辑判断, 判断当前环境
// vite默认提供的环境变量
console.log(import.meta.env.MODE)
console.log(import.meta.env.DEV) // 是否开发环境
console.log(import.meta.env.PROD) // 是否生产环境
console.log(import.meta.env.SSR) // 是否是服务器端渲染(server side render)let BASE_URL = ''
if (import.meta.env.PROD) {BASE_URL = 'http://codercba.prod:8000'
} else {BASE_URL = 'http://192.168.133.126:8888'
}console.log(BASE_URL)
通过npm run dev运行的代码,import.meta.env.MODE输出devlopment。
通过npm run build,然后通过npm run preview运行的代码输出production。
这样就可以动态的区分开发环境和生产环境了。
3.通过创建.env文件直接创建变量
可以创建.env文件,可以自定义一些全局变量。并且规定要以VITE_开头,不然是识别不到的。
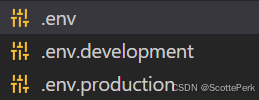
并且可以同时创建.env.develoment和.env.production目录,给不同的环境使用,这两个文件的优先级是比.env高的,如果变量名称重复的话。
还可以创建.env.local,.env.develoment.local和.env.production.local这样有.local后缀名的文件,这些文件会被git忽略,这个实际上是git的规范,会被忽略是因为git的ignore文件里面需要配置忽略.local文件。
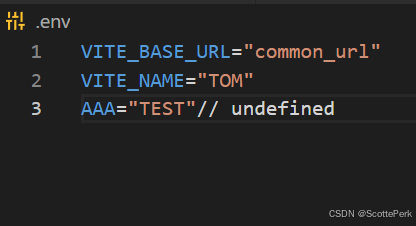
// 3.通过创建.env文件直接创建变量
console.log(import.meta.env.VITE_BASE_URL)export const TIME_OUT = 10000
export { BASE_URL }
配置element plus
全局配置是最简单的方式,把所有控件都引入,非常的方便,但缺点就是引入没有用到的组件。按需引入就非常灵活,只是配置步骤稍微多一点。
全局配置
安装:
pnpm install element-plus
在main.ts中配置:
// main.ts
import { createApp } from 'vue'
import ElementPlus from 'element-plus'
import 'element-plus/dist/index.css'
import App from './App.vue'const app = createApp(App)app.use(ElementPlus)
app.mount('#app')
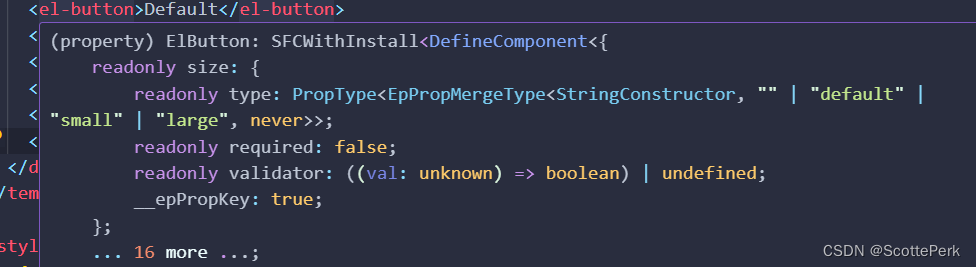
如果用的volar,添加添加下面的配置。可以添加ts对element-plus组件的鼠标悬浮提示。(在新的vue-official里面,好像是没有效果的)。
实测有效果,我是添加在tsconfig.app.json文件里面。
// tsconfig.json或者tsconfig.app.json
{"compilerOptions": {// ..."types": ["element-plus/global"]}
}
按需引入
需要安装这两个插件。下面代码是官方文档里面写的。
npm install -D unplugin-vue-components unplugin-auto-import
在vite中添加下面的配置。
// vite.config.ts
import { defineConfig } from 'vite'
import AutoImport from 'unplugin-auto-import/vite'
import Components from 'unplugin-vue-components/vite'
import { ElementPlusResolver } from 'unplugin-vue-components/resolvers'export default defineConfig({// ...plugins: [// ...AutoImport({resolvers: [ElementPlusResolver()],}),Components({resolvers: [ElementPlusResolver()],}),],
})
安装完成后,是会多出下面这两个文件的,不要去编辑这两个文件。让他自动生成就行。

我们发现,还是没有ts的代码提示,需要在tsconfig.json(或者tsconfig.app.json)里面添加下面的配置,
主要是添加"auto-imports.d.ts",“components.d.ts”。
这个在官方文档里面是没有提到的。
"include": ["env.d.ts", "src/**/*", "src/**/*.vue","auto-imports.d.ts","components.d.ts"],
这样,vscode就有ts代码提示了。
注意:
只能自动导入template里面的组件,script里面的组件是不会自动导入的,例如ElMessage这些反馈组件。这些组件只能自动导入,或者使用一些第三方组件。
配置页面高度占满
因为我们设计的是一个后台管理系统。登录页面通常是占满屏幕的。要想实现占满屏幕的效果,有两种方式来实现。一般有内容的页面,宽度一定是占满的,因为div就是占满宽度的,而高度是没有占满的。
1.通过height:100%(不推荐)
写height:100%是没有效果的,因为index.html的高度不是100%。不光如此,body和html标签的高度也要是100%。
需要在index.html写下面的代码。
html,body,#app{height:100%
}
显然,这样是不太合适的。
2.通过height:100vh(推荐)
比较合理的做法就是在App.vue里面定义一个顶层div。给这个div设置如下的css样式。
.app {width: 100wh;height: 100vh;background-color: aquamarine;
}
总结
主要讲解了框架搭建和配置。下一篇介绍登录模块的搭建。