【C++】string类字符串详细解析
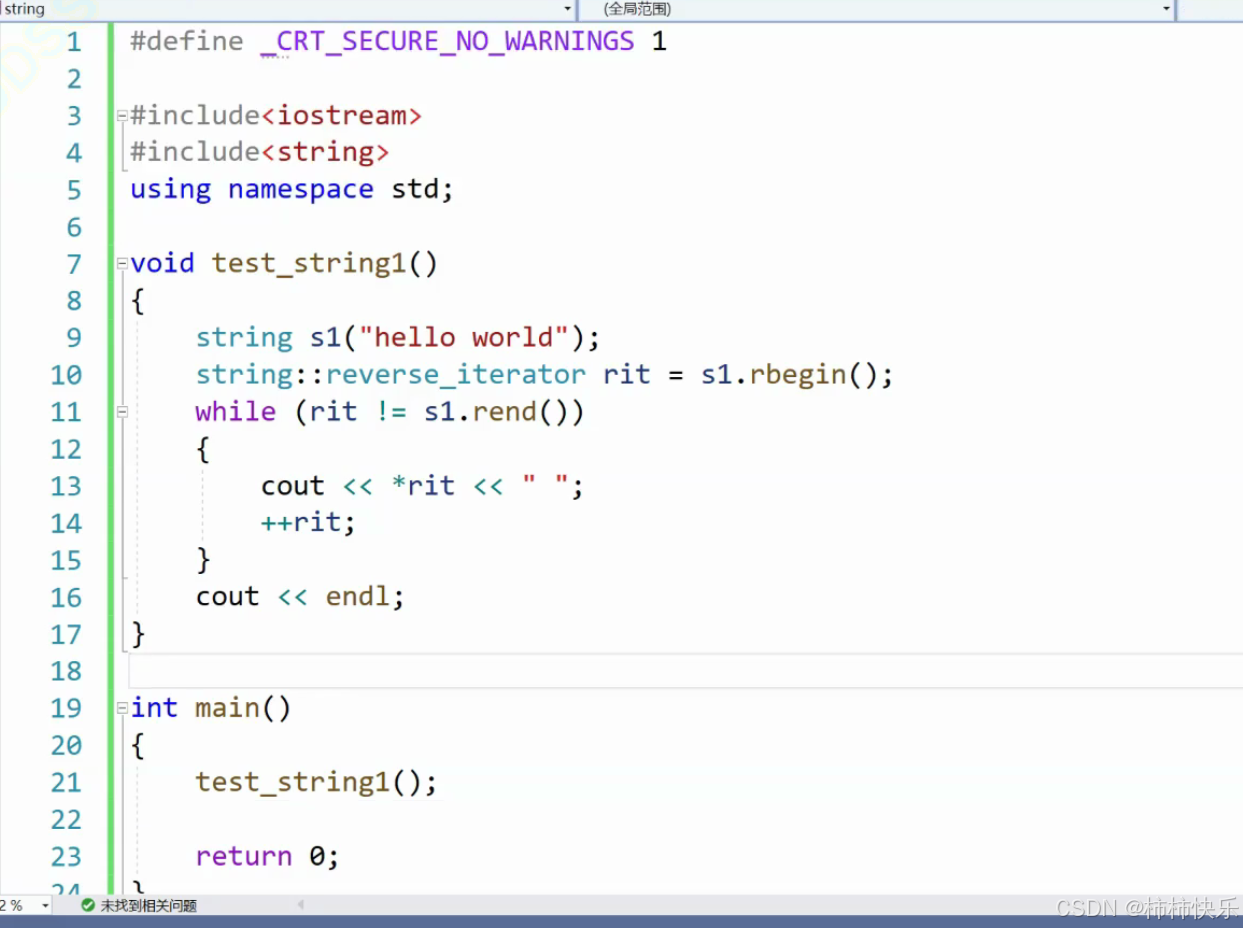
1.反向迭代器/正向迭代器
//正向/反向迭代器
void test1()
{
//正向迭代器++就是往正向走
string s1("Hello World");
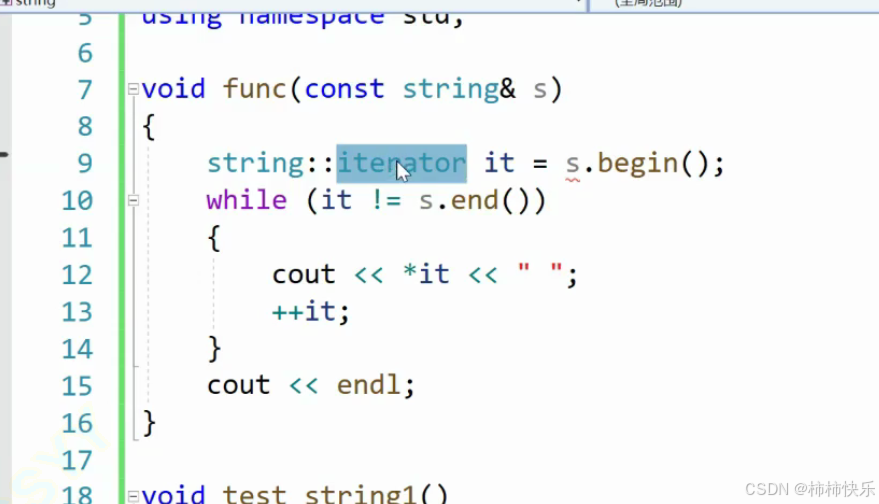
string::iterator it = s1.begin();
while (it != s1.end())
{
cout << *it << " ";
++it;
}
cout << endl;
}
void test2()
{
//反向迭代器++就是往方向走
string s1("Hello World");
string::reverse_iterator rit = s1.rbegin();
while (rit != s1.rend())
{
cout << *rit << " ";
++rit;
}
cout << endl;
}
2.逆置reverse和 扩容接口reserve(可以扩容,缩容不清楚)(详细了解)
void fun(string& s)
{
	string::iterator it = s.begin();
	while (it != s.end())
	{
		cout << *it << " ";
		++it;
	}
	cout << endl;
}


//逆置reverse
void test3()
{
	string s1("Hello World");
	fun(s1);
	reverse(s1.begin(), s1.end());
	fun(s1);
}
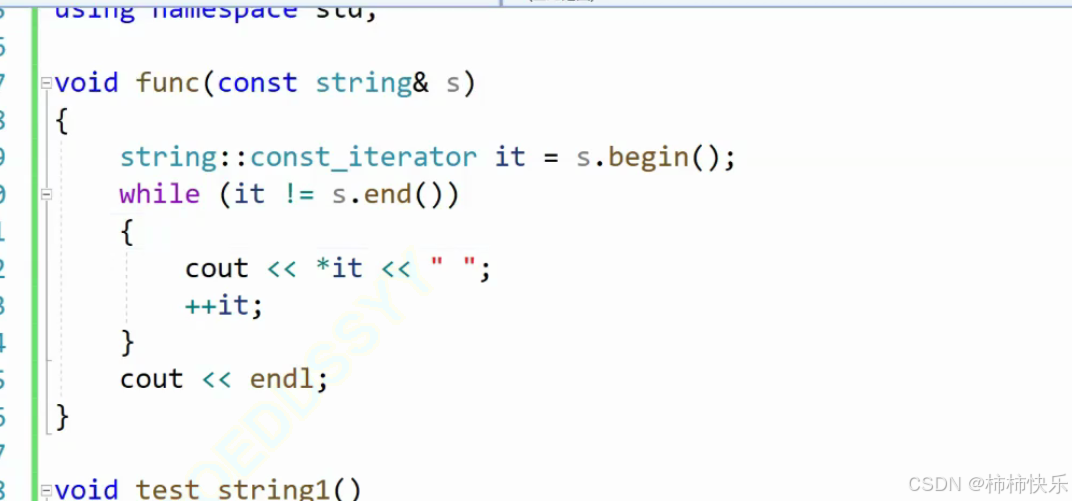
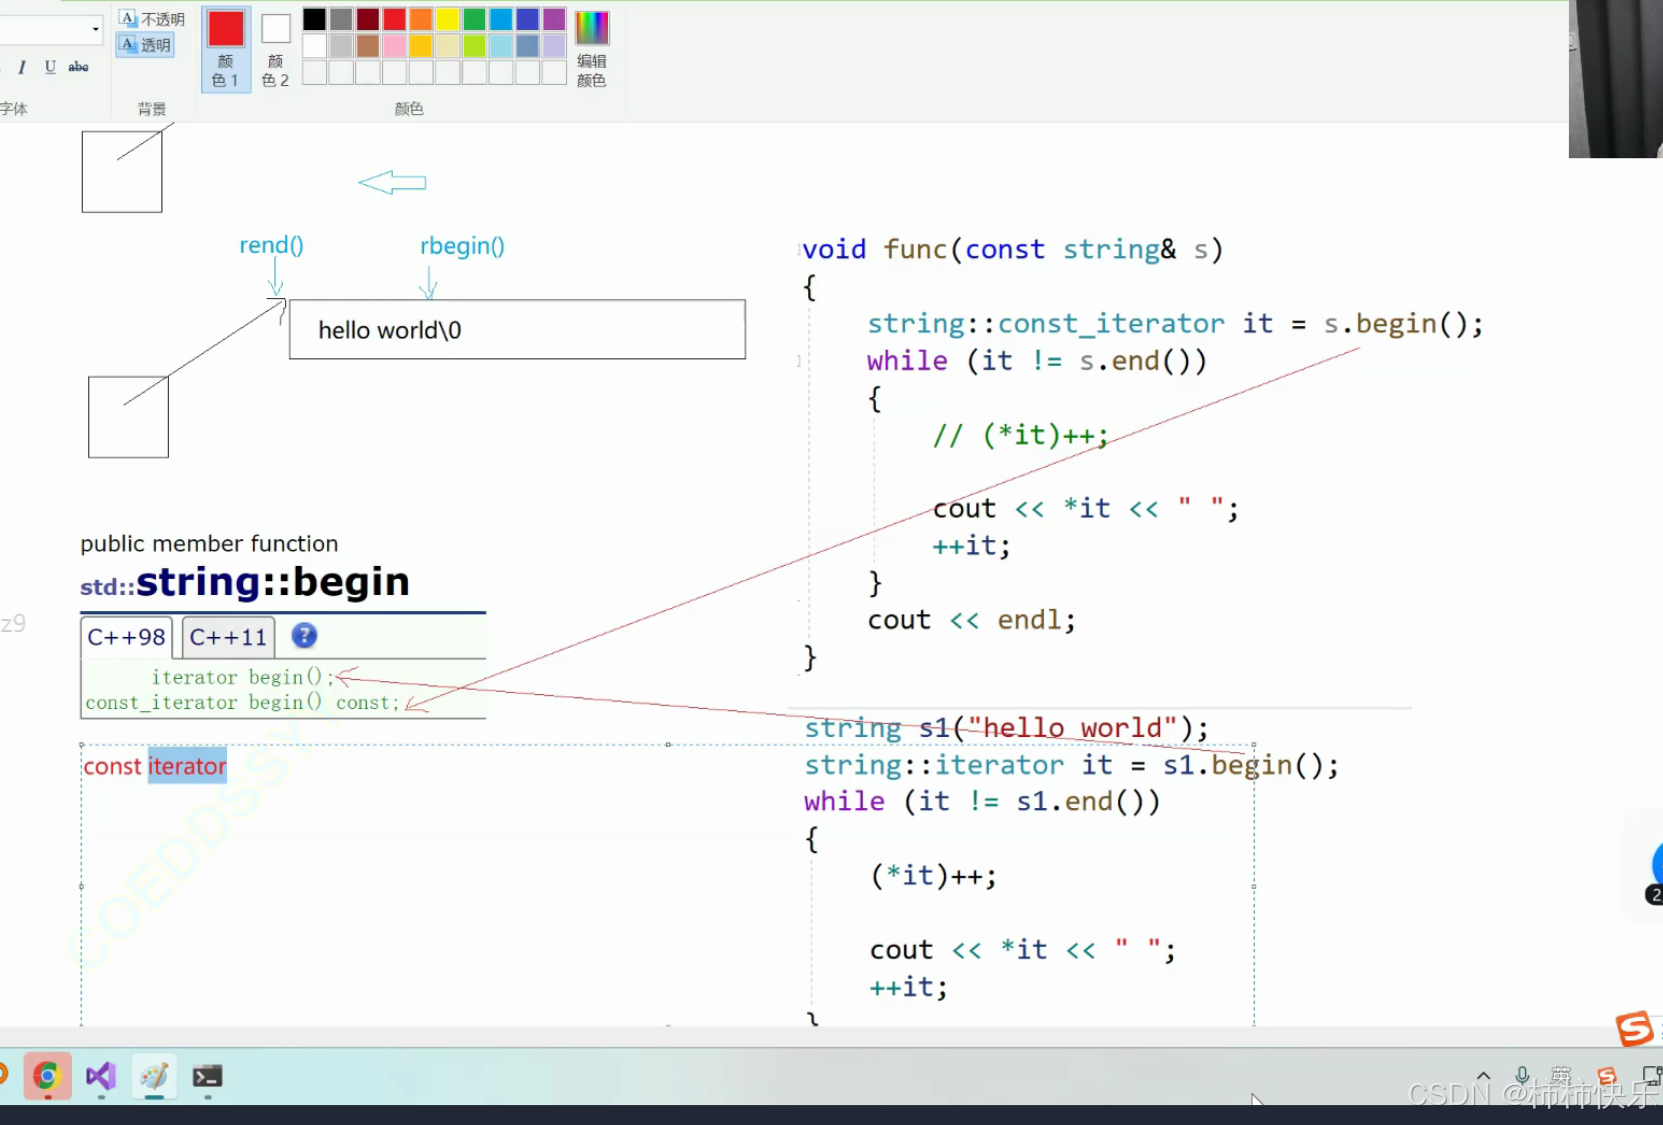
普通迭代器和const迭代器
在C++中,迭代器(Iterator)是用于遍历容器(如std::vector, std::list, std::set等)中的元素的工具。普通迭代器和常量迭代器(const iterator)的主要区别在于它们对容器中元素的访问权限以及能否修改这些元素。
普通迭代器
- 定义:普通迭代器允许你读取、修改容器中的元素。
- 使用场景:当你需要遍历容器并对其中的元素进行修改时使用。
- 声明方式:例如,对于一个
std::vector<int>类型的容器vec,普通迭代器可以这样声明:std::vector<int>::iterator it; - 操作:可以通过解引用操作符
*it来读取或修改元素值。*it = 10; // 修改元素值 int value = *it; // 读取元素值
常量迭代器(Const Iterator)
- 定义:常量迭代器只允许你读取容器中的元素,但不能修改它们。它保证了通过该迭代器无法改变容器的内容。
- 使用场景:当你只需要遍历容器而不需要修改其中的任何元素时使用。
- 声明方式:对于同一个
std::vector<int>类型的容器vec,常量迭代器可以这样声明:std::vector<int>::const_iterator cit; - 操作:只能通过解引用操作符
*cit来读取元素值,尝试修改元素会导致编译错误。// *cit = 10; // 错误:不能通过 const_iterator 修改元素值 int value = *cit; // 正确:读取元素值
其他相关的常量概念
-
cbegin()和cend():返回指向容器起始和结束位置的常量迭代器,即使调用它们的容器不是常量。这确保了你不能通过这些迭代器修改容器中的元素。for (auto it = vec.cbegin(); it != vec.cend(); ++it) { // 只能读取元素值,不能修改 } -
const容器对象上的迭代器:如果你有一个const限定的容器对象,那么调用其begin()和end()方法也会返回常量迭代器。const std::vector<int> constVec = {1, 2, 3}; for (auto it = constVec.begin(); it != constVec.end(); ++it) { // 只能读取元素值,不能修改 }
示例代码对比
下面是一个简单的示例,展示了普通迭代器和常量迭代器的区别:
#include <iostream>
#include <vector>

int main() {
    std::vector<int> vec = {1, 2, 3, 4, 5};

    // 使用普通迭代器
    for (std::vector<int>::iterator it = vec.begin(); it != vec.end(); ++it) {
        *it = *it * 2; // 修改元素值
        std::cout << *it << " "; // 输出: 2 4 6 8 10
    }
    std::cout << std::endl;

    // 使用常量迭代器
    for (std::vector<int>::const_iterator cit = vec.cbegin(); cit != vec.cend(); ++cit) {
        // *cit = *cit * 2; // 编译错误:不能修改元素值
        std::cout << *cit << " "; // 输出: 2 4 6 8 10
    }
    std::cout << std::endl;

    return 0;
}
总结
- 普通迭代器:提供对容器元素的读写访问权限。
- 常量迭代器:仅提供对容器元素的只读访问权限,防止意外修改容器内容。
cbegin()和cend():无论容器是否为常量,都返回常量迭代器,适用于只想读取数据的情况。const容器对象:在这种情况下,begin()和end()方法也会返回常量迭代器。

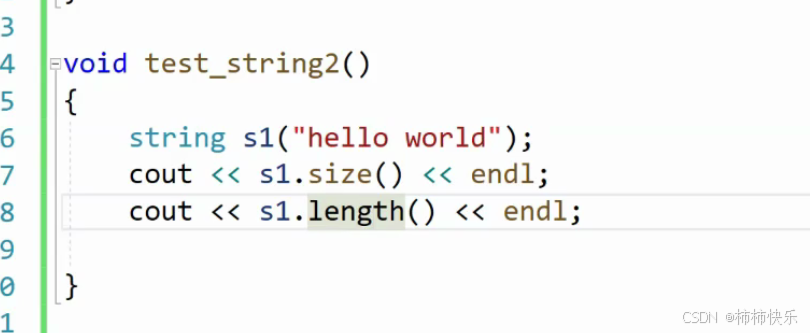
在C++中,size 和 length 都是用来获取容器或字符串长度的方法,但它们的使用场景和适用对象有所不同。理解它们的区别有助于更准确地操作不同的数据结构。
size 方法
- 适用范围:广泛应用于多种标准库容器,包括但不限于
std::vector,std::list,std::deque,std::set,std::unordered_set,std::map,std::unordered_map等。 - 功能:返回容器中元素的数量。
- 定义位置:这些容器都继承自
std::container概念,并实现了size()方法,该方法通常具有常量时间复杂度 O(1)。 - 示例:
#include <iostream>
#include <vector>

int main() {
    std::vector<int> vec = {1, 2, 3, 4, 5};
    std::cout << "Vector size: " << vec.size() << std::endl;
    return 0;
}
length 方法
- 适用范围:仅适用于
std::string类型。对于其他标准库容器没有length()方法。 - 功能:返回字符串中的字符数量。
- 定义位置:作为
std::string类的一个成员函数提供,类似于size(),也通常具有常量时间复杂度 O(1)。 - 示例:
#include <iostream>
#include <string>

int main() {
    std::string str = "Hello, World!";
    std::cout << "String length: " << str.length() << std::endl;
    return 0;
}
size vs length 在 std::string 中
有趣的是,std::string 同时提供了 size() 和 length() 方法,且它们的功能完全相同,都是返回字符串的长度。这是为了兼容不同的编程习惯和标准:
size():源自于 STL 容器的一致性设计,使得std::string可以像其他容器一样工作。length():更符合传统的字符串处理习惯,尤其是从 C 语言过来的开发者可能会更倾向于使用length()。
因此,在 std::string 中,你可以根据个人偏好选择使用 size() 或 length(),它们实际上是等价的。
示例对比
#include <iostream>
#include <vector>
#include <string>

int main() {
    // 使用 vector 的 size 方法
    std::vector<int> vec = {1, 2, 3, 4, 5};
    std::cout << "Vector size: " << vec.size() << std::endl;

    // 使用 string 的 size 和 length 方法
    std::string str = "Hello";
    std::cout << "String size: " << str.size() << std::endl;
    std::cout << "String length: " << str.length() << std::endl;

    return 0;
}
输出结果:
Vector size: 5
String size: 5
String length: 5
总结
size():适用于所有标准库容器,包括std::string,用于获取容器中元素的数量。length():仅适用于std::string,用于获取字符串的长度,但在std::string中与size()功能完全相同。
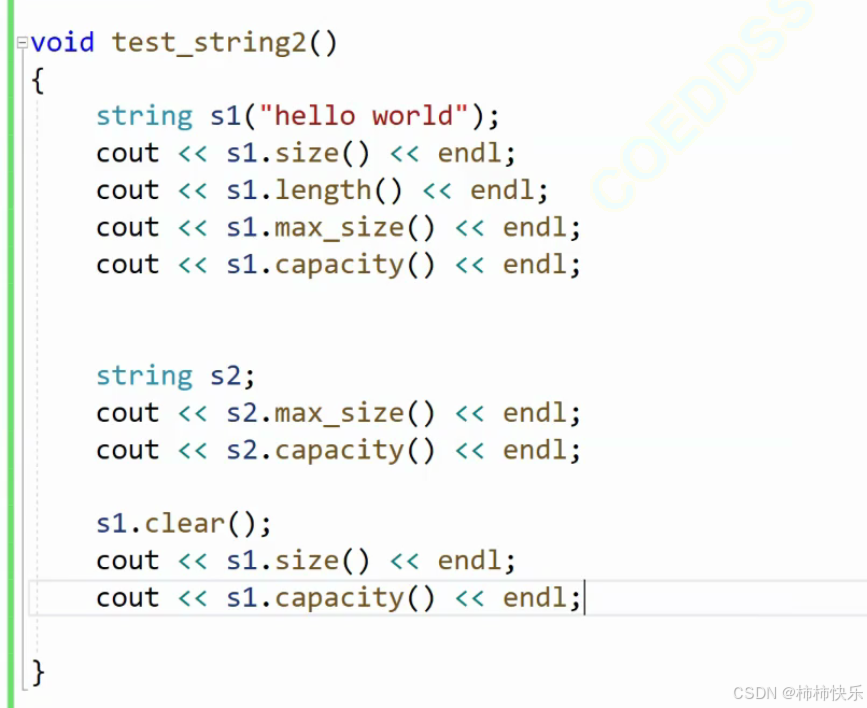
简洁介绍
reserve 是什么?
- 用途:
reserve是 C++ 标准库中某些容器(如std::vector和std::string)提供的一个成员函数,用于预先分配足够的内存空间以容纳指定数量的元素。 - 作用:减少因频繁插入元素而导致的多次内存重新分配,从而提高性能。
主要特点
- 预分配内存:提前为容器分配足够的内存,避免后续插入元素时频繁重新分配内存。
- 不影响大小:只改变容器的容量(即它可以容纳多少元素),而不改变当前存储的元素数量(即大小)。
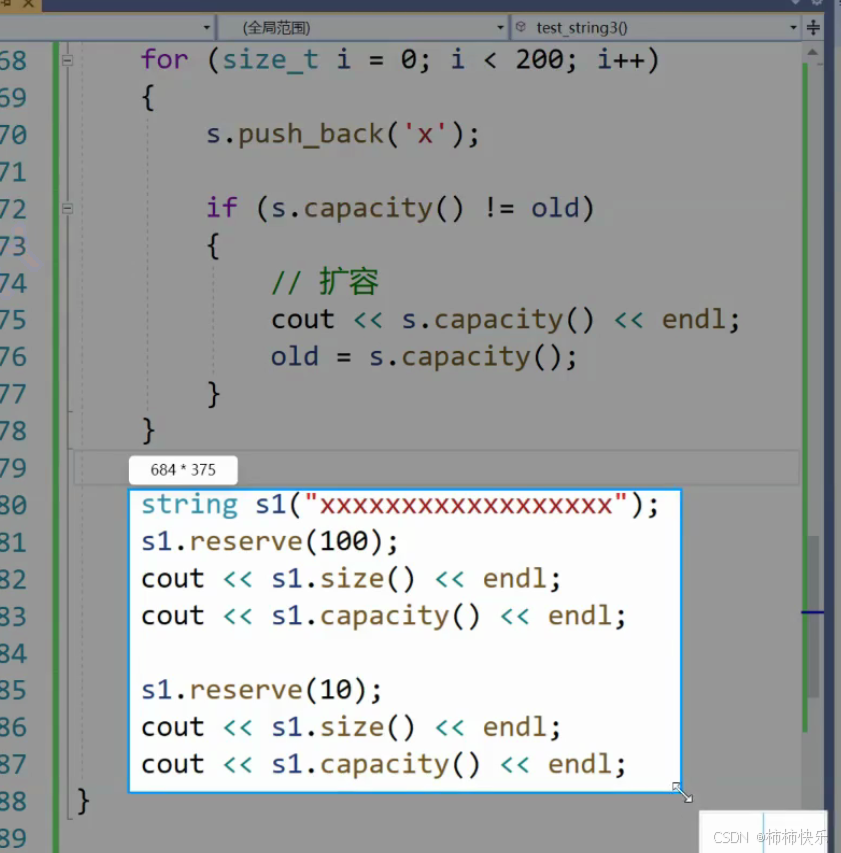
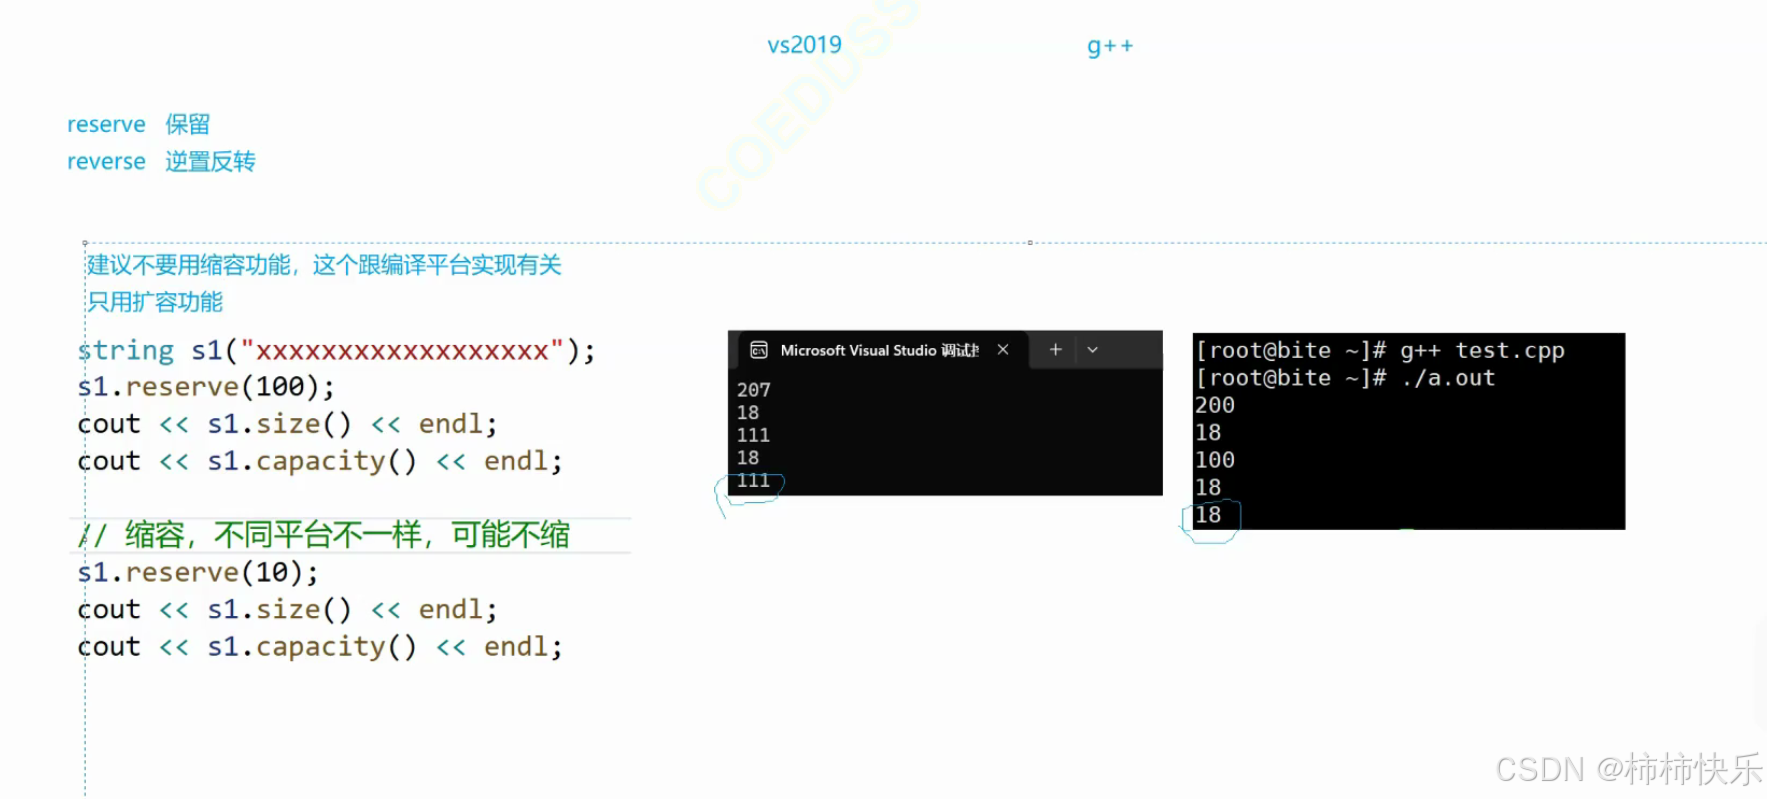
- 仅增加容量:只能增加容量,不能减少容量。如果需要尝试减少容量,可以使用
shrink_to_fit方法,但这只是一个请求,并不保证会实际减少容量。
示例代码
#include <iostream>
#include <vector>

int main() {
    std::vector<int> vec;

    // 预先分配足够的内存来存储 1000 个整数
    vec.reserve(1000);
    std::cout << "Capacity after reserve: " << vec.capacity() << std::endl; // 输出 1000

    // 插入一些元素
    for (int i = 0; i < 500; ++i) {
        vec.push_back(i);
    }

    // 输出插入后的容量和大小
    std::cout << "Capacity after insertions: " << vec.capacity() << std::endl; // 输出 1000
    std::cout << "Size after insertions: " << vec.size() << std::endl; // 输出 500

    return 0;
}
关键点总结
- 什么时候使用:当你知道即将插入大量元素时,提前调用
reserve可以避免多次内存重新分配,提高程序效率。 - 如何使用:
vec.reserve(1000); // 提前分配足够存储 1000 个元素的内存 - 注意事项:
reserve只能增加容量,不能减少容量。若需尝试减少容量,可以使用shrink_to_fit,但其效果不确定。
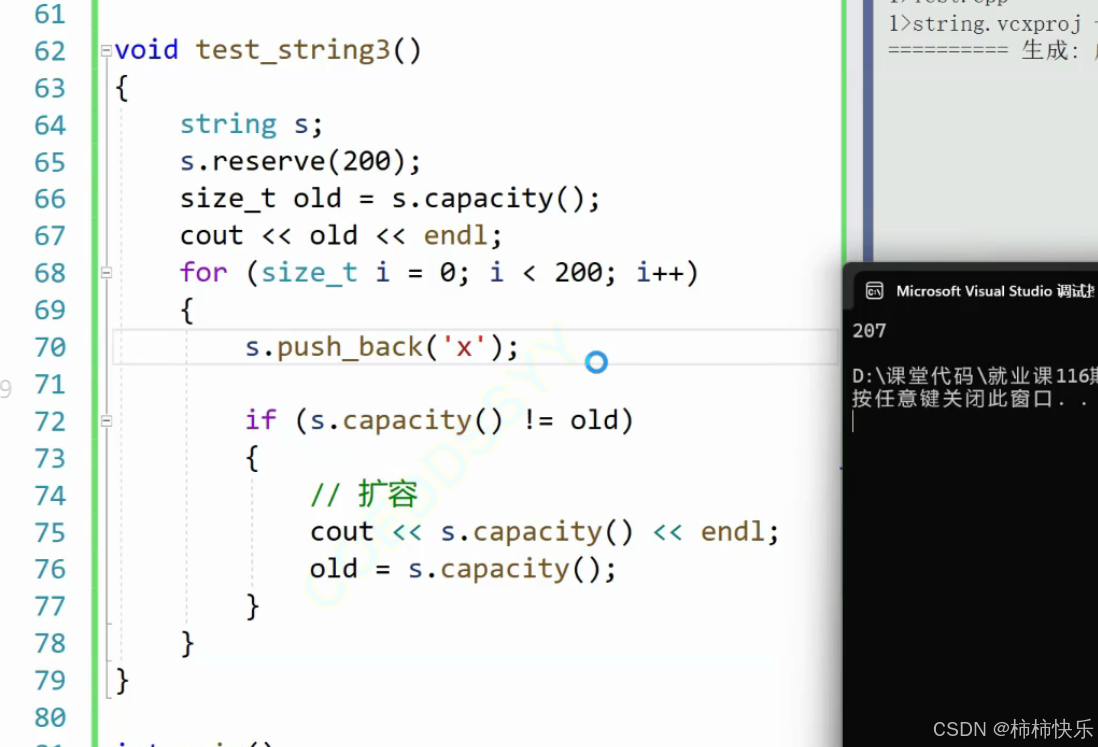
//观察扩容规则
void test5()
{
	string s;
	size_t old= s.capacity();
	cout << old << endl;
	for (size_t i = 0; i < 200; i++)
	{
		s.push_back('x');
		if (s.capacity() != old)
		{
			//扩容,打印出每次内容的改变
			cout << s.capacity() << endl;
			old = s.capacity();
		}
	}

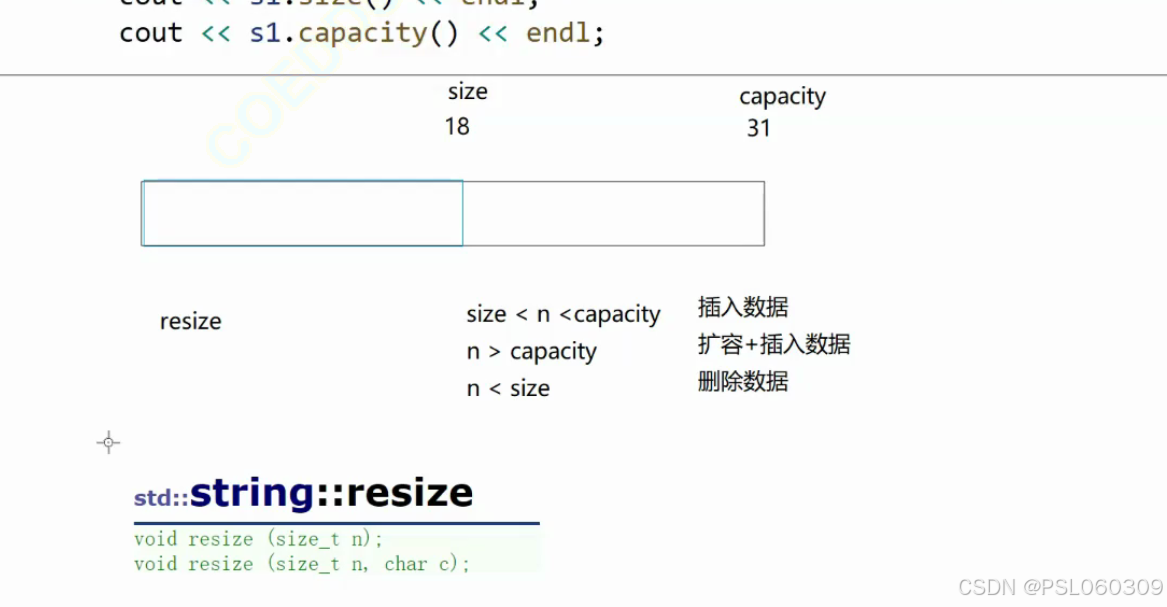
在C++标准库中,resize 是容器(如 std::vector, std::string, std::deque 等)提供的一个成员函数,用于改变容器的大小。与 reserve 不同,resize 会直接修改容器的元素数量,并且如果需要的话,还会初始化或删除元素。
resize 的主要特点
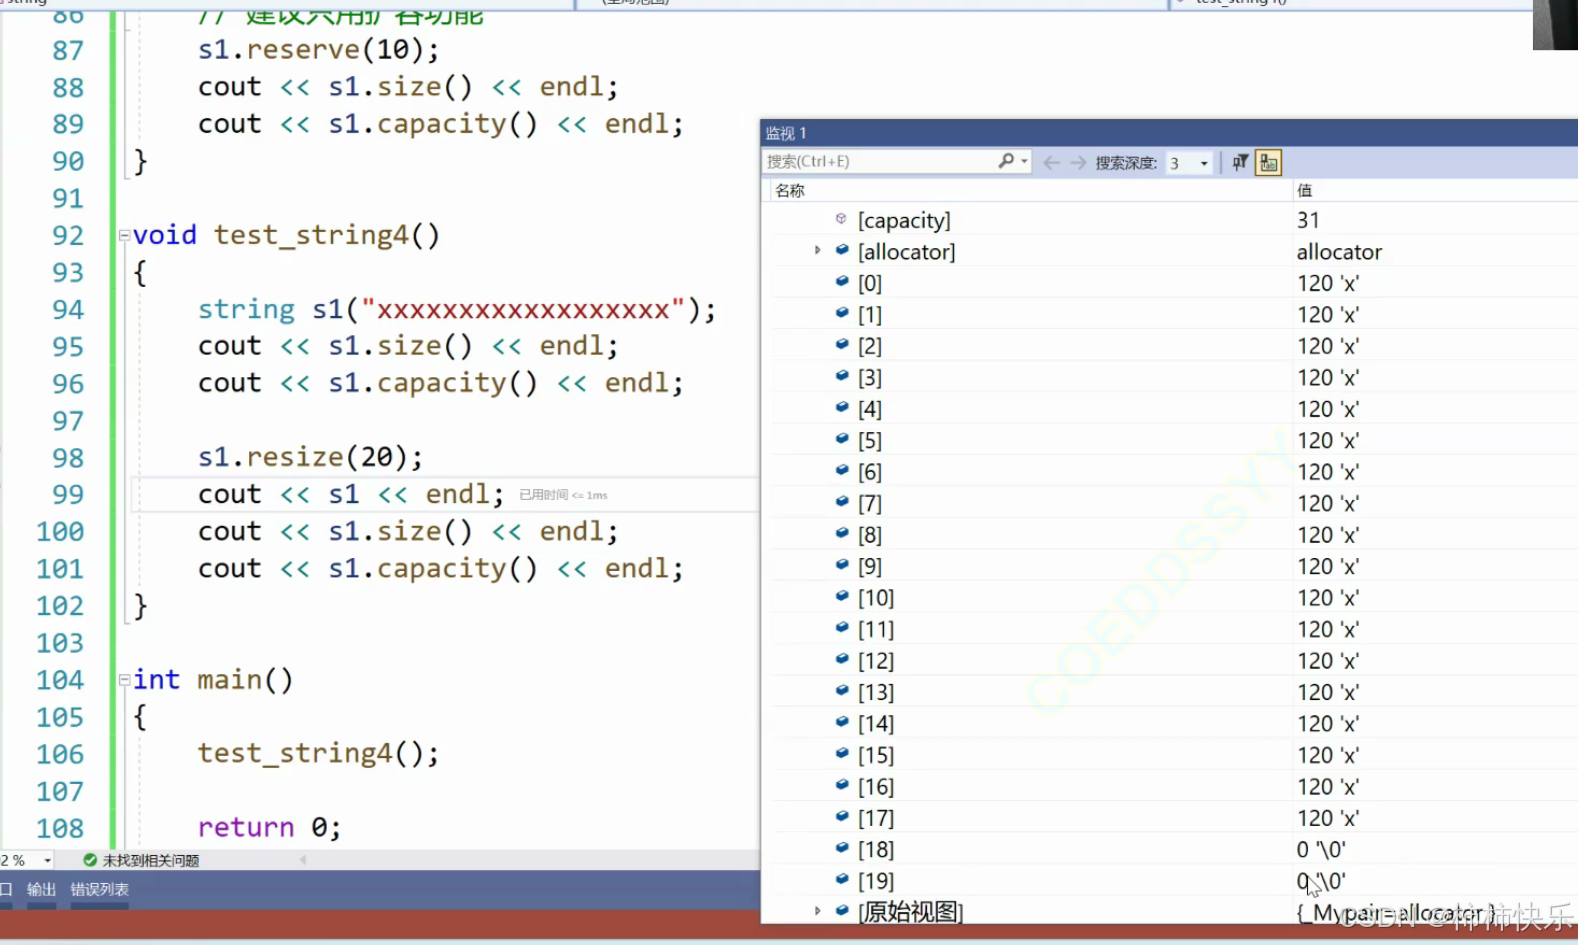
- 改变大小:
resize直接改变容器的大小(即元素的数量),而不仅仅是容量。 - 填充新元素:如果新的大小大于当前大小,那么新增加的元素将被初始化为默认值或指定值。
- 移除多余元素:如果新的大小小于当前大小,多余的元素将被移除。
函数原型
对于大多数容器,resize 的基本用法如下:
void resize(size_type count);
void resize(size_type count, const value_type& value);
- 第一种形式将容器调整为包含
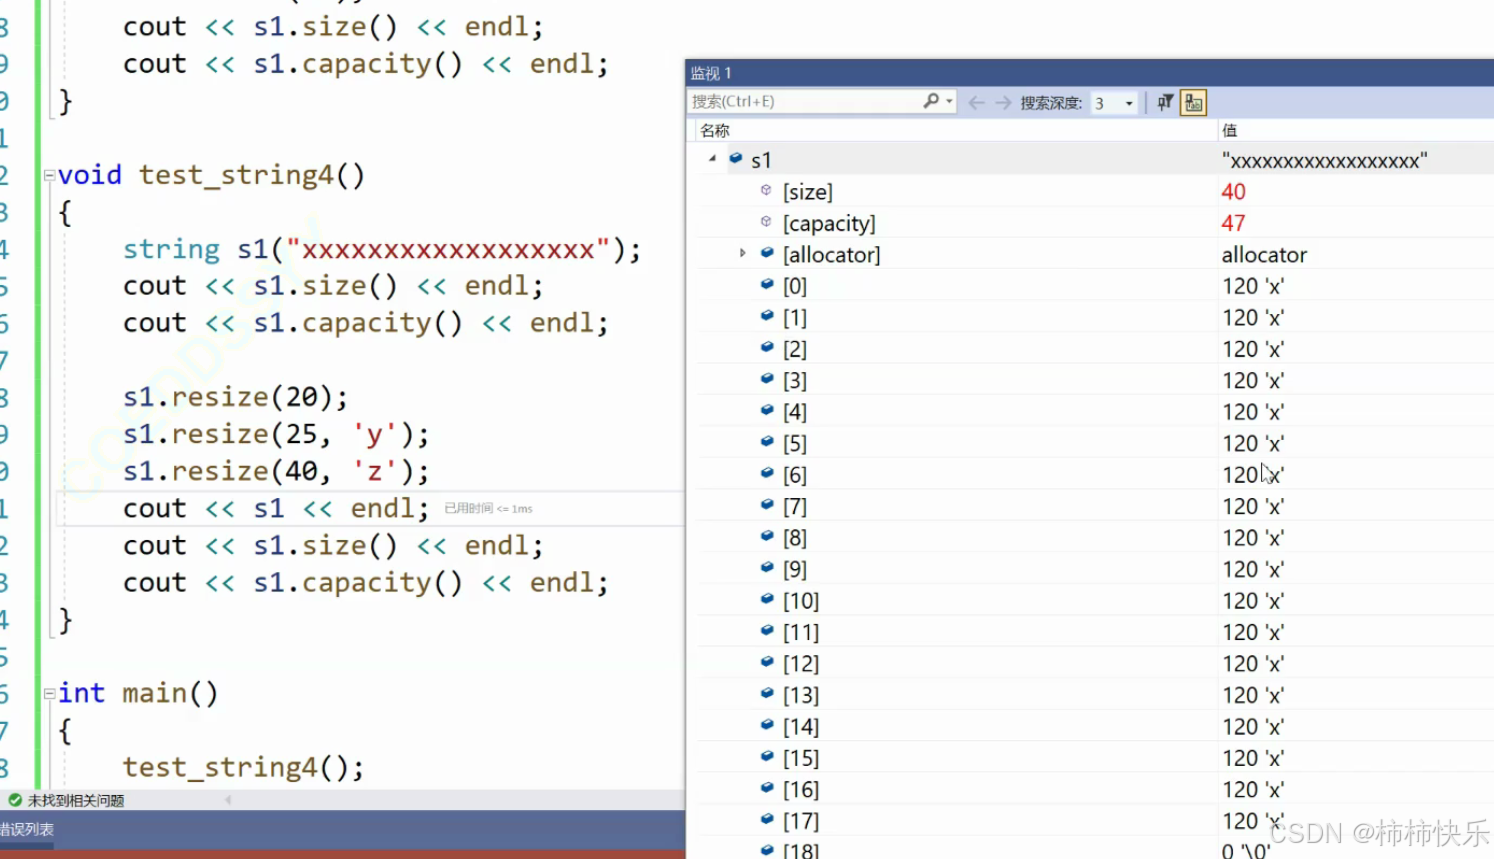
count个元素,新增加的元素使用该类型的默认构造函数进行初始化。 - 第二种形式允许你指定一个值
value,所有新增加的元素都将被初始化为这个值。
使用场景
- 扩展容器:当你需要增加容器的大小,并且希望新元素具有特定的初始值时。
- 缩小容器:当你需要减少容器的大小,并愿意丢弃多余的元素时。
示例代码
下面通过几个示例来展示如何使用 resize 方法:
示例 1: 扩展容器
#include <iostream>
#include <vector>

int main() {
    std::vector<int> vec = {1, 2, 3};

    // 输出原始大小和内容
    std::cout << "Original size: " << vec.size() << std::endl;
    for (const auto& elem : vec) {
        std::cout << elem << " ";
    }
    std::cout << std::endl;

    // 将大小调整为 5,新增加的元素初始化为 0
    vec.resize(5);

    // 输出调整后的大小和内容
    std::cout << "Size after resize to 5: " << vec.size() << std::endl;
    for (const auto& elem : vec) {
        std::cout << elem << " "; // 输出: 1 2 3 0 0
    }
    std::cout << std::endl;

    return 0;
}
示例 2: 缩小容器
#include <iostream>
#include <vector>

int main() {
    std::vector<int> vec = {1, 2, 3, 4, 5};

    // 输出原始大小和内容
    std::cout << "Original size: " << vec.size() << std::endl;
    for (const auto& elem : vec) {
        std::cout << elem << " ";
    }
    std::cout << std::endl;

    // 将大小调整为 3,移除多余的元素
    vec.resize(3);

    // 输出调整后的大小和内容
    std::cout << "Size after resize to 3: " << vec.size() << std::endl;
    for (const auto& elem : vec) {
        std::cout << elem << " "; // 输出: 1 2 3
    }
    std::cout << std::endl;

    return 0;
}
示例 3: 指定新元素的值
#include <iostream>
#include <vector>

int main() {
    std::vector<int> vec = {1, 2, 3};

    // 输出原始大小和内容
    std::cout << "Original size: " << vec.size() << std::endl;
    for (const auto& elem : vec) {
        std::cout << elem << " ";
    }
    std::cout << std::endl;

    // 将大小调整为 5,新增加的元素初始化为 10
    vec.resize(5, 10);

    // 输出调整后的大小和内容
    std::cout << "Size after resize to 5 with value 10: " << vec.size() << std::endl;
    for (const auto& elem : vec) {
        std::cout << elem << " "; // 输出: 1 2 3 10 10
    }
    std::cout << std::endl;

    return 0;
}
总结
-
resize:直接改变容器的大小(即元素数量),并根据需要初始化或移除元素。- 如果扩大容器,新增加的元素可以指定初始值。
- 如果缩小容器,多余的元素会被移除。
-
与
reserve的区别:reserve只改变容器的容量(即它可以容纳多少元素而不需重新分配内存),而不改变其大小。resize则直接改变容器的大小,并可能添加或移除元素。
在C++中,at 是标准库容器(如 std::vector, std::string, std::deque, std::array 等)提供的一个成员函数。它的主要作用是访问容器中的元素,并且与直接使用下标操作符 [] 不同的是,at 方法会在访问越界时抛出 std::out_of_range 异常,从而提供了一种更安全的访问方式。
at 方法的主要特点
- 边界检查:
at方法在访问元素时会进行边界检查。如果索引超出范围,则会抛出std::out_of_range异常。 - 安全性:由于其提供了边界检查,
at比直接使用下标操作符[]更加安全,特别是在不确定索引是否有效的情况下。 - 性能影响:因为
at需要进行额外的边界检查,所以在某些情况下可能会比直接使用[]稍微慢一些。但是,这种性能差异通常可以忽略不计,尤其是在需要确保程序健壮性的情况下。
函数原型
对于大多数支持 at 方法的容器,其原型如下:
reference at(size_type pos);
const_reference at(size_type pos) const;
pos是你想要访问的元素的索引。- 返回值是一个引用,允许你读取或修改该位置上的元素。
示例代码
下面通过几个示例来展示如何使用 at 方法:
示例 1: 使用 at 访问元素
#include <iostream>
#include <vector>

int main() {
    std::vector<int> vec = {1, 2, 3, 4, 5};

    // 使用 at 方法访问元素
    try {
        std::cout << "Element at index 2: " << vec.at(2) << std::endl; // 输出: 3
        std::cout << "Element at index 4: " << vec.at(4) << std::endl; // 输出: 5
        std::cout << "Element at index 5: " << vec.at(5) << std::endl; // 抛出异常
    } catch (const std::out_of_range& e) {
        std::cerr << "Exception caught: " << e.what() << std::endl;
    }

    return 0;
}
示例 2: 修改元素
#include <iostream>
#include <vector>

int main() {
    std::vector<int> vec = {1, 2, 3, 4, 5};

    // 使用 at 方法修改元素
    try {
        vec.at(1) = 10; // 将索引为 1 的元素修改为 10
        for (const auto& elem : vec) {
            std::cout << elem << " "; // 输出: 1 10 3 4 5
        }
        std::cout << std::endl;

        vec.at(5) = 20; // 抛出异常
    } catch (const std::out_of_range& e) {
        std::cerr << "Exception caught: " << e.what() << std::endl;
    }

    return 0;
}
示例 3: 在 std::string 中使用 at
#include <iostream>
#include <string>

int main() {
    std::string str = "Hello";

    // 使用 at 方法访问字符
    try {
        std::cout << "Character at index 1: " << str.at(1) << std::endl; // 输出: e
        std::cout << "Character at index 5: " << str.at(5) << std::endl; // 抛出异常
    } catch (const std::out_of_range& e) {
        std::cerr << "Exception caught: " << e.what() << std::endl;
    }

    return 0;
}
与下标操作符 [] 的对比
-
operator[]:不进行边界检查,访问越界时行为未定义(通常是非法内存访问,可能导致程序崩溃)。适用于性能敏感场景,且确信索引不会越界的情况。 -
at:进行边界检查,在访问越界时抛出std::out_of_range异常。适用于需要更高安全性的场景,或者当你无法保证索引一定有效时。
总结
at方法 提供了带有边界检查的安全访问方式,适合用于避免因索引越界导致的潜在错误。- 下标操作符
[]更快,但没有边界检查,适合于性能优化并且确定索引不会越界的情况。
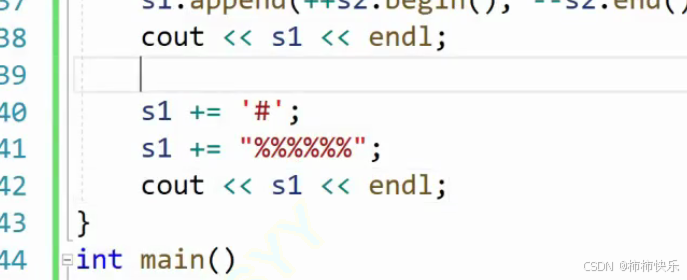
在C++中,append 是一个用于将数据追加到容器或字符串末尾的方法。它广泛应用于 std::string 和某些序列容器(如 std::vector)中。append 方法提供了一种方便的方式来扩展这些对象的内容。
在 std::string 中使用 append
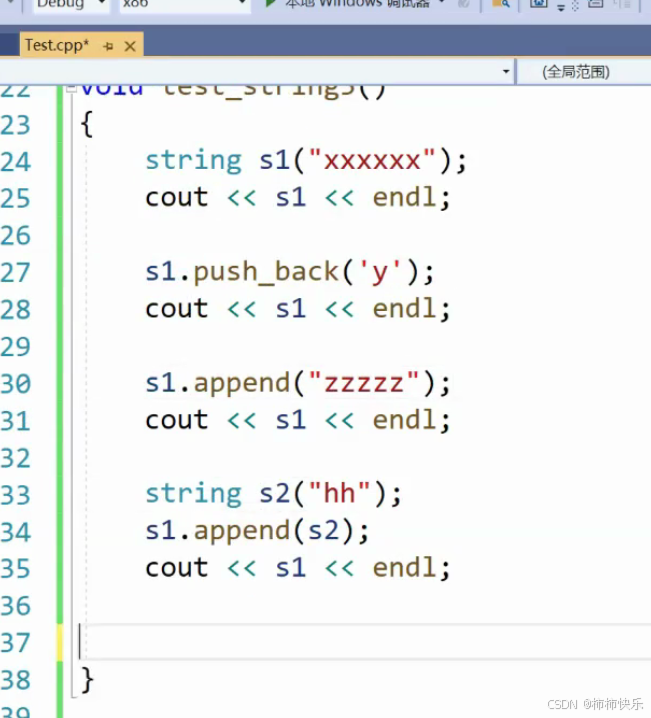
对于 std::string,append 方法可以用来将另一个字符串、字符数组、单个字符或者指定数量的同一字符添加到当前字符串的末尾。
函数原型
string& append(const string& str); // 将 str 追加到当前字符串的末尾
string& append(const string& str, size_t pos, size_t len); // 从 str 的 pos 位置开始,追加 len 个字符
string& append(const char* s); // 将 C 字符串 s 追加到当前字符串的末尾
string& append(const char* s, size_t n); // 将 C 字符串 s 的前 n 个字符追加到当前字符串的末尾
string& append(size_t n, char c); // 将 n 个字符 c 追加到当前字符串的末尾
string& append(InputIt first, InputIt last); // 将 [first, last) 范围内的字符追加到当前字符串的末尾
示例代码
#include <iostream>
#include <string>

int main() {
    std::string str = "Hello";

    // 追加一个字符串
    str.append(", World!");
    std::cout << str << std::endl; // 输出: Hello, World!

    // 追加部分字符串
    str.append(" Welcome", 0, 7); // 从 " Welcome" 的开头开始,追加 7 个字符
    std::cout << str << std::endl; // 输出: Hello, World! Welcom

    // 追加一个 C 风格字符串
    str.append(" to C++");
    std::cout << str << std::endl; // 输出: Hello, World! Welcom to C++

    // 追加重复字符
    str.append(3, '!'); // 追加三个 '!'
    std::cout << str << std::endl; // 输出: Hello, World! Welcom to C!!!

    return 0;
}
在 std::vector 中使用 append
虽然 std::vector 没有直接命名为 append 的方法,但可以通过 insert 或者 push_back 来实现类似的功能。不过,为了更直观地模拟 append 行为,通常使用 insert 方法结合两个迭代器来追加另一个容器的所有元素。
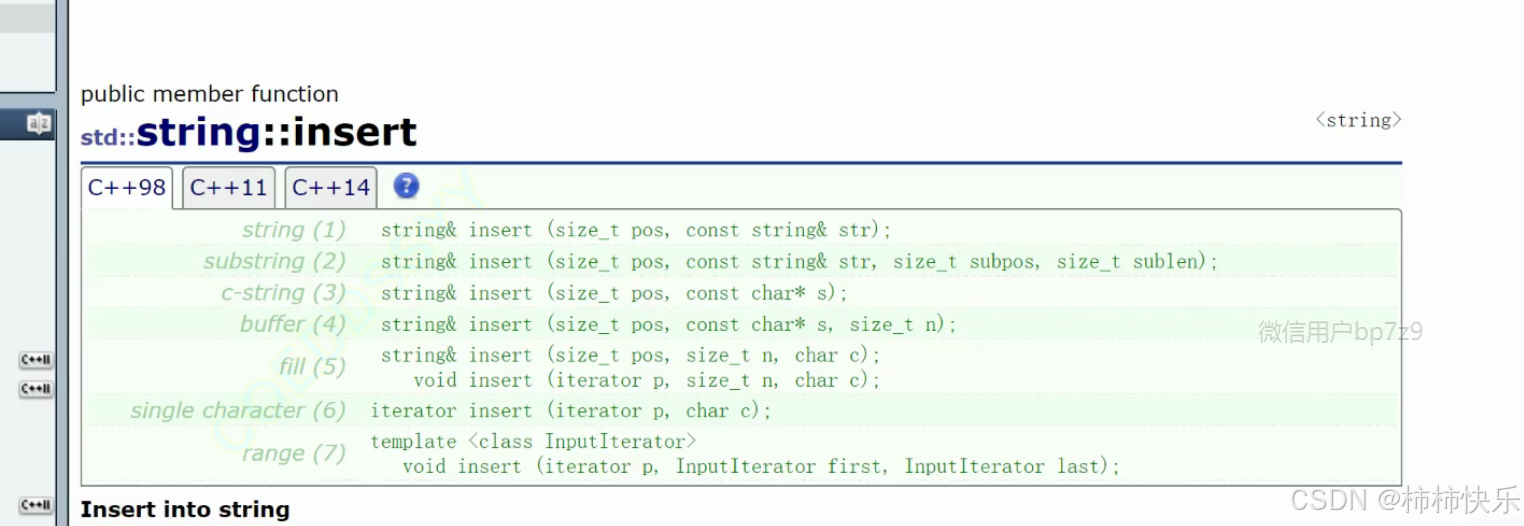
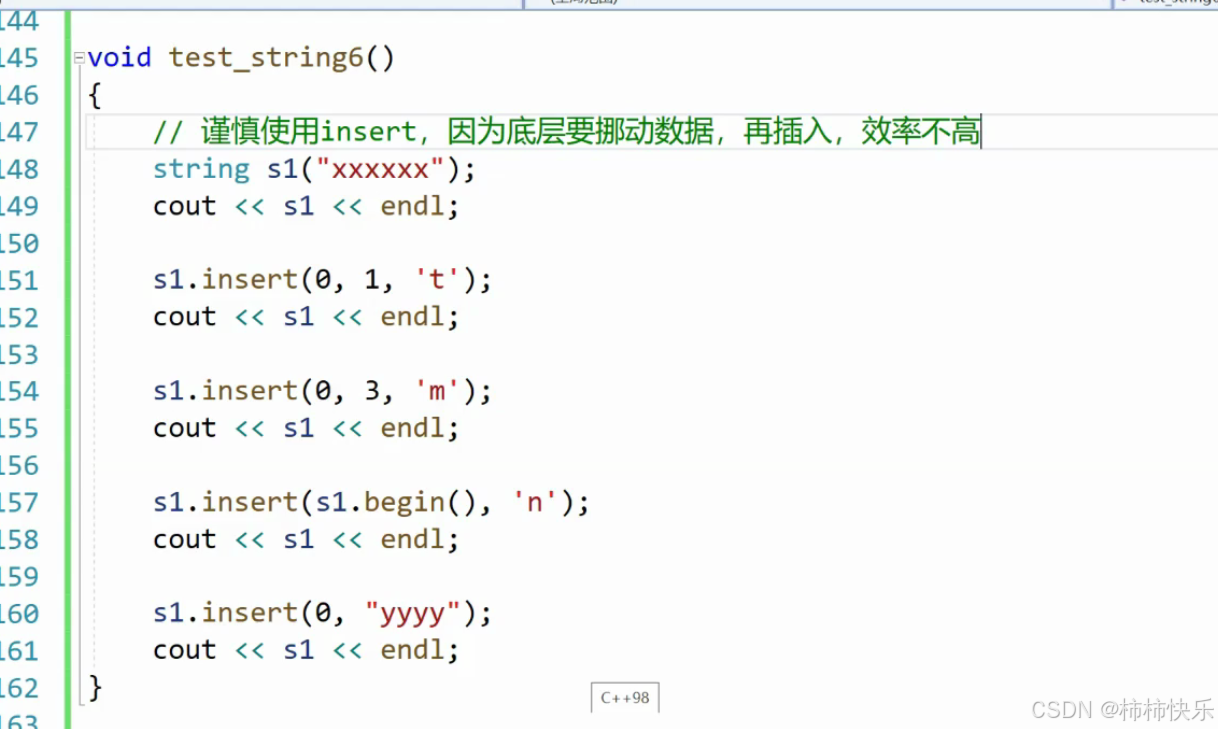
在C++中,insert 是一个非常有用的成员函数,广泛应用于多种标准库容器(如 std::string, std::vector, std::list, std::deque 等),用于在指定位置插入元素。不同容器的 insert 方法略有不同,但它们的基本功能都是相似的:在容器中的某个位置插入一个或多个元素。
在 std::string 中使用 insert
对于 std::string,insert 可以用来在字符串的任意位置插入字符、子串或字符数组。
函数原型
string& insert(size_t pos, const string& str); // 在 pos 位置插入 str
string& insert(size_t pos, const string& str, size_t subpos, size_t sublen); // 在 pos 位置插入 str 的子串
string& insert(size_t pos, const char* s); // 在 pos 位置插入 C 风格字符串 s
string& insert(size_t pos, const char* s, size_t n); // 在 pos 位置插入 s 的前 n 个字符
string& insert(size_t pos, size_t n, char c); // 在 pos 位置插入 n 个字符 c
iterator insert(const_iterator p, char c); // 在迭代器 p 指向的位置插入字符 c
void insert(const_iterator p, size_type n, char c); // 在迭代器 p 指向的位置插入 n 个字符 c
template<class InputIt>
void insert(const_iterator p, InputIt first, InputIt last); // 在迭代器 p 指向的位置插入 [first, last) 范围内的字符
示例代码
#include <iostream>
#include <string>

int main() {
    std::string str = "Hello";

    // 在索引为 5 的位置插入 ", World!"
    str.insert(5, ", World!");
    std::cout << str << std::endl; // 输出: Hello, World!

    // 在索引为 0 的位置插入 3 个 '!'
    str.insert(0, 3, '!');
    std::cout << str << std::endl; // 输出: !!!Hello, World!

    // 使用迭代器在特定位置插入字符
    str.insert(str.begin() + 3, '*');
    std::cout << str << std::endl; // 输出: !!!*Hello, World!

    return 0;
}
在 std::vector 中使用 insert
对于 std::vector,insert 方法可以用来在指定位置插入单个元素或多个元素。
函数原型
iterator insert(const_iterator position, const value_type& val); // 在 position 指向的位置插入值为 val 的元素
iterator insert(const_iterator position, size_type n, const value_type& val); // 在 position 指向的位置插入 n 个值为 val 的元素
template<class InputIt>
iterator insert(const_iterator position, InputIt first, InputIt last); // 在 position 指向的位置插入 [first, last) 范围内的元素
void insert(const_iterator position, std::initializer_list<value_type> ilist); // 在 position 指向的位置插入 initializer_list 中的所有元素
示例代码
#include <iostream>
#include <vector>

int main() {
    std::vector<int> vec = {1, 2, 3, 4};

    // 在索引为 2 的位置插入单个元素 99
    auto it = vec.begin() + 2;
    vec.insert(it, 99);
    for (const auto& elem : vec) {
        std::cout << elem << " "; // 输出: 1 2 99 3 4
    }
    std::cout << std::endl;

    // 在相同位置插入 2 个值为 88 的元素
    vec.insert(vec.begin() + 2, 2, 88);
    for (const auto& elem : vec) {
        std::cout << elem << " "; // 输出: 1 2 88 88 99 3 4
    }
    std::cout << std::endl;

    // 插入另一个 vector 的所有元素
    std::vector<int> additional = {6, 7};
    vec.insert(vec.end(), additional.begin(), additional.end());
    for (const auto& elem : vec) {
        std::cout << elem << " "; // 输出: 1 2 88 88 99 3 4 6 7
    }
    std::cout << std::endl;

    return 0;
}
总结
insert方法:允许你在容器的指定位置插入一个或多个元素。- 对于
std::string,你可以根据索引或者迭代器插入字符、子串或字符数组。 - 对于
std::vector,你可以根据迭代器插入单个元素、多个相同元素或来自其他容器的元素范围。
- 对于
理解并合理使用 insert 方法可以帮助你更灵活地操作和管理容器中的数据。如果你有更多问题或需要进一步的帮助,请随时告诉我!
使用 insert 实现 append 功能
#include <iostream>
#include <vector>

int main() {
    std::vector<int> vec1 = {1, 2, 3};
    std::vector<int> vec2 = {4, 5, 6};

    // 使用 insert 方法实现 append 功能
    vec1.insert(vec1.end(), vec2.begin(), vec2.end());

    for (const auto& elem : vec1) {
        std::cout << elem << " "; // 输出: 1 2 3 4 5 6
    }
    std::cout << std::endl;

    return 0;
}
总结
std::string::append:提供了多种重载形式来追加不同类型的字符串或字符序列到当前字符串的末尾,并且支持边界检查和灵活的参数选择。std::vector类似功能:虽然std::vector没有直接的append方法,但可以通过insert方法结合两个迭代器来实现向量的追加操作,或者使用push_back方法逐个追加元素。
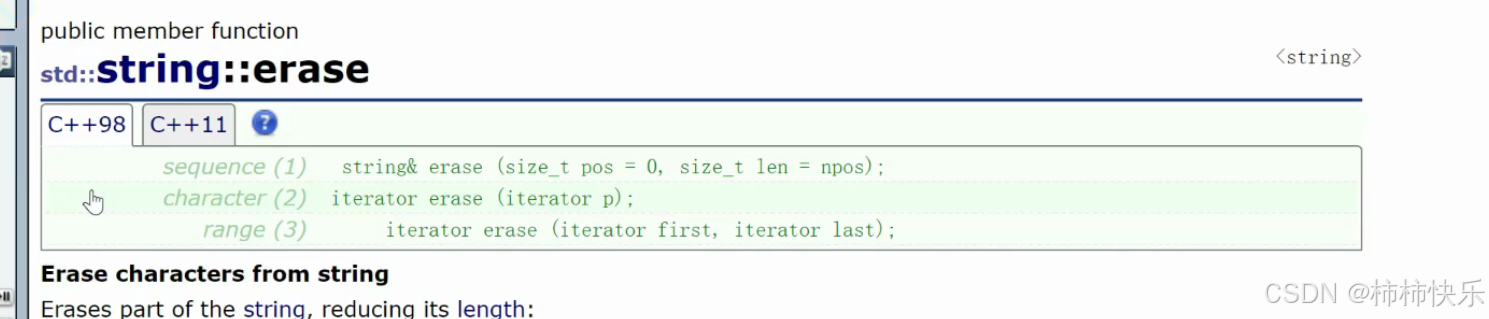
在C++标准库中,erase 是一个用于从容器中删除元素的成员函数。它被广泛应用于多种容器类型,如 std::string, std::vector, std::list, std::deque 等。根据容器的不同,erase 的使用方式和行为也略有不同。
在 std::string 中使用 erase
对于 std::string,erase 方法可以用来删除字符串中的一个子串或单个字符。
函数原型
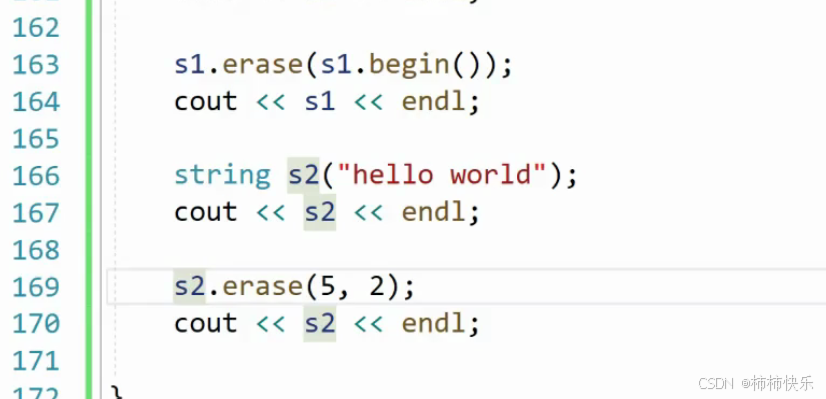
string& erase(size_type pos = 0, size_type len = npos); // 删除从 pos 开始的 len 个字符
iterator erase(const_iterator position); // 删除 position 指向的字符
iterator erase(const_iterator first, const_iterator last); // 删除 [first, last) 范围内的字符
pos和len:指定要删除的子串的起始位置和长度。如果省略len,则从pos开始直到字符串末尾的所有字符都将被删除。position:指向要删除的单个字符的位置。first和last:定义了要删除的字符范围[first, last)。
示例代码
#include <iostream>
#include <string>

int main() {
    std::string str = "Hello, World!";

    // 删除从索引 7 开始的 6 个字符
    str.erase(7, 6);
    std::cout << str << std::endl; // 输出: Hello, !

    // 使用迭代器删除单个字符
    str.erase(str.begin() + 5); // 删除索引为 5 的字符(即 ',')
    std::cout << str << std::endl; // 输出: Hello!

    // 删除从索引 1 到 4 的字符(不包括索引 4)
    str.erase(str.begin() + 1, str.begin() + 4);
    std::cout << str << std::endl; // 输出: Ho!

    return 0;
}
在 std::vector 中使用 erase
对于 std::vector,erase 方法可以用来删除单个元素或一段连续的元素。
函数原型
iterator erase(const_iterator position); // 删除 position 指向的元素
iterator erase(const_iterator first, const_iterator last); // 删除 [first, last) 范围内的元素
position:指向要删除的单个元素的位置。first和last:定义了要删除的元素范围[first, last)。
示例代码
#include <iostream>
#include <vector>

int main() {
    std::vector<int> vec = {1, 2, 3, 4, 5, 6};

    // 删除索引为 2 的元素(即值为 3 的元素)
    vec.erase(vec.begin() + 2);
    for (const auto& elem : vec) {
        std::cout << elem << " "; // 输出: 1 2 4 5 6
    }
    std::cout << std::endl;

    // 删除从索引 1 到 3 的元素(不包括索引 3),即删除值为 2 和 4 的元素
    vec.erase(vec.begin() + 1, vec.begin() + 3);
    for (const auto& elem : vec) {
        std::cout << elem << " "; // 输出: 1 5 6
    }
    std::cout << std::endl;

    return 0;
}
注意事项
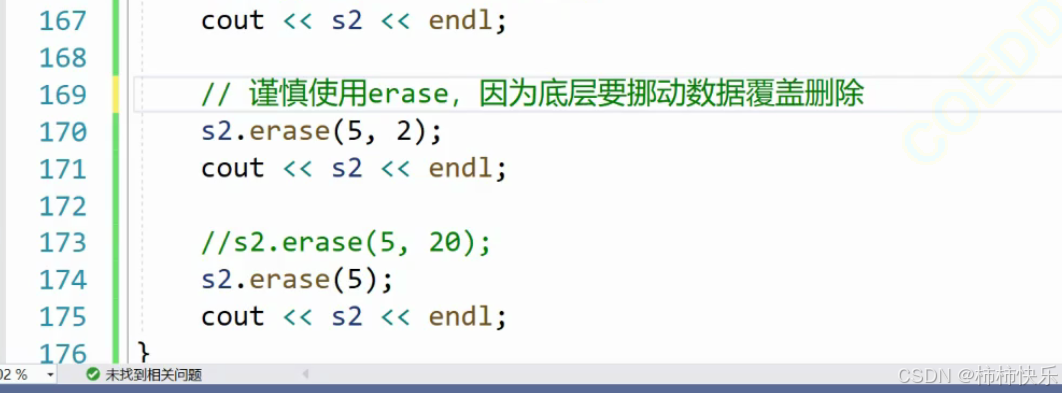
- 性能问题:在
std::vector中使用erase删除元素时,特别是删除中间位置的元素,可能会导致后续元素向前移动以填补空缺,这可能会影响性能,特别是在大容量的容器中频繁进行删除操作时。 - 无效化迭代器:删除操作可能会使指向已删除元素的迭代器失效。因此,在使用
erase后应避免继续使用这些迭代器。
总结
erase方法:允许你从容器中删除一个或多个元素。- 对于
std::string,可以根据索引或迭代器删除一个子串或单个字符。 - 对于
std::vector,可以根据迭代器删除单个元素或一段连续的元素。
- 对于
在C++中,replace 是 std::string 类提供的一个成员函数,用于替换字符串中的部分内容。它允许你根据指定的起始位置和长度、特定值或匹配的子串来替换字符串中的字符序列。
在 std::string 中使用 replace
replace 函数有多个重载形式,可以满足不同的替换需求:
函数原型
string& replace(size_type pos, size_type len, const string& str); // 从 pos 开始,用 str 替换 len 个字符
string& replace(size_type pos, size_type len, const string& str, size_type subpos, size_type sublen); // 从 pos 开始,用 str 的子串(从 subpos 开始,长度为 sublen)替换 len 个字符
string& replace(size_type pos, size_type len, const char* s); // 从 pos 开始,用 C 风格字符串 s 替换 len 个字符
string& replace(size_type pos, size_type len, const char* s, size_type n); // 从 pos 开始,用 C 风格字符串 s 的前 n 个字符替换 len 个字符
string& replace(size_type pos, size_type len, size_type n, char c); // 从 pos 开始,用 n 个字符 c 替换 len 个字符
iterator replace(const_iterator i1, const_iterator i2, const string& str); // 使用 str 替换范围 [i1, i2) 内的字符
iterator replace(const_iterator i1, const_iterator i2, const char* s); // 使用 C 风格字符串 s 替换范围 [i1, i2) 内的字符
iterator replace(const_iterator i1, const_iterator i2, const char* s, size_type n); // 使用 C 风格字符串 s 的前 n 个字符替换范围 [i1, i2) 内的字符
iterator replace(const_iterator i1, const_iterator i2, size_type n, char c); // 使用 n 个字符 c 替换范围 [i1, i2) 内的字符
template<class InputIt>
iterator replace(const_iterator i1, const_iterator i2, InputIt first, InputIt last); // 使用 [first, last) 范围内的字符替换 [i1, i2) 内的字符
示例代码
下面通过几个示例展示如何使用 replace 方法:
示例 1: 基本替换
#include <iostream>
#include <string>

int main() {
    std::string str = "Hello, World!";

    // 从索引 7 开始,用 "Universe" 替换 5 个字符
    str.replace(7, 5, "Universe");
    std::cout << str << std::endl; // 输出: Hello, Universe!

    return 0;
}
示例 2: 使用迭代器进行替换
#include <iostream>
#include <string>

int main() {
    std::string str = "Hello, World!";

    // 使用迭代器替换 "World" 为 "Universe"
    str.replace(str.begin() + 7, str.begin() + 12, "Universe");
    std::cout << str << std::endl; // 输出: Hello, Universe!

    return 0;
}
示例 3: 替换为重复字符
#include <iostream>
#include <string>

int main() {
    std::string str = "Hello, World!";

    // 从索引 7 开始,用 8 个 '!' 替换 5 个字符
    str.replace(7, 5, 8, '!');
    std::cout << str << std::endl; // 输出: Hello, !!!!!!!!

    return 0;
}
示例 4: 使用部分字符串替换
#include <iostream>
#include <string>

int main() {
    std::string str = "Hello, World!";
    std::string replacement = "My New Universe";

    // 从索引 7 开始,用 replacement 字符串的第 4 到第 9 个字符(即 "New Un")替换 5 个字符
    str.replace(7, 5, replacement, 3, 6);
    std::cout << str << std::endl; // 输出: Hello, New Un!

    return 0;
}
总结
replace方法:提供了一种灵活的方式来替换std::string中的部分内容。- 可以基于索引和长度来指定要替换的部分,并指定新的内容。
- 也可以使用迭代器来指定要替换的范围,并使用各种类型的新内容(如另一个字符串、C风格字符串、单个字符或字符数组)进行替换。
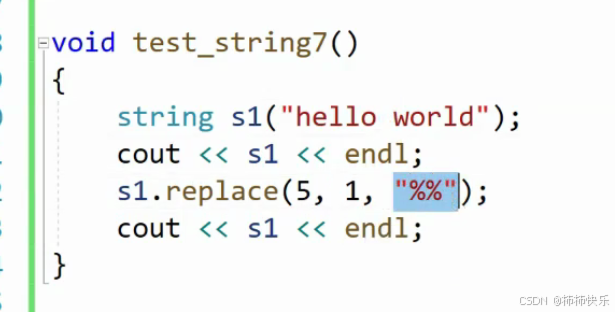
把空格替换成“%%”,两种方法

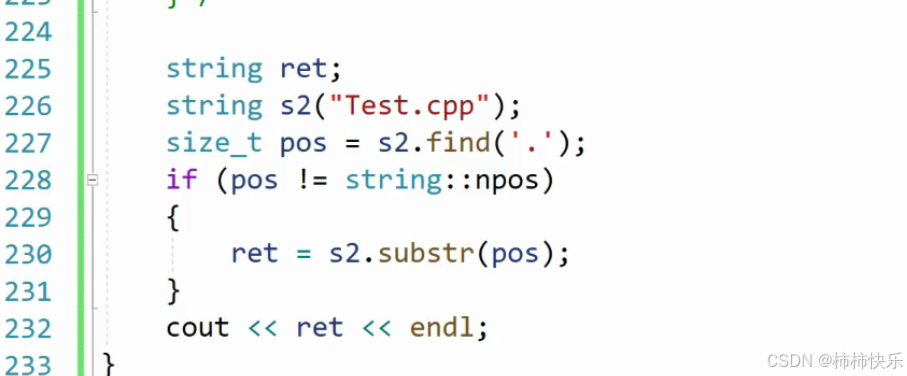
在C++中,find 是 std::string 类提供的一个成员函数,用于查找子串或字符首次出现的位置。它从字符串的开头开始搜索,并返回匹配项的起始位置。如果没有找到匹配项,则返回 std::string::npos。
函数原型
find 方法有几种重载形式,可以满足不同的查找需求:
size_t find(const string& str, size_t pos = 0); // 从 pos 开始查找子串 str
size_t find(const char* s, size_t pos = 0); // 从 pos 开始查找 C 风格字符串 s
size_t find(const char* s, size_t pos, size_t n); // 从 pos 开始查找 C 风格字符串 s 的前 n 个字符
size_t find(char c, size_t pos = 0); // 从 pos 开始查找字符 c
str或s:要查找的子串或C风格字符串。c:要查找的单个字符。pos:开始查找的位置,默认是从字符串的开头(即索引 0)开始查找。
示例代码
下面通过几个示例展示如何使用 find 方法:
示例 1: 查找子串首次出现的位置
#include <iostream>
#include <string>

int main() {
    std::string str = "Hello, welcome to the world of C++";

    // 查找子串 "world" 在 str 中首次出现的位置
    size_t position = str.find("world");

    if (position != std::string::npos) {
        std::cout << "'world' found at position: " << position << std::endl;
    } else {
        std::cout << "'world' not found in the string." << std::endl;
    }

    return 0;
}
输出:
'world' found at position: 18
示例 2: 查找单个字符首次出现的位置
#include <iostream>
#include <string>

int main() {
    std::string str = "Hello, welcome to the world of C++";

    // 查找字符 'o' 在 str 中首次出现的位置
    size_t position = str.find('o');

    if (position != std::string::npos) {
        std::cout << "'o' found at position: " << position << std::endl;
    } else {
        std::cout << "'o' not found in the string." << std::endl;
    }

    return 0;
}
输出:
'o' found at position: 4
示例 3: 从指定位置开始查找
你可以通过指定 pos 参数来限制搜索范围:
#include <iostream>
#include <string>

int main() {
    std::string str = "Hello, welcome to the world of C++";

    // 从索引 5 开始查找字符 'o'
    size_t position = str.find('o', 5);

    if (position != std::string::npos) {
        std::cout << "'o' found at position: " << position << std::endl;
    } else {
        std::cout << "'o' not found after index 5." << std::endl;
    }

    return 0;
}
输出:
'o' found at position: 17
示例 4: 查找部分C风格字符串
#include <iostream>
#include <string>

int main() {
    std::string str = "Hello, welcome to the world of C++";
    const char *cStr = "to the world";

    // 查找 C 风格字符串 "to the world" 的前 2 个字符 ("to") 在 str 中的位置
    size_t position = str.find(cStr, 0, 2);

    if (position != std::string::npos) {
        std::cout << "'to' found at position: " << position << std::endl;
    } else {
        std::cout << "'to' not found in the string." << std::endl;
    }

    return 0;
}
输出:
'to' found at position: 10
总结
find方法:从字符串的开头开始搜索,查找指定子串或字符首次出现的位置。如果找到匹配项,则返回匹配项的起始位置;如果没有找到匹配项,则返回std::string::npos。- 用途:适用于需要查找特定子串或字符在字符串中的位置的情况,如解析文本、验证输入等。
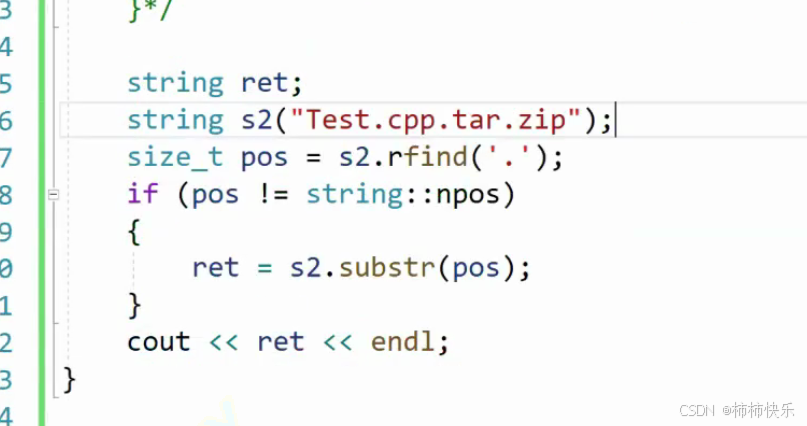
配合取后缀
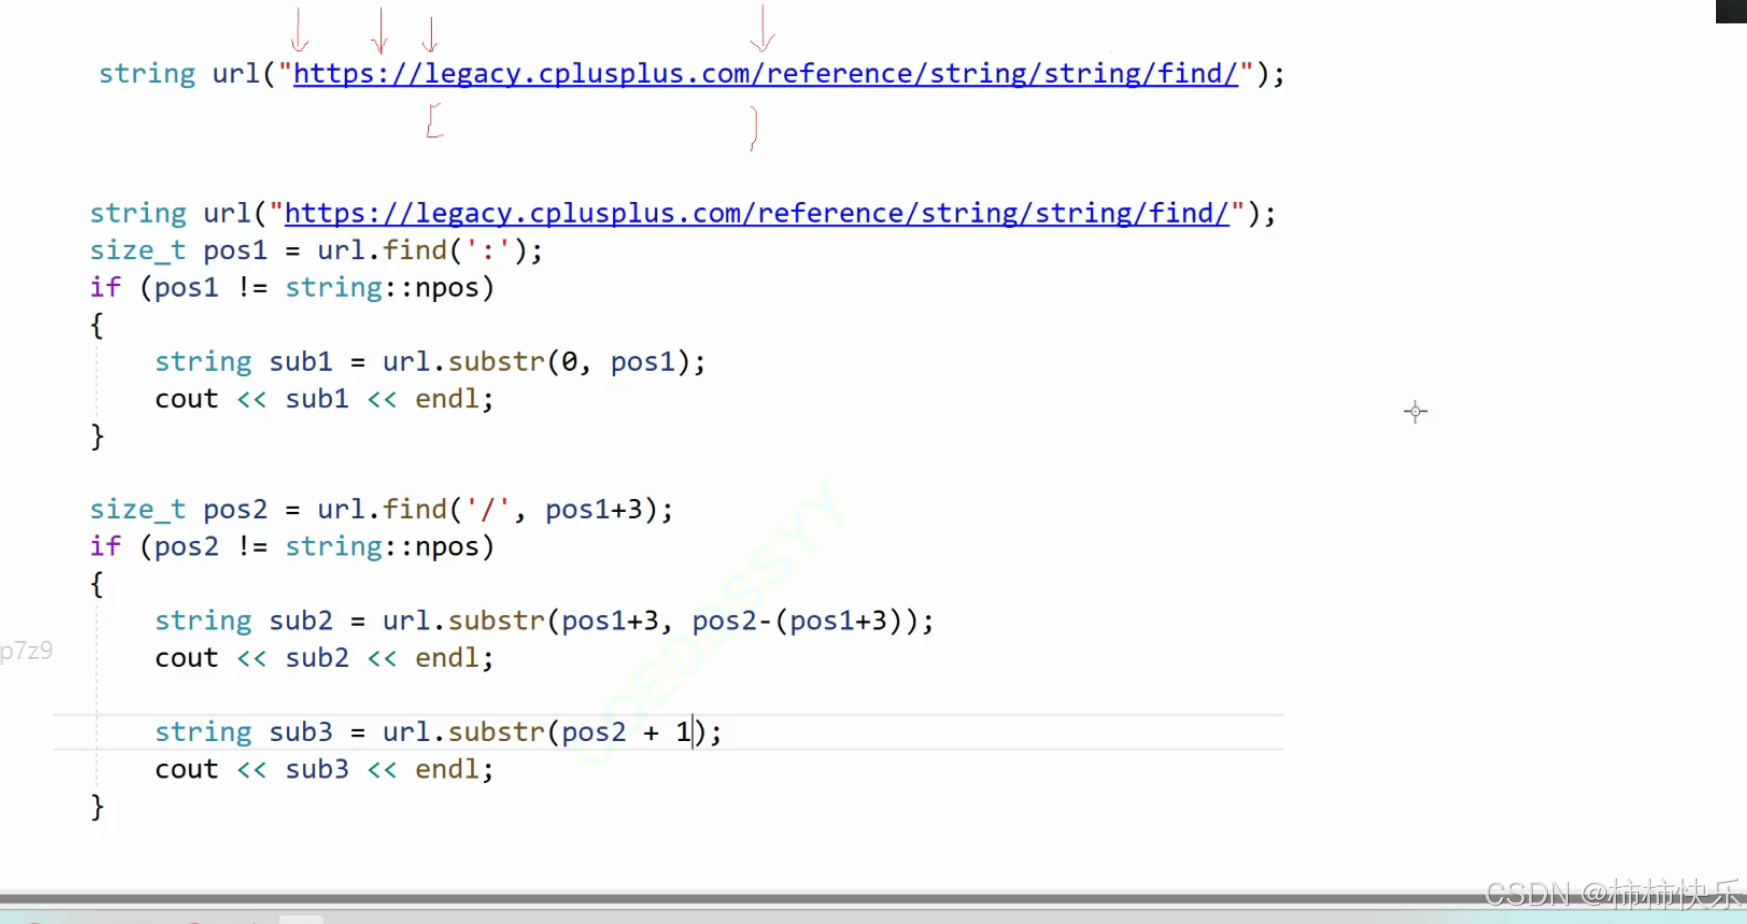
在C++中,substr 是 std::string 类提供的一个成员函数,用于提取字符串的子串。它允许你基于指定的起始位置和长度来获取原字符串的一个片段。substr 是处理和分析字符串时非常常用的工具。
函数原型
string substr(size_type pos = 0, size_type len = npos) const;
pos:子串的起始位置。默认是从字符串的开头(即索引 0)开始。len:要提取的子串长度。如果省略或者指定的长度超过了字符串末尾,则从pos开始直到字符串结束的所有字符都将被包含在内。
示例代码
以下是一些使用 substr 方法的示例:
示例 1: 提取从指定位置开始到字符串结尾的子串
#include <iostream>
#include <string>

int main() {
    std::string str = "Hello, World!";

    // 从索引 7 开始提取子串
    std::string result = str.substr(7);

    std::cout << "Substring from index 7 to end: " << result << std::endl; // 输出: World!

    return 0;
}
示例 2: 提取指定长度的子串
#include <iostream>
#include <string>

int main() {
    std::string str = "Hello, World!";

    // 从索引 0 开始,提取长度为 5 的子串
    std::string result = str.substr(0, 5);

    std::cout << "First 5 characters: " << result << std::endl; // 输出: Hello

    return 0;
}
示例 3: 处理越界情况
如果你尝试提取超出字符串长度的子串,substr 不会抛出异常,而是返回尽可能多的字符直至字符串的末尾:
#include <iostream>
#include <string>

int main() {
    std::string str = "Hello";

    // 尝试从索引 2 开始提取长度为 10 的子串
    std::string result = str.substr(2, 10);

    std::cout << "Substring from index 2 with length 10: " << result << std::endl; // 输出: llo

    return 0;
}
示例 4: 结合其他字符串操作方法使用
你可以将 substr 和其他字符串操作方法结合使用,以实现更复杂的字符串处理任务:
#include <iostream>
#include <string>

int main() {
    std::string str = "The quick brown fox jumps over the lazy dog.";

    // 查找 "fox" 在字符串中的位置
    size_t position = str.find("fox");

    if (position != std::string::npos) {
        // 提取从 "fox" 开始的子串
        std::string result = str.substr(position);

        std::cout << "Substring starting from 'fox': " << result << std::endl; // 输出: fox jumps over the lazy dog.
    } else {
        std::cout << "'fox' not found in the string." << std::endl;
    }

    return 0;
}
总结
substr方法:提供了从字符串中提取子串的功能,基于指定的起始位置和长度。它是处理字符串切片、文本分析等任务时的重要工具。- 用途:适用于需要根据特定条件从原字符串中抽取部分信息的情况,如解析数据、格式化输出等。
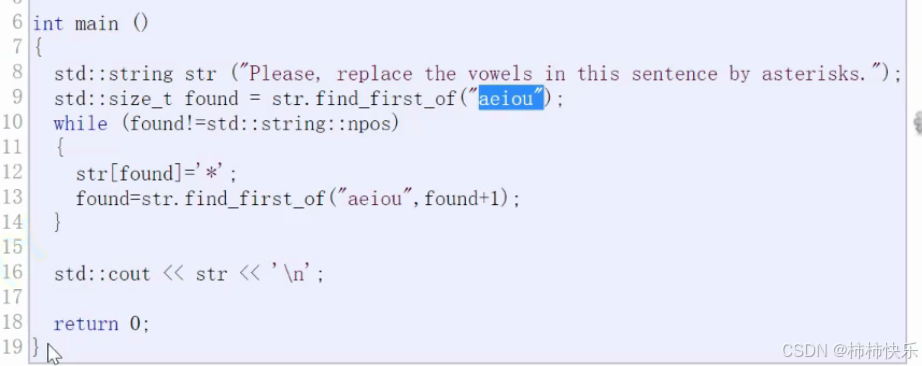
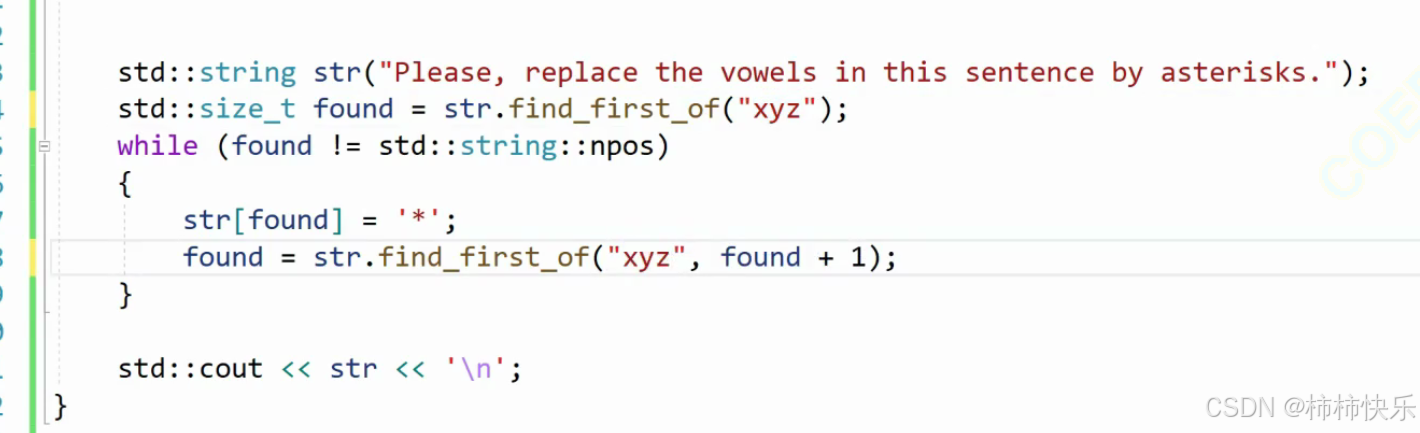
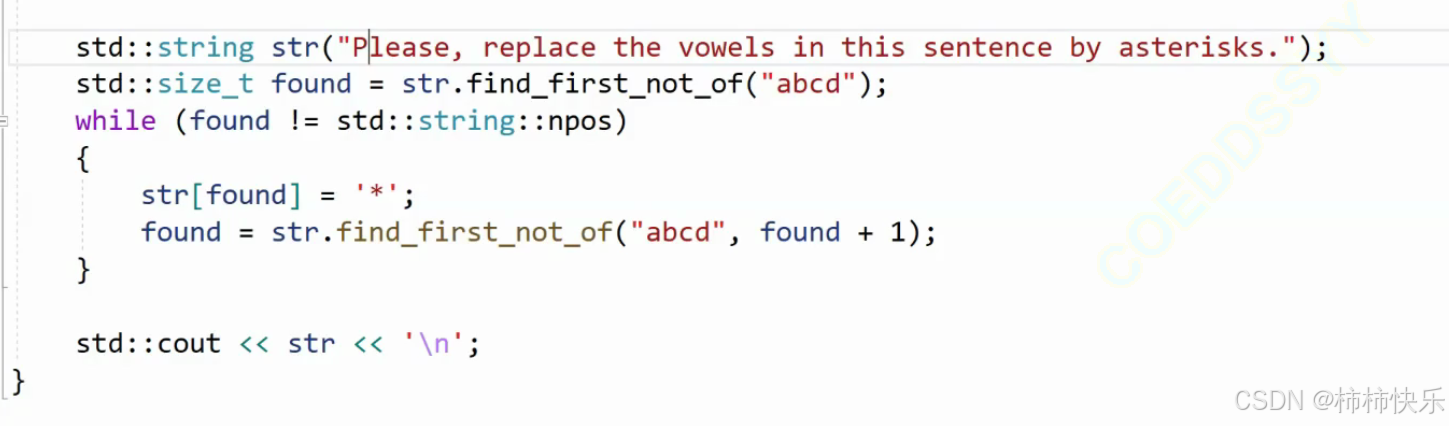
在C++中,find_first_of 是 std::string 类提供的一个成员函数,用于查找指定字符集合中任意字符在字符串中首次出现的位置。与 find 方法不同,find 是查找一个完整的子串,而 find_first_of 是查找一组字符中的任何一个字符第一次出现在字符串中的位置。如果找到匹配项,则返回其索引;如果没有找到匹配项,则返回 std::string::npos。
函数原型
find_first_of 提供了几种重载形式,可以满足不同的查找需求:
size_t find_first_of(const string& str, size_t pos = 0); // 从 pos 开始查找 str 中的任意字符
size_t find_first_of(const char* s, size_t pos, size_t n); // 从 pos 开始查找 C 风格字符串 s 的前 n 个字符中的任意字符
size_t find_first_of(const char* s, size_t pos = 0); // 从 pos 开始查找 C 风格字符串 s 中的任意字符
size_t find_first_of(char c, size_t pos = 0); // 从 pos 开始查找字符 c(等同于 find)
str或s:包含要查找的字符集的字符串或C风格字符串。pos:开始查找的位置,默认是从字符串的开头(即索引 0)开始查找。n:对于使用C风格字符串的版本,表示要检查的字符数量。
示例代码
以下是一些使用 find_first_of 方法的示例:
示例 1: 查找一组字符中任意字符首次出现的位置
#include <iostream>
#include <string>

int main() {
    std::string str = "Hello, welcome to the world of C++";

    // 查找字符集 ",.!" 中的任意字符在 str 中首次出现的位置
    size_t position = str.find_first_of(",.!");

    if (position != std::string::npos) {
        std::cout << "First found character from ',.!' is at position: " << position << std::endl;
    } else {
        std::cout << "No characters from ',.!' found in the string." << std::endl;
    }

    return 0;
}
输出:
First found character from ',.!' is at position: 5
示例 2: 从指定位置开始查找
你可以通过指定 pos 参数来限制搜索范围:
#include <iostream>
#include <string>

int main() {
    std::string str = "Hello, welcome to the world of C++";

    // 从索引 6 开始查找字符集 ",.!" 中的任意字符
    size_t position = str.find_first_of(",.!", 6);

    if (position != std::string::npos) {
        std::cout << "First found character from ',.!' after index 6 is at position: " << position << std::endl;
    } else {
        std::cout << "No characters from ',.!' found after index 6." << std::endl;
    }

    return 0;
}
输出:
First found character from ',.!' after index 6 is at position: 29
示例 3: 使用C风格字符串进行查找
#include <iostream>
#include <string>

int main() {
    std::string str = "Hello, welcome to the world of C++";
    const char *chars = "aeiou"; // 要查找的字符集

    // 查找 chars 中的任意字符在 str 中首次出现的位置
    size_t position = str.find_first_of(chars);

    if (position != std::string::npos) {
        std::cout << "First vowel found at position: " << position << std::endl;
    } else {
        std::cout << "No vowels found in the string." << std::endl;
    }

    return 0;
}
输出:
First vowel found at position: 1
总结
find_first_of方法:从字符串的某个起始位置开始,查找一组字符中任意字符首次出现的位置。如果找到匹配项,则返回匹配项的索引;如果没有找到匹配项,则返回std::string::npos。- 用途:适用于需要查找一组特定字符中的任何一个字符首次出现的情况,如解析分隔符、查找标点符号或元音字母等。